
Manually install the Windows Agent
Recommendation: Use the newer Add devices task to create a Site Install Package and install the Agent.
The Advanced Monitoring Agent installation wizard guides you through the manual installation process to get the Agent running on a new device. When the device is reported to N-sight RMM, it installs enabled features such as: Take Control, Patch Management, Managed Antivirus, Web Protection or Backup & Recovery.
Follow these steps to manually install the Windows Agent:
- Step 1: Download the Windows Agent
- Step 2: Configure the proxy settings (if required)
- Step 3: Log in to the Advanced Monitoring Agent
- Step 4: Select the Agent Mode for workstations
- Step 5: Enter device details
- Step 6: Set up 24x7 checks
- Step 7: Set up Daily Safety Checks (DSC)
- Step 8: Test all checks
- Step 9: Start monitoring the device
Step 1: Download the Windows Agent
- In the All Devices view, go to Agent > Download Agent > Download Windows Agent x.x.x.

- General Availability (GA): Latest production Agent release.
- Release Candidate (RC): Extensive testing completed but may include minor bugs.
- Select the location to download the file and save it.
- After the Agent ZIP file downloads, copy it to the device(s) where you are installing the Agent.
- On the device, unpack the Agent ZIP file and click the executable to begin the installation.
If User Access Control is enabled, you may see "The requested operation requires elevation." To resolve this, right-click the Advanced Monitoring Agent entry in All Programs and select Run as Administrator.
- When prompted, select the language to use during the installation.
The Advanced Monitoring Agent setup wizard displays.
- Select Next to continue.
- Accept the License Agreement and select Next.
- To choose a different installation folder, click Browse and navigate to the location.
The default installation folder depends on the device operating system:
C:\Program Files (x86)\Advanced Monitoring Agent (64-bit operating systems)
C:\Program Files\Advanced Monitoring Agent (32-bit operating systems)
- Select Next and then Install.
The Agent installs.
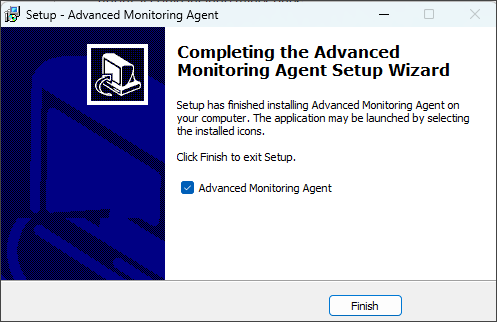
- Select Finish.
The Login dialog for the Advanced Monitoring Agent displays.
If the device uses a proxy to access the internet, configure the proxy server settings before entering the login credentials. This helps to ensure the Agent can communicate with the N-sight RMM user interface.
There can be two Agent types:
Step 2: Configure the proxy settings (if required)
If a proxy server is in place on the network, you may need to configure the Windows Agent's proxy settings to ensure it can communicate with our servers.
- On the Advanced Monitoring Agent Login dialog, select Proxy server settings.

- In the Proxy Server dialog, select the Use a proxy server checkbox and enter the required proxy information. For more information, see Supported Proxy Authentication Protocols.

- Address: Enter the IP address, not the NetBIOS name.
- Port: Enter the port the connection is going through.
- Username: Enter the username the proxy requires for authentication. Ensure the selected user has sufficient privileges to use the proxy. The username must be in the format: DOMAIN\username.
- Password: Enter the password the proxy requires for authentication.
- Select OK.
The proxy may occasionally be unavailable, for example, if the Agent is installed on a laptop that is removed from the network. To ensure continuation of the service, the Agent attempts to connect directly if communication fails using the entered proxy information.
Step 3: Log in to the Advanced Monitoring Agent
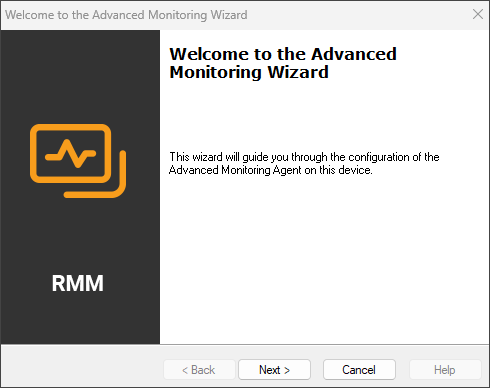
On the Advanced Monitoring Agent Login dialog, enter your N-sight RMM username and password to open the Advance Monitoring Wizard and continue the setup.
To log in to the Agent, you need the Agent Key or a staff N-sight RMM login (Administrator level or above) if the device has internet access. You can also log in using the Alternate Agent password if it is configured.
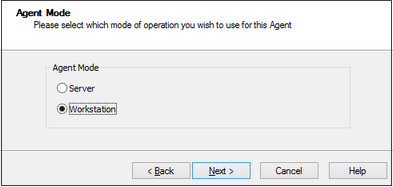
Step 4: Select the Agent Mode for workstations
When manually installing the Windows Agent on a workstation, you can select its mode of operation as server or workstation. The mode you select determines the checks and features available for the device.
You can only select the Agent Mode when you manually install the Windows Agent on workstations. For servers, the Windows Agent always installs in Server Mode.
- Server mode: Supports the full range of 24x7 Checks and Daily Safety Checks, as well as performing as a Windows - Designate a Site Concentrator.
- Workstation mode: Supports a subset of 24x7 checks for the Windows Agent and Daily Safety Checks - Windows Agent , querying only the local device.
Selecting Server mode for a workstation will incur server pricing.
Data Overdue Cross Check is only available to Server mode.
Backup & Recovery Documents is only available for Workstation Mode.
For more information about the supported checks for Server and Workstation Agent modes, see Supported checks by operating system.
Step 5: Enter device details
- If the device name is not automatically populated, enter a name. This name appears in the All Devices view, Alerts, Reports, and other areas of the N-sight RMM interface.

- Enter a device description.
- Choose the client and site to assign the device to. If the client or site doesn't exist, enter names to create them.
- Select a monitoring template to automatically configure checks and automated tasks. To use default checks instead, select Standard checks.
N-sight RMM hierarchical structure
- Client: Customer name or another identifier. One client can have many sites.
- Site: A group that includes the client's devices. A site can be a physical location, a department, an overall device type, or any other type of group you define. One site can have many devices.
- Device: Endpoints with the N-sight RMM Agent installed.
Step 6: Set up 24x7 checks
24x7 checks monitor the device continuously at your selected frequency. N-sight RMM generates a failure whenever a problem is detected.
- In the 24x7 Checks dialog, select Activate the 24x7 Checks.
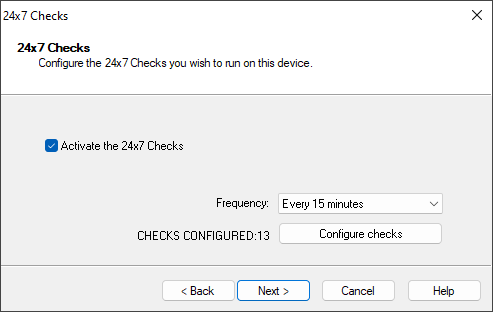
- Select the Frequency to choose the 24x7 check run cycle.
- Click Configure checks to edit the Check settings.
The Configure 24x7 Checks dialog displays.
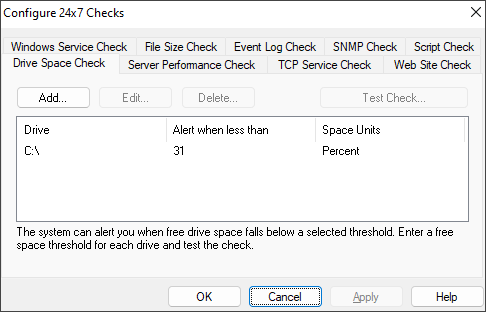
- Configure the checks and select OK to return to the 24x7 Checks dialog.
- Select Next.
To edit check settings after installation, right-click the check in the South-pane Checks tab and select Edit Check.
Step 7: Set up Daily Safety Checks (DSC)
Daily Safety Checks run once a day to monitor scheduled tasks, backups, antivirus updates, and more. They run based on the local time of the computer where the Agent is installed.
- In the Daily Safety Checks dialog, select Activate the Daily Safety Checks (DSC).
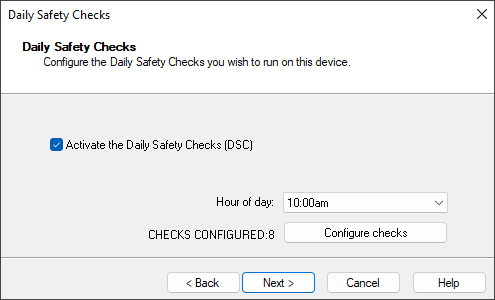
- Select the Frequency to choose the Check run hour.
To avoid false positives, ensure the Daily Safety Checks run after the monitored tasks are complete
To avoid messages about today's data not available against checks in the Server or Workstation Daily or Weekly Reports, we recommend you run the Daily Safety Checks before the Reports run time - Click Configure checks to edit the check settings.
The Configure Daily Safety Checks dialog displays.

- Configure the checks and select OK to return to the Daily Safety Checks dialog.
- Select Next.
Step 8: Test all checks
- In the Double Check dialog, select Test all checks.
All the checks on the device run to identify failures so you can investigate or reconfigure the checks before the Agent begins reporting to the All Devices view.
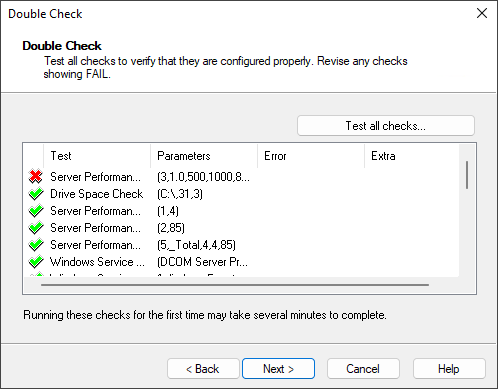
- If there are any failing checks, use the Back button to investigate and reconfigure. Otherwise, select Next.
Step 9: Start monitoring the device
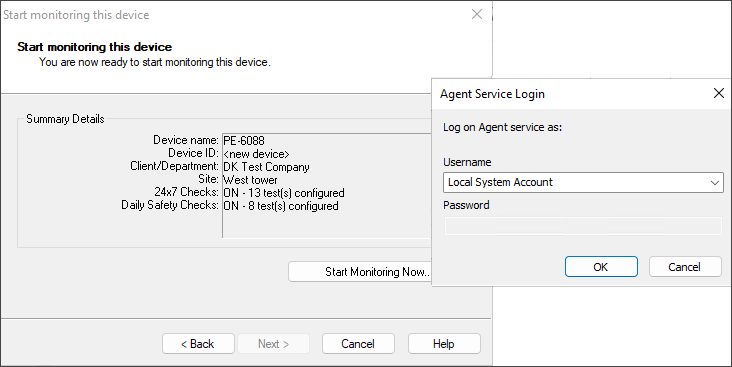
- In the Start monitoring this device dialog, click Start Monitoring Now.
In some cases, you may need to run the Agent using an account with enhanced privileges. You can do this after installation by changing the Log on account for the Advanced Monitoring Agent service in the Windows Services Console.
- In the Agent Service Login dialog, select the Username for the account the Agent is to run under. If you are not using the Local System Account, enter the password associated with the username.
By default, the Agent runs under the Local System Account, although you can use any valid system account.
- Select OK.
- Click Start Monitoring Now.
The Agent verifies the credentials to ensure they are valid and the device displays in the N-sight RMM All Devices view.
- Select Finish to exit the wizard.
Related topics