
Automation Manager Overview
This section describes the main elements of the Automation Manager. For a policy (script) creation example, see Construct a Policy (script) using Automation Manager
Automation Manager Layout
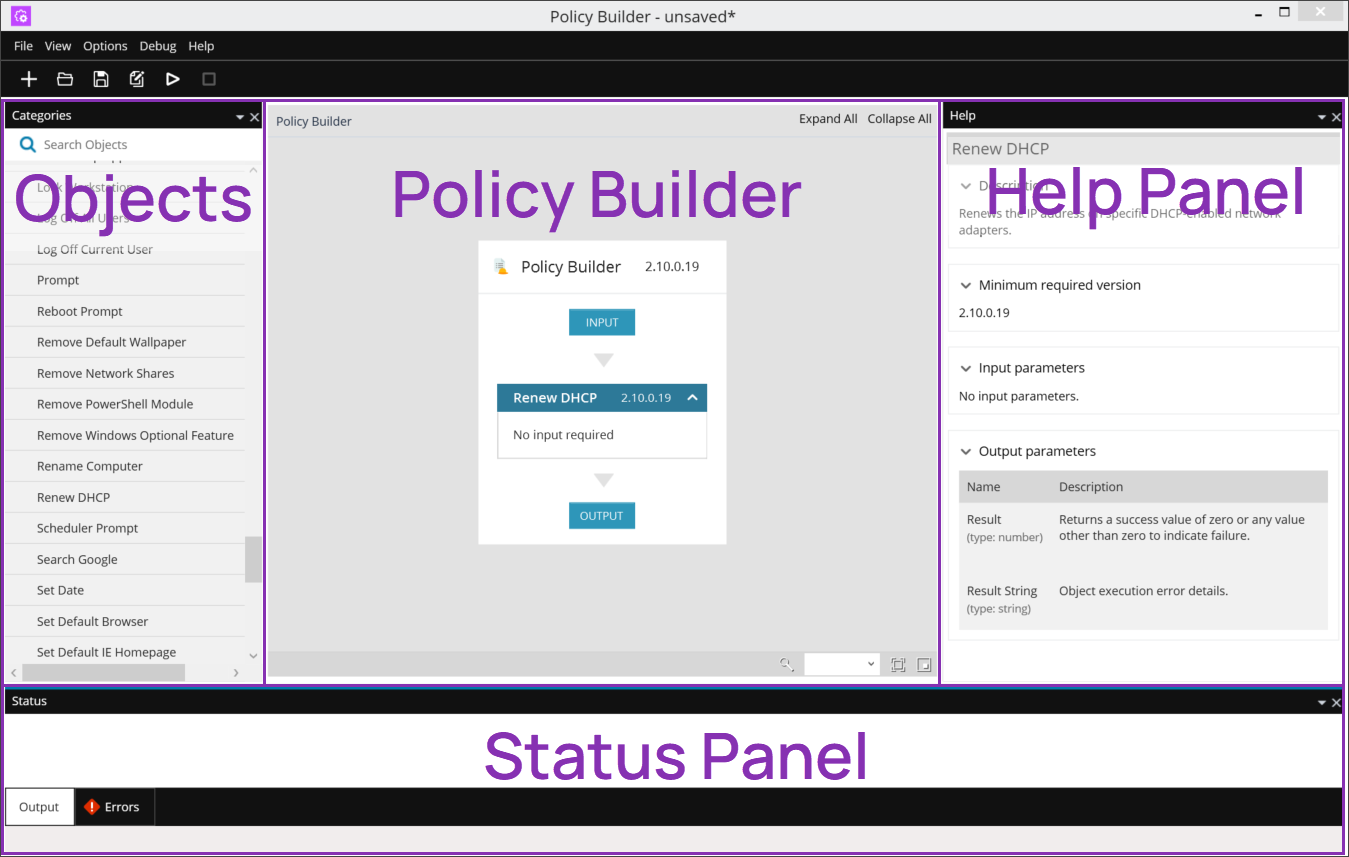
The Automation Manager interface has four panels:
| Location | Panel | Description |
|---|---|---|
| Left (West) | Objects | Lists all the available objects (modules) grouped under functional headings |
| Main (North) | Policy Builder | Used to construct or amend a .amp policy (script) |
| Right (East) | Help Panel | Returns description and parameter details when you select a object in the Policy Builder pane. It is enabled or disabled using the View menu. |
| Bottom (South) | Status Panel | Displays the logging information when you run a policy (from Run or Debug) with problems returned in Errors |
Policy Builder panel
Policies are a collection of tasks (objects) that run in sequence.
To create a new policy:
- Launch the Automation Manager
- To create the policy:
- Click New Policy in the North-pane, or
- Click the plus button in the menu bar, or
- Go to File > New
- Enter a descriptive Name
- Provide information on its usage, parameter requirements... in the Description
- Click OK to proceed
To edit a policy:
- Launch the Automation Manager
- Open the policy
- Click Open Policy File in the North-pane (available when Automation Manager launches), or
- Go to File > Open, or
- Click the Open button in the toolbar
- Select the target policy to open it in the north Policy Builder pane
- Change the script
- User the Run or Debug option to test the script and ensure it is working (recommended)
- Click Save
Objects panel
Object (Policy Components)
The object panel contains over 600 pre-built components grouped under functional headings including the following objects:
Add an Object to a Policy
Browse or Search through the Object pane to find the target component.
Drag and drop objects onto the Policy Builder frame in the order they execute. Use drag and drop to reorder objects in the policy and change the order they run.
If you cannot find an object that meets your needs, you can use the Run PowerShell Script component to insert a custom PowerShell script into the project.
To remove an object from a script, right-click on its title bar in the policy and choose Delete. Depending on the object this menu may include the option to Cut, Copy, Paste, Copy as Image, Save as Image and Toggle Breakpoint.
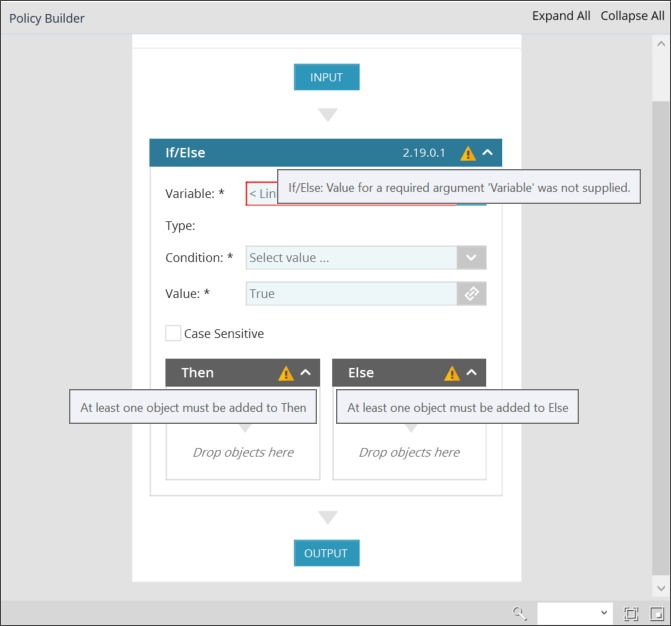
An exclamation mark against a policy object indicates that a field may need attention. Hovering over the exclamation mark displays details of the potential issue.
Help Panel (Object Information)
The right Help Panel (if enabled in the View menu) contains description and parameter information about the policies highlighted in the Policy Builder.
| Help Panel If/Else Example | ||||||
|---|---|---|---|---|---|---|
|
If/Else Performs an action if the given condition is met, otherwise performs a different action. Input Parameters
Output Parameters No output parameters |
An exclamation mark is displayed against an object in the policy to flag that a field may require attention. Hover over the exclamation mark to display the details of the potential issue.
Control Flow
Conditional statements or actions are amongst the main building blocks of a policy and are listed under Control Flow.
Control Flow objects take the output from another component and make a decision based on that output's result.
These objects include:
- If (If X Condition, Value Then Y)
- If / Else (If X Condition, Value Then Y Else Z)
- For Each (For each item in X do Y)
In the below example: If File Exists (Object) Equals (Condition) True (Value) Then Move File (Object) Else Create File (Object):
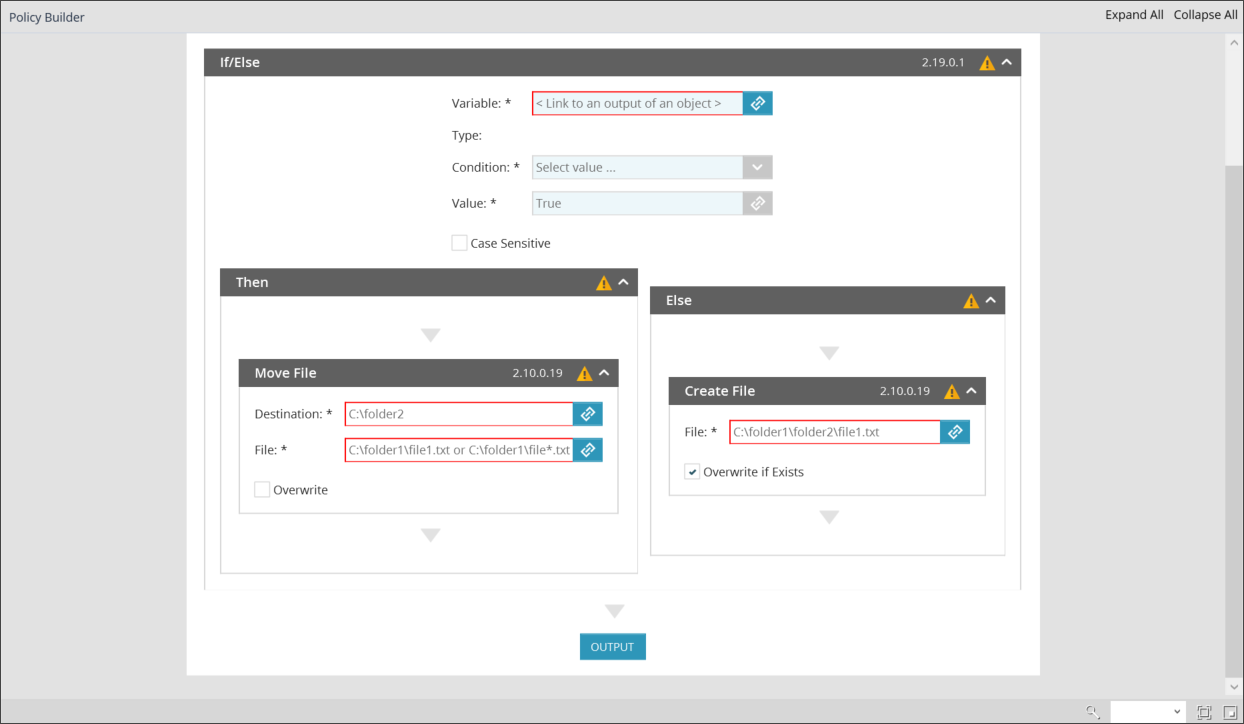
If unsure of the available options when entering a conditional Value, we would suggest running the policy (File, Run) and reviewing the information in the Output panel.
| Output Example: Conditional False | Output Example: Conditional True |
|---|---|
|
Input parameters:
Output parameters:
Conditional:
|
Input parameters:
Output parameters:
Conditional:
|
Parameters and Object Linking
Parameters specify the values processed by a policy. They may be pre-populated when constructing a policy, enter specific values in all object fields. By linking the object to another component of variable. By prompting the user to enter a value when configuring the policy on the Dashboard.
Each object has different parameter requirements. This information, along with a description of the object, is available in the Help Panel when highlighting an object
Input Parameters
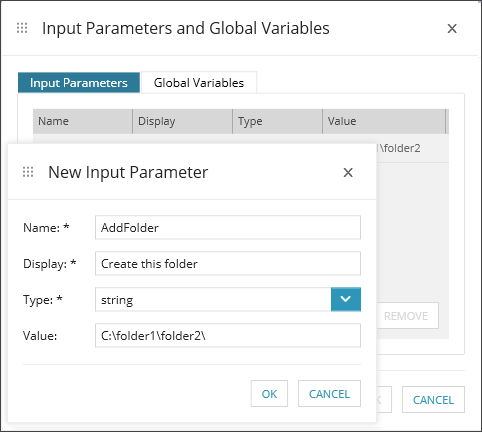
The policy's Input Parameters are configured by clicking on the policy's Input button.
Complete the Input Parameter fields to apply every time the policy runs. Leave the fields blank to prompt the user to enter a value when configuring the policy as an Automated Task or Script Check on the Dashboard.
| Field | Note | ||||||||
|---|---|---|---|---|---|---|---|---|---|
| Name | Variable name: cannot contain spaces and must be unique | ||||||||
| Display | The label of the field as it appears in the Dashboard | ||||||||
| Type |
Choose the input type from the drop-down:
|
||||||||
| Value | The data input field. This can be left blank, or pre-populated to provide an example for the user adding the Script Check or Automated Task. |
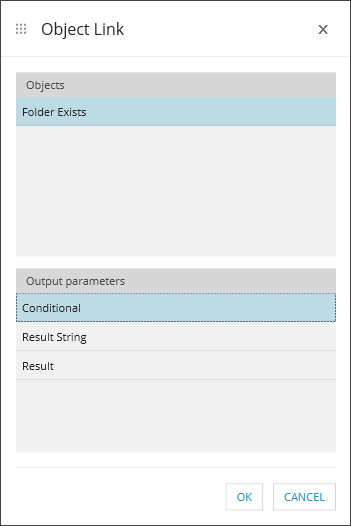
Linking Objects and Variables
As objects in the policy rely on other components or parameters, they are linked by clicking on their chain icon. This opens the Object Link dialog that lists all the preceding objects in the policy along with the associated parameters. Select the target value and okay to apply.
Example Input Parameter Dialog and Object Link:
Test the Policy (Script)
We would suggest using the Automation Manager's Run or Debug options to test the script once it is complete.
Run
Use one of the following options to execute the script in real-time.
- Ctrl + F5
- Click on the play icon in the toolbar
- Go to File > Run
Debug
Use one of the following options to execute the script one object at a time to help review its progress.
- F5
- Go to Debug > Go
Regardless of the method used to run the script, logging details appear in the Output pane.
If the script performs as expected, upload it to the Dashboard using the Script Manager.
What do you want to do?
- Launch the Automation Manager
- Construct a Policy (script) using Automation Manager
- Read more information on policy debugging
- Learn about using custom PowerShell scripts in the policy
- Download Default Automation Manager Policies
- Upload a script to the Dashboard through the Script Manager
- Deploy scripts as Checks or Automated Tasks
- Uninstall the Automation Manager from a device