
Construct a Policy (script) using Automation Manager
You can construct a policy (script) using the Automation Manager in a few steps. The following example covers the process of creating a policy to check for the existence of a folder and, depending on the result, the action to take as specified in an If conditional statement.
The creation of this policy is split into six steps:
- Create a New Policy
- Policy Workflow (add objects)
- Configure Variables and Values
- Enter Input Parameters
- Link Input Parameter to Object
- Test Policy and upload to the Dashboard for distribution
When you submit passwords in your custom automation manager scripts, Automation Manager validates those passwords to ensure they do not include the following unsupported characters: " ‘ / \ $ `
If there are unsupported characters, the validation field indicates which characters are not supported so you can adjust your passwords.
Create a New Policy
- Launch the Automation Manager
- Create the policy:
- Click New Policy in the North-pane, or
- Click the plus button in the menu bar, or
- Go to File > New
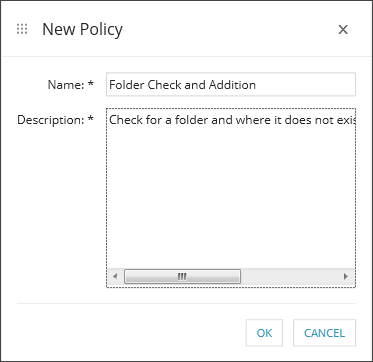
- Enter a descriptive Name
- Provide information on its usage, parameter requirements... in the Description
- OK to proceed
Policy Workflow (add objects)
The policy workflow determines the objects (tasks) run sequence. Add objects to the policy in their execution order.
- Browse or Search through the left Object pane for the target component
- Drag and drop this object onto the Policy Builder frame where you want it to run in the policy
To display description and parameter information for the object in the right Help Panel (where enabled in the View menu). Highlight the object in the policy.
We will cover the objects required for this policy and the sequence they are entered:
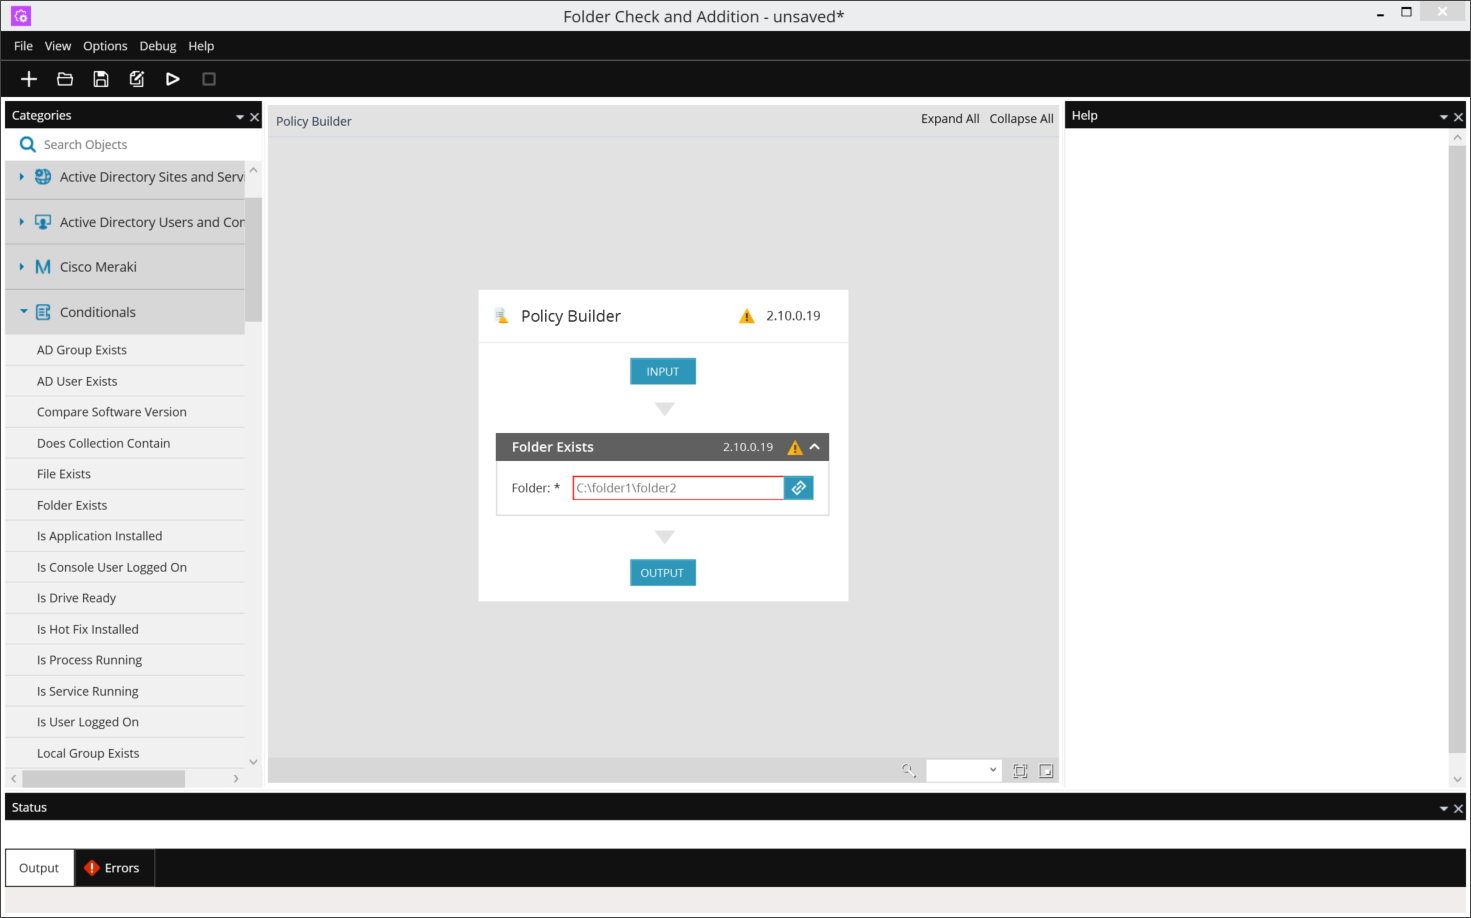
- Choose the Folder Exists object
- Drop Folder Exists onto the policy between Input and Output
- This object checks whether the given folder exists
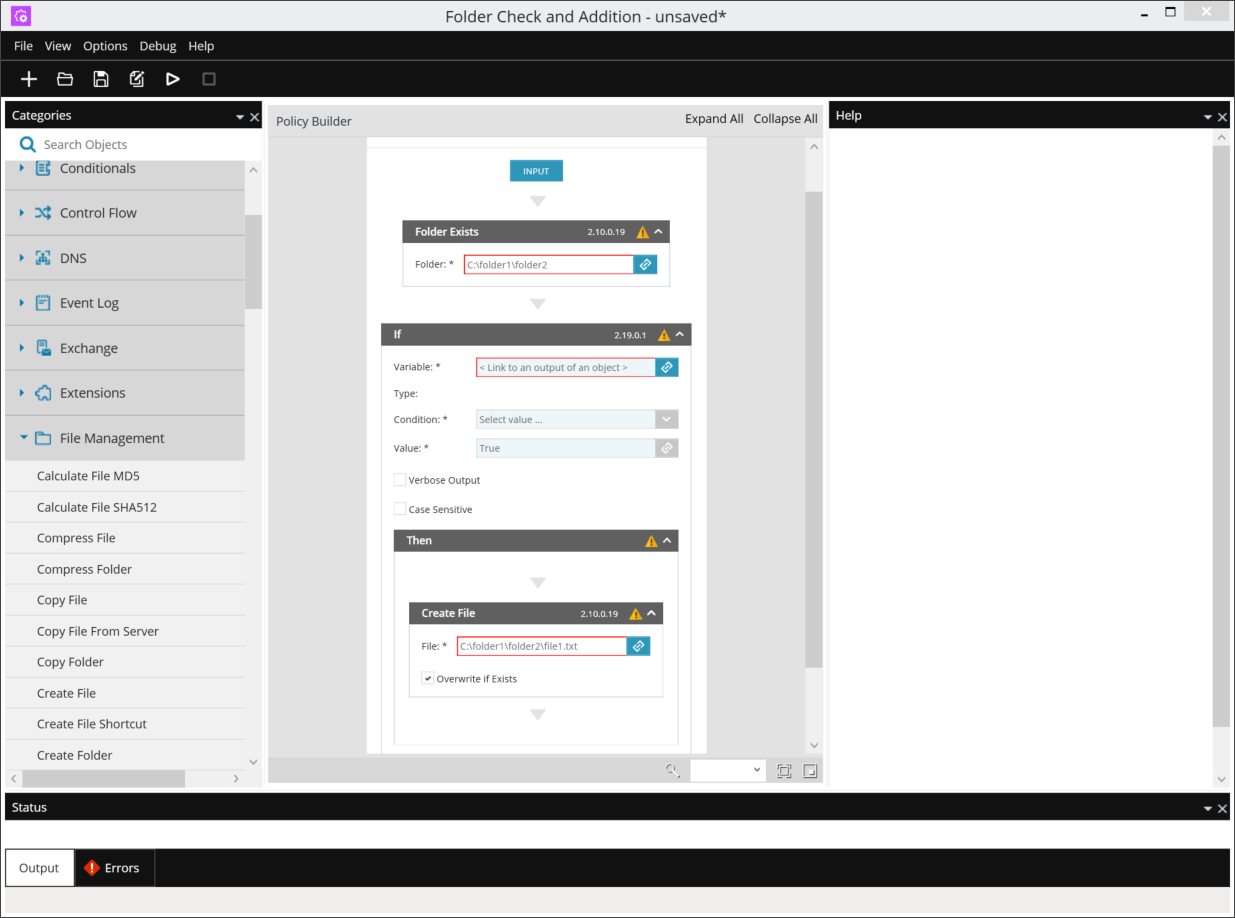
- Chose an If object
- Drop If under Folder Exists in the policy
- This object instructs the script to perform an action when the specific condition is met. Add the action object in the If component's Then field.
- Choose the Create Folder object.
- Drop the Create Folder object under If in the Then condition (Drop objects here)
This object creates a folder with the given path.
Drag and drop objects to reorder their sequence in the policy.
Configure Variables and Values
After the objects are added to the policy and the layout is complete, the next stage is to begin populating the variables and values.
Folder Exists
Identifies the folder to search for.
Input Parameter
Folder
Pre-populate the field to always check whether a specific folder exists or link the parameter to another object or Input Parameter. This field requires the full path to the folder.
In our example we will link this field to an Input Parameter entered by the Dashboard user.
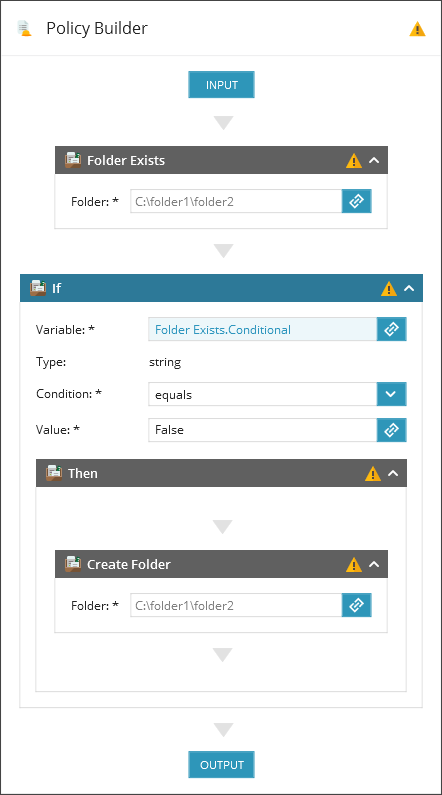
If
Checks whether the specified folder exists.
Input Parameters
Variable
Click the link (chain) icon beside the Variable: field and select
Objects: Folder Exists
Output Parameters: Conditional
OK to save
Condition
Choose equals
Value
Enter False
Then
Triggers the Create Folder object where the specified folder does not exist.
Create Folder
Pre-populate the field to always check whether a specific folder exists or link the parameter to another object or Input Parameter. This field requires the full path to the folder.
In our example we will link this field to the Input Parameter entered by the Dashboard user.
If Object and Variable Link: Folder Exists
Enter Input Parameters
The parameters processed by the policy vary depending on the intended usage of the script. When using Input Parameters the user may be prompted to enter the parameters when configuring the script on the Dashboard as a Check or Automated Task.
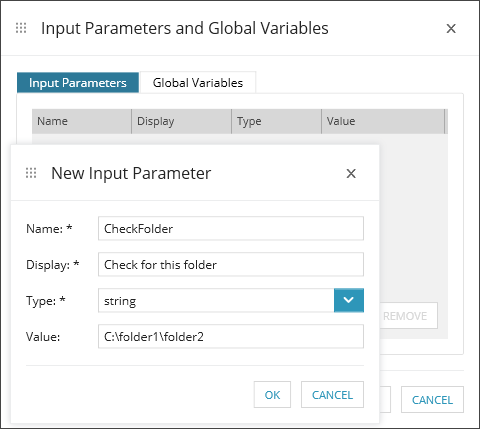
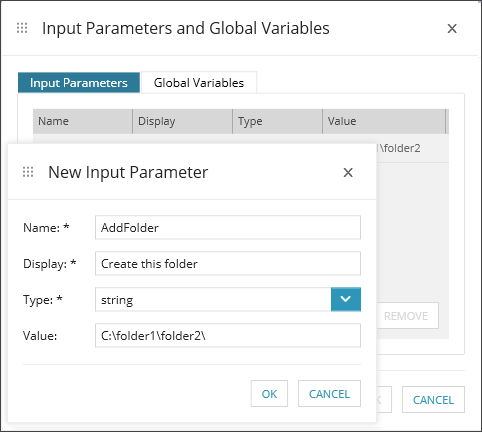
Our example requires two Input Parameters to prompt the user to enter both the Folder Exists and Create Folder locations.
| Field | Note | Folder Exists - Example Input Parameters | Create Folder - Example Input Parameters | ||||||||
|---|---|---|---|---|---|---|---|---|---|---|---|
|
Name |
Variable name: cannot contain spaces and must be unique |
CheckFolder |
AddFolder |
||||||||
|
Display |
The label of the field as it appears in the Dashboard |
Check for this folder |
Create this folder |
||||||||
|
Type |
Choose the input type from the drop-down:
|
String |
String |
||||||||
|
Value |
The data input field. This can be left blank, or pre-populated to provide an example for the user adding the Script Check or Automated Task. |
e.g. C:\Users\John.Doe\Documents\My Projects |
e.g. C:\Users\John.Doe\Documents\My Projects |
Folder Exists - Example Input Parameter Dialog and Create Folder - Example Input Parameter Dialog
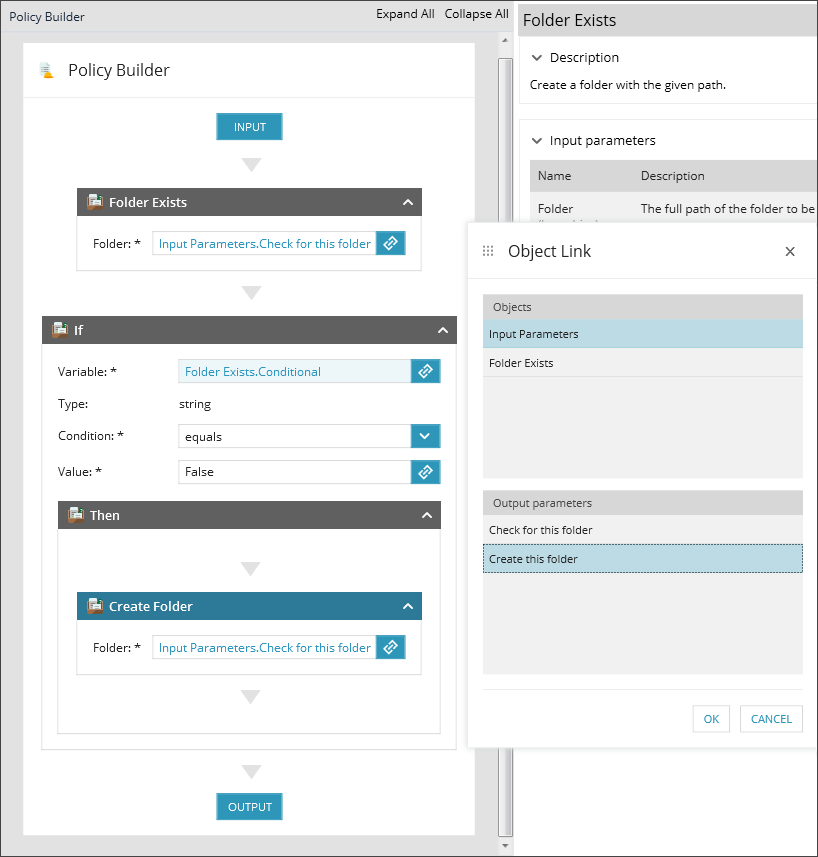
Link Input Parameter to Object
After creating the Folder Exists and Create Folder Input Parameters, the next stage is to associate these inputs with a object.
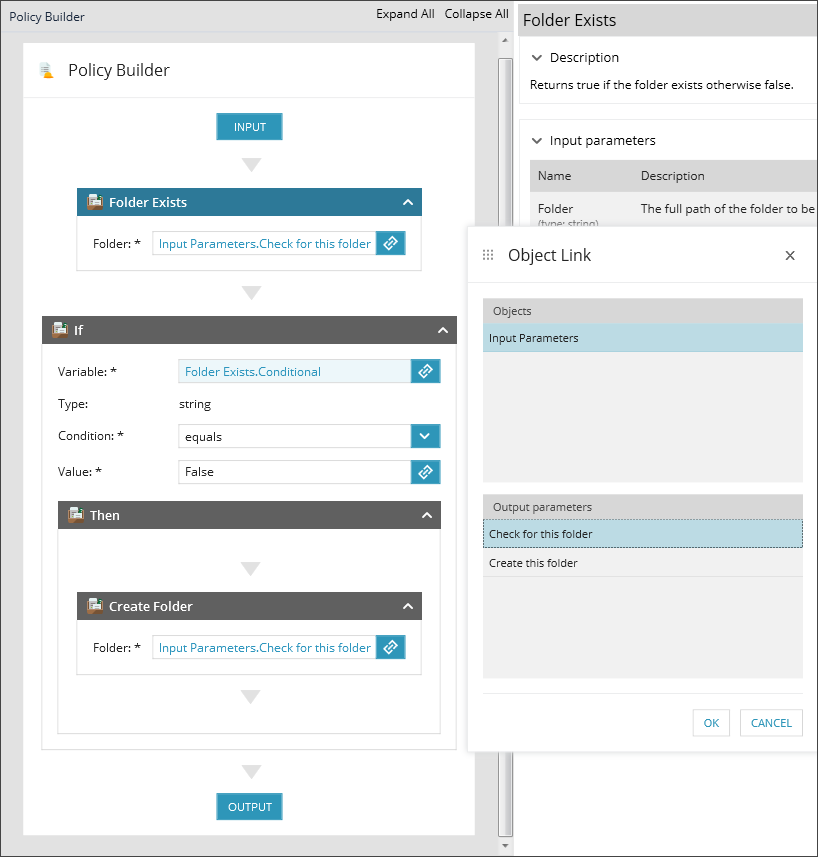
Folder Exists
- Go to the Folder Exists object in the policy
- Click the link button against Folder: field to open the Object Link dialog
- Under Objects choose Input Parameters
- In Output Parameters select the Folder Exists parameter (i.e. CheckFolder)
- OK to save
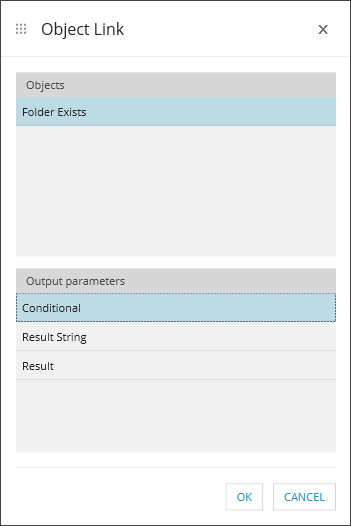
Create Folder
- Go to the Create Folder object in the policy
- Click the link button against the Folder: field to open the Object Link dialog
- Under Objects choose Input Parameters
- In Output Parameters select the Create Folder parameter (i.e. AddFolder)
- OK to save
Folder Exists - Example Object Link Dialog and Create Folder - Example Object Link Parameters
Test Policy and upload to the Dashboard for distribution
Once all the objects are added to the policy and the variables, values and parameters populated, the final stage is testing. Testing ensures the script will work as expected before uploading to the Dashboard and deploying across mutliple devices.
- Test the policy locally
- Click the play icon on the toolbar, or
- Press Ctrl + F5, or
- Go to File > Run
- Enter Input Parameters where prompted
- To stop the policy at any time before it completes
- Click the stop icon on the toolbar, or
- Press Shift + F5
To allow you to follow the policy's execution process it logs its results to the Output pane. Where problems are encountered they appear in the Errors section.
Use the Debug option, to execute the policy one component at a time to allow for easier reviewing. Implement Breakpoints to stop the policy at specific points.
If testing proves successful, the next steps is to save the policy locally (save icon on the toolbar or File > Save) then upload to the Dashboard for distribution.
- Log into the Dashboard
- Go to Settings > Script Manager
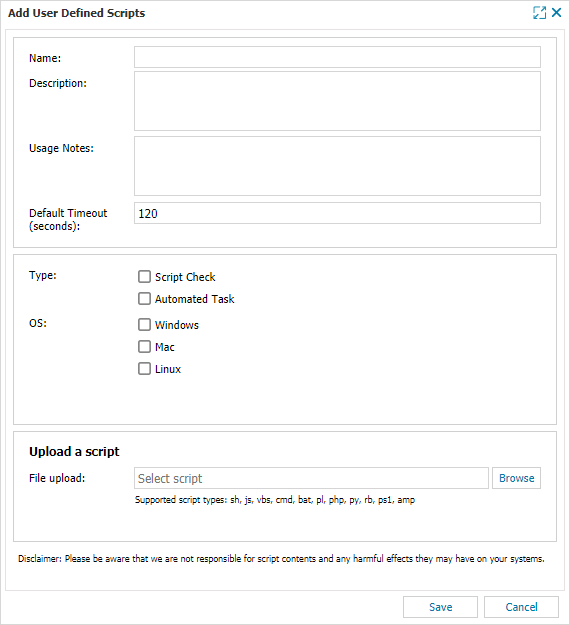
- Click New, populate the required information and upload the script as a Windows Script Check or Automated Task
Automation Manager - Enter Input Parameters and Policy Output and Script Manger - Add User Defined Scripts Dialog

Exit codes returned by the PowerShell script are only consumed within the Run PowerShell Script module and not passed back to the Dashboard.
To generate a Dashboard failure where the PowerShell script fails, add an If or If/Else Control Flow condition and include the Fail Policy module.
For example, Run PowerShell Script (Extensions) > If (Control Flow) > Then > Fail Policy (Control Flow).
What do you want to do?
- Launch the Automation Manager
- View the Automation Manager Overview and learn about policy components (objects, control flow, parameters etc.)
- Read more information on policy debugging
- Learn about using custom PowerShell scripts in the policy
- Discover how to edit a policy (.amp script)
-
Upload a script to the Dashboard through the Script Manager
-
Deploy scripts as Checks or Automated Tasks