
Learn about the Technician console
The Take Control Technician console provides a number of account configuration options, in addition to displaying incoming support requests and starting support sessions. Use the console to chat with other technicians in your company, customize colors for remote sessions, or view your session history.
- Navigate to the Support Sessions tab
 of the Console to launch a new support session from the New Session tab. Fill out the Customer's information and click Start New Session, then view the PIN and Support Link info in the right side of the Console window.
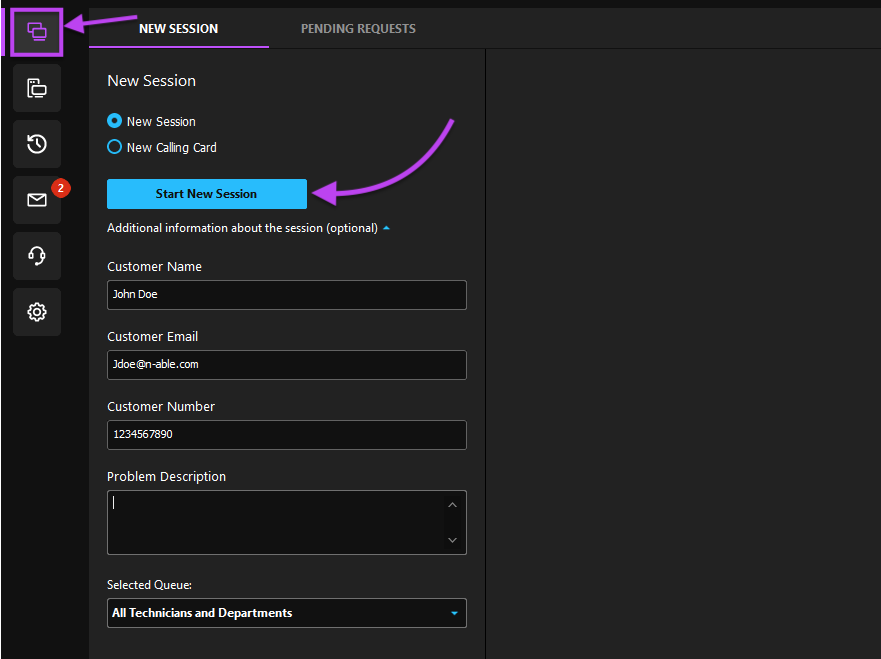
- After clicking Start New Session, the right side of the Console window displays two options to begin the session: click the PIN Code to copy it to your local clipboard, this is also a convenient option when verbally communicating with a customer. You can also send the Support Link directly to your customer via chat, or click the Envelope icon
 to open your default email client with the link already added to the body of the message.
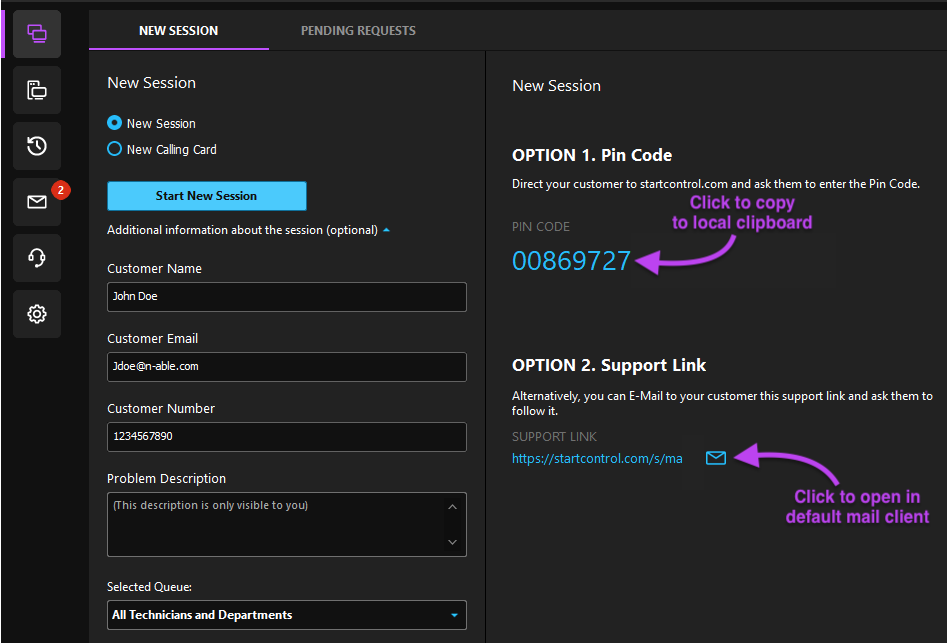
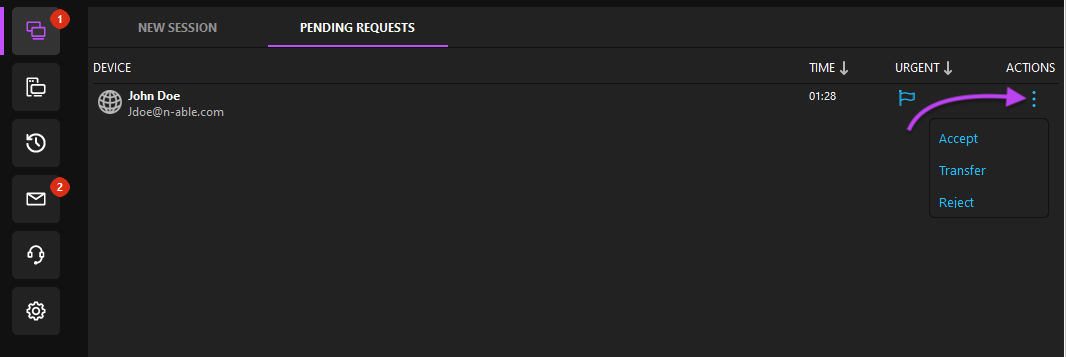
- The Pending Requests tab displays any incoming support requests and allows the technician to accept, reject or transfer the request. Click the Request to view its information in the right side of the window, or use the Ellipsis icon
 in the Actions column to quickly accept, transfer or reject the request. Click the Urgent Flag
  to mark the request as Urgent and move it to the top of the list.
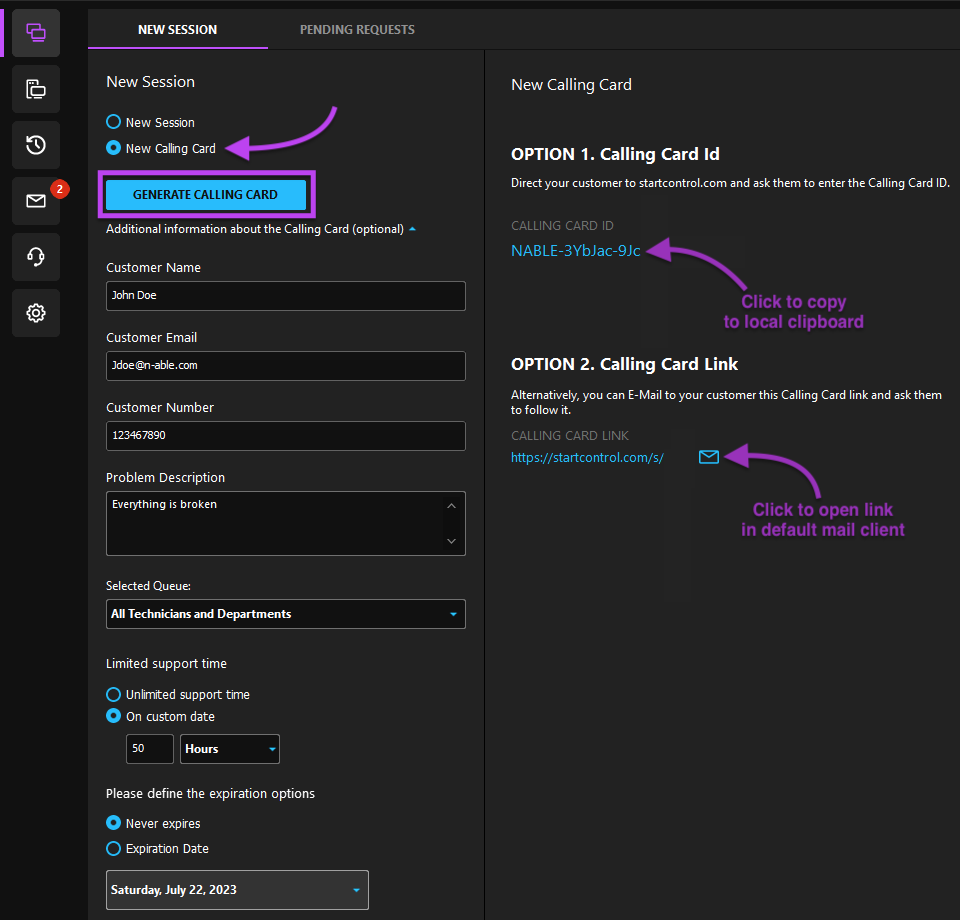
- The Support Sessions tab also provides the option to start a new session by creating a Calling Card. Click New Calling Card, enter the customer's information, specify the Support Time and Expiration options for the Calling Card, and click Generate Calling Card to populate the right side of the window with the Calling Card's information. Learn more about creating and using Calling Cards.
- After clicking Start New Session, the right side of the Console window displays two options to begin the session: click the PIN Code to copy it to your local clipboard, this is also a convenient option when verbally communicating with a customer. You can also send the Support Link directly to your customer via chat, or click the Envelope icon
- Select the My Computers tab
 to view devices with the Agent installed. From here you can add new devices, chat with devices that are online, use the Wake-On-LAN feature to remotely wake devices, or quickly launch a support session by clicking on the Connect button.
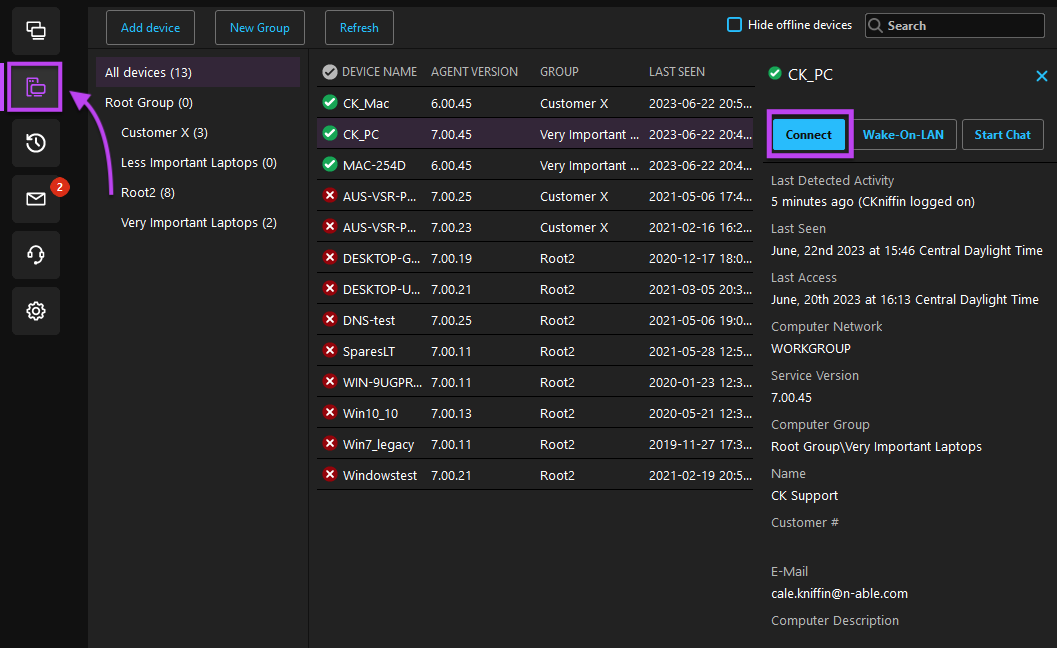
- Select the Session History Icon
 to view the session history for all technicians, or search for a specific technician's session history.
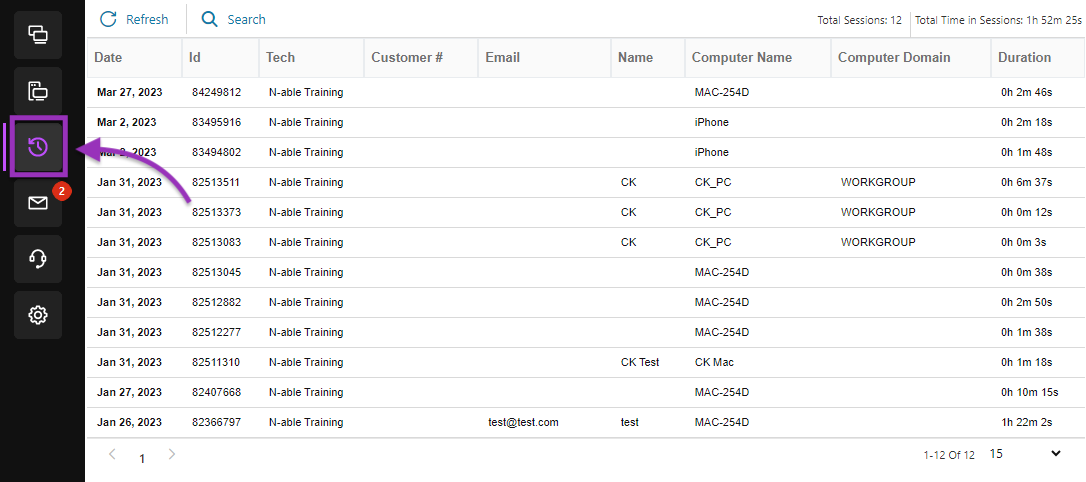
- Select the to Inbox Icon
 to view all Deferred Support Requests submitted by customers and End Users. Select a message from the list to populate the bottom of the page with the contents of the message.
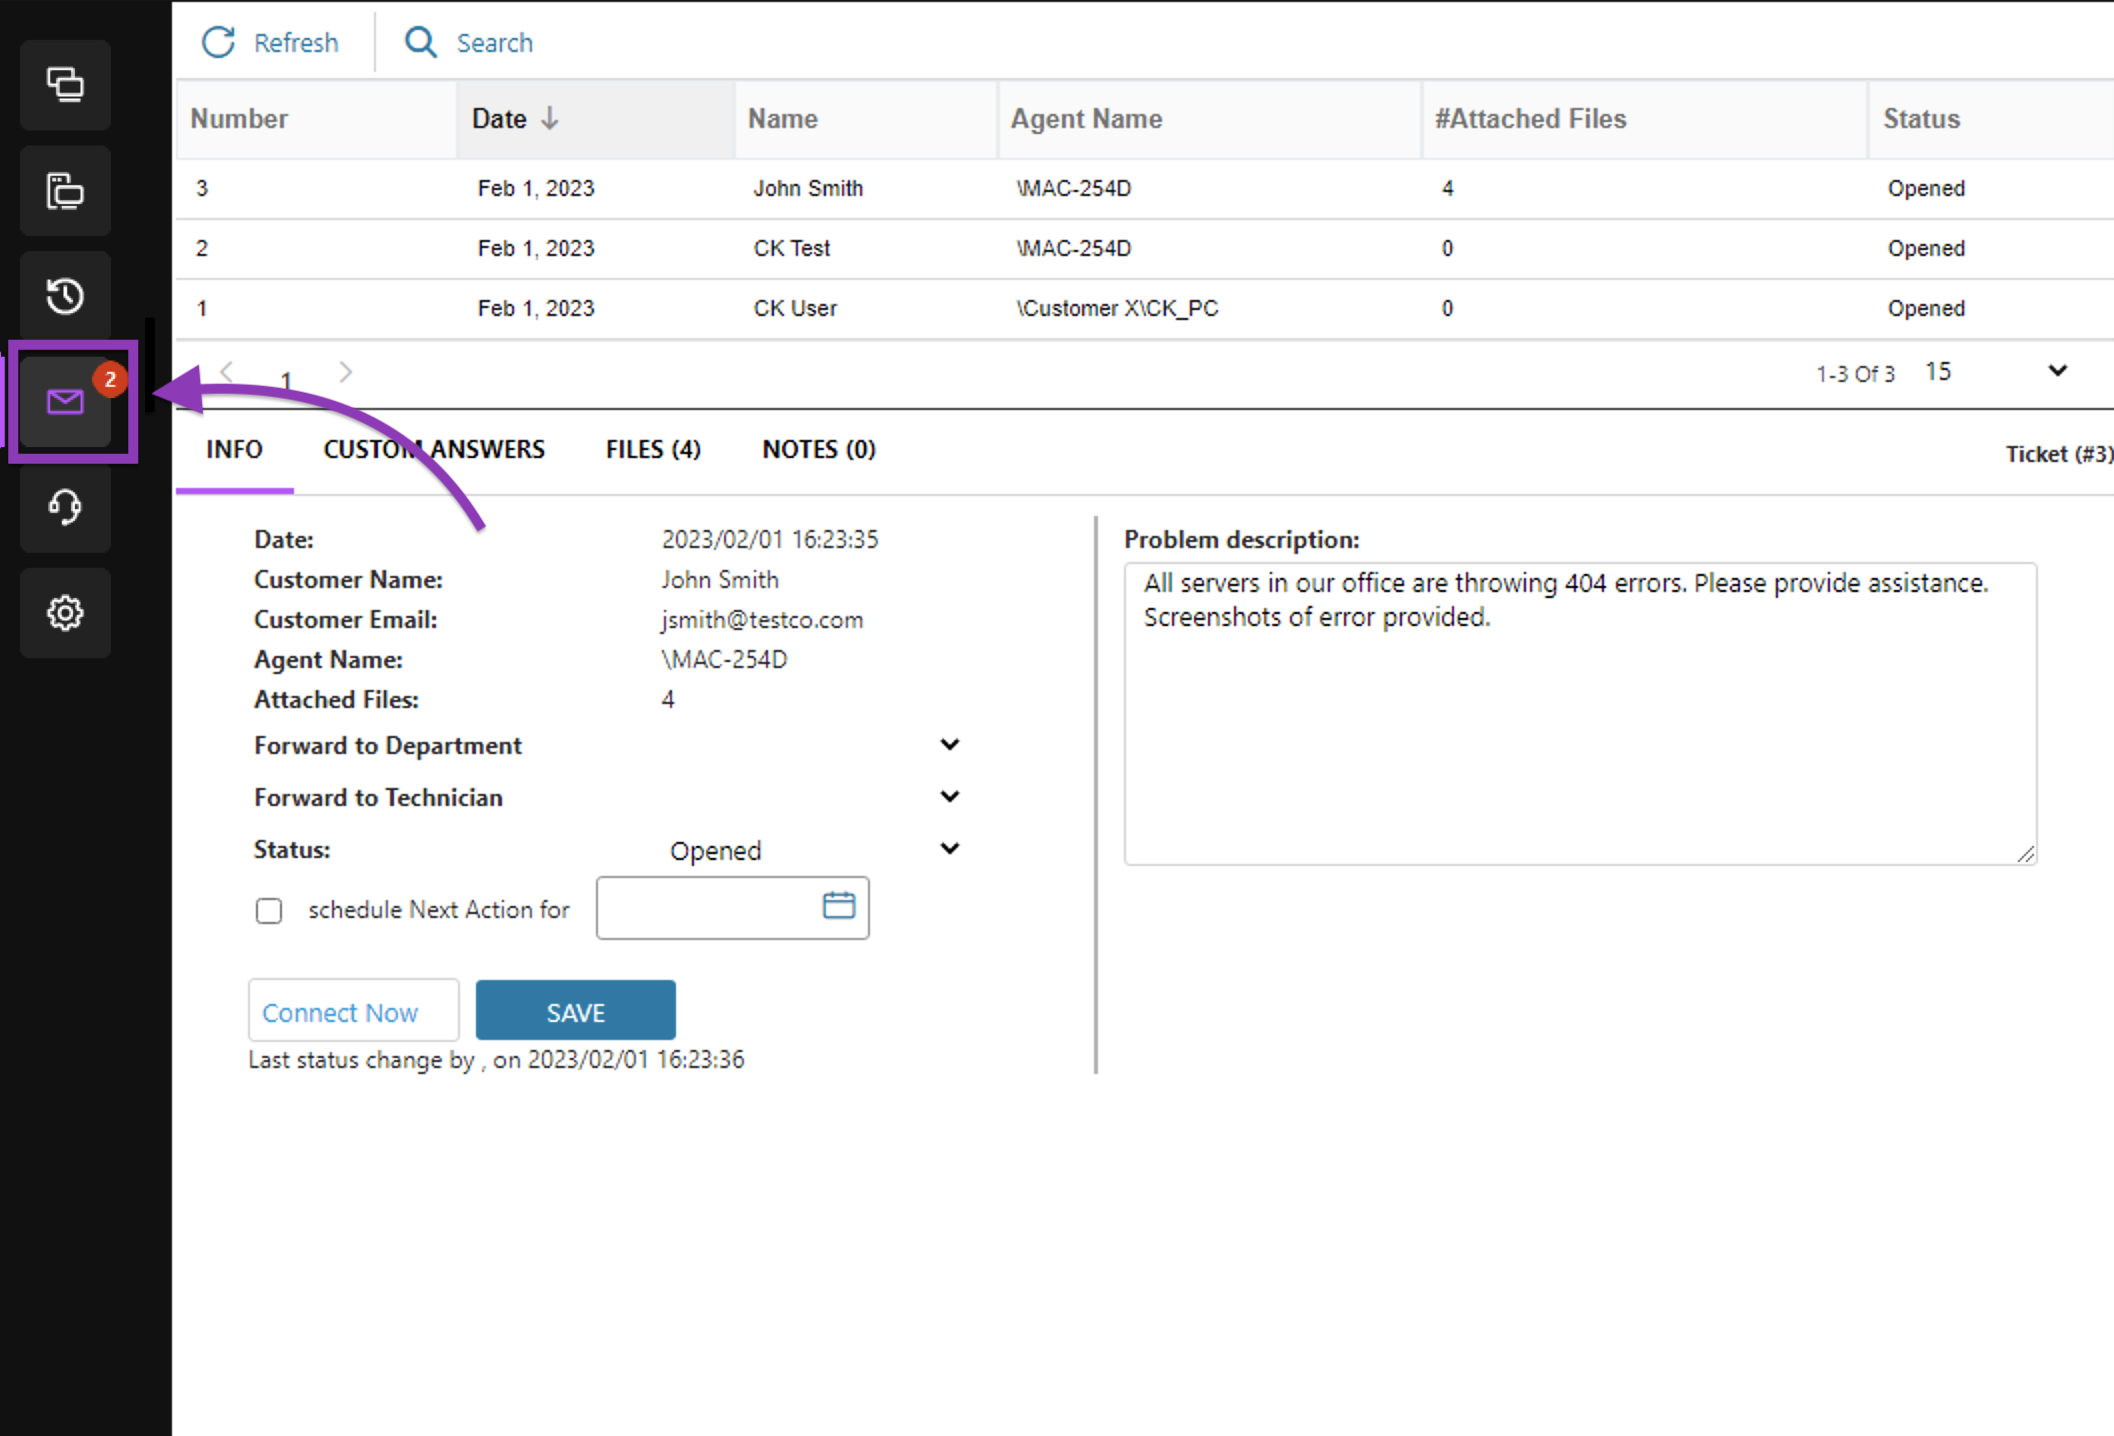
- Use the Active Users
 section of the Console to view a list of Take Control technicians currently logged in to the console, along with their status and number of active sessions.
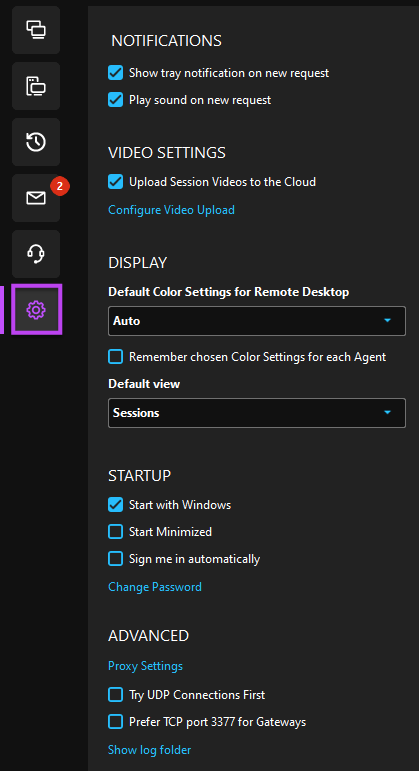
- Navigate to the Options link
 to access and configure account settings, like changing your password, or configuring proxy settings. Additional options in this menu include:
 - Show system tray notification for new support requests
- Play a sound for new support requests
- Upload session video to the cloud (make sure to configure your video storage location in order to use this feature)
- Configure default color settings for remote sessions and remember color settings for Agents
- Automatically launch when Windows opens
- Change your password
- Configure proxy settings
- Try UDP connections first
- Prefer TCP Port 3377 for Gateways
- Access the log folder
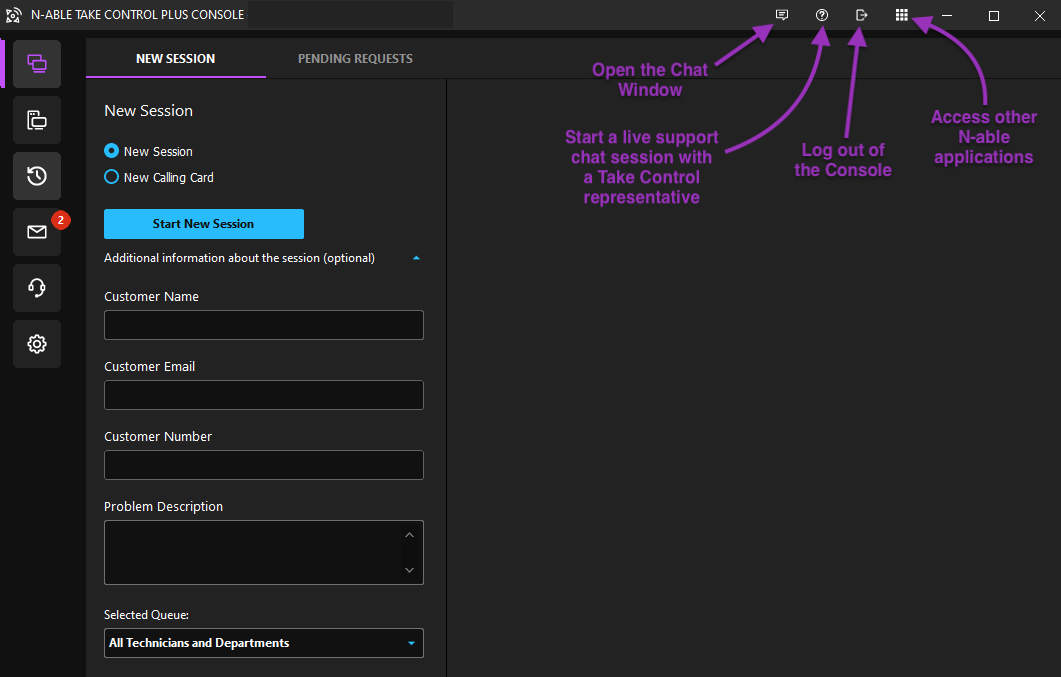
- Use the options in the top right menu of the Console to open the Chat Window and start a chat session with other technicians, start a live support session with a Take Control representative, log out of the Console or access other N-able applications.
What do you want to do?