
Disable Backup & Recovery
If Backup and Recovery options do not appear in N-sight RMM, use Cove instead.
To start a 30-day free trial of Cove:
- Open the app switcher in the Product Bar.
- Select Cove Data Protection (Cove).
Where Backup & Recovery is no longer required it can be switched off for all servers and workstations or for servers and workstations at individual clients and sites.
By default, servers and workstations will inherit policy from site, which will in turn inherit from client, which will in turn inherit policies set for all servers and workstations.
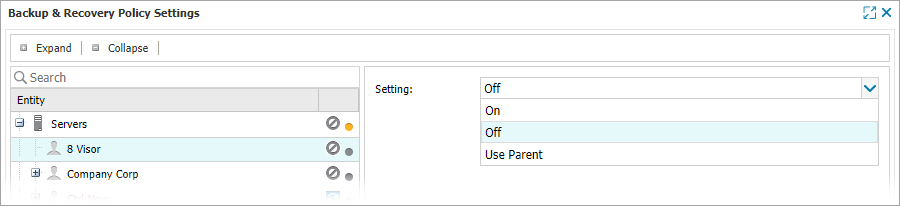
Multiple Devices (Device type, Clients and Sites):
- Navigate to Settings > Backup & Recovery > Settings
- Select the entity in the left pane (Device type, Client or Site)
- In the right hand pane, change Setting to Off
- Click OK to save and apply
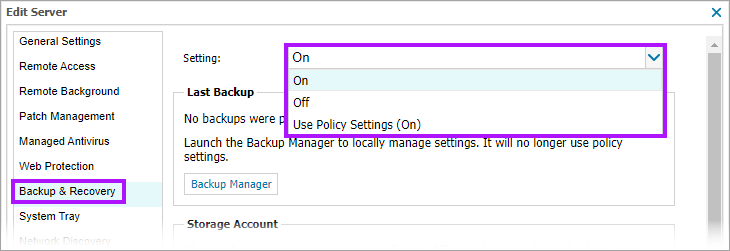
Individual Device:
- Right-click on the device in the North-pane of the Dashboard (or from the Server or Workstation drop-down)
- Go to Edit Server or Edit Workstation then Backup & Recovery
- Change Setting: to Off
- Click OK to save and apply
Inactive Storage Accounts
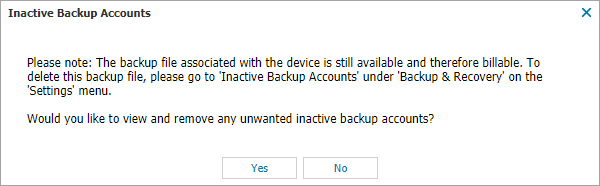
When Backup & Recovery is switched off (or the device is deleted from the Dashboard or the Agent is uninstalled from the device) the storage account remains (so you can still restore from this account), but is now labeled as Inactive.
You will continue to be charged for the storage used by inactive storage accounts until you remove that account.
To emphasize this point, when confirming that Backup & Recovery is to be disabled the following message is displayed with the option to view and remove any Inactive Backups:
Remove an Inactive Backup Account
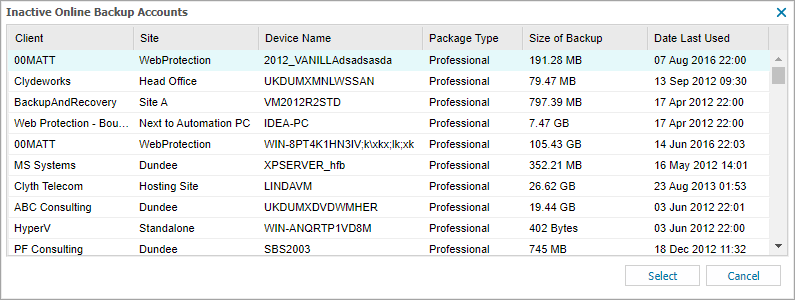
To remove inactive backup accounts
- Go to Settings > Backup & Recovery > Inactive Backup Accounts
- Multi-select the target backup accounts (use Shift+left-click to choose a range of accounts or Ctrl +left-click for specific accounts)
- Click Delete and review the changes, then select OK to remove the selected backup accounts
- Once removed you will no longer be charged for that storage and you cannot restore this data
This will list all inactive backup accounts along with the details of the device which last used this account, when this account was last used and the amount of storage used.
These settings are only available when logged into the N-sight RMM using an account with enhanced privileges Superuser or (non-Classic) Administrator level access, a login with the required Backup & Recovery permissions enabled or the Agent Key (where access is enabled)
What do you want to do?