Create a Custom SNMP Check Walkthrough
To illustrate how to create the custom SNMP Check based on the interface information retrieved from the MIB Browser, we have used the Add Custom SNMP Checks instructions as a background.
Network Device Monitoring supports a wide variety of vendors, devices and indicators. For in-depth monitoring of devices not supported by our vendor specific Checks, you can create your own custom SNMP Checks.
- Create a query with the OID for a table index. Create separate queries for each individual index entry or add all monitorable entries in the table index.
- Setup variables based on OID values then decide on how to use them. These range from displaying information on the index object (for example its name). To failing the Check based on specific returned values or calculation results.
- View the Alert recipients if the Check fails. Use the defaults or change the notification method.
We suggest using an SNMP Walk tool, such as iReasoning's MIB Browser, to query a network device and retrieve its OIDs.
Add Custom SNMP Check
Each section of the SNMP Check setup configuration is has a dedicated topic:
- Select the target Network Device in the Network Devices North-pane.
- Go to the South-pane Checks tab.
- Click Add Check > SNMP Check to open the configuration wizard.
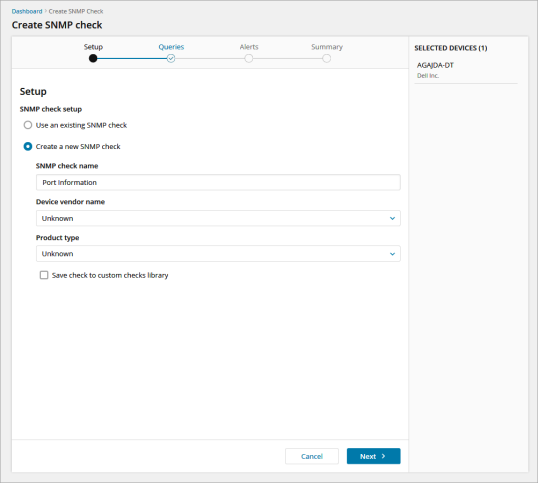
- Choose whether to Use an existing SNMP Check from the library or Create a new SNMP check.
As this example covers adding a custom SNMP Checks to a device we will select the Create a new SNMP check option,
Create a new SNMP Check
Setup
- Enter the SNMP check name for identification.
- Enter: Port Information as a name.
- Select the associated Device vendor name and Product type from the drop-downs.
- Choose whether to Save check to custom checks library for use on other devices.
- Tick this option where you want to add this custom check to the library.
- Click Next to configure the Queries
Select Unknown for generic or non-vendor specific Checks.

What do you want to do?
