Manage feature policies for client groups
You can enable and configure feature policy access for individual client groups so users can access, manage and apply the feature policies allocated to their client group.
Manage feature policies supports Managed Antivirus, Patch Management for Windows, Take Control and Web Protection policies.
When feature policy access is configured for an individual client group, users who access a policy dialog for a supported feature see only the Policies assigned to their client group.
The User Accounts dialog includes a column to indicate if a client group has restricted feature policy access. To open the User Accounts dialog, go to Settings > Users > User Accounts on the All Devices view.

When a user creates a new policy, it is automatically added to the policy list for their client group and it is only shared with other users in the same group.
Users with All Clients access can view and manage all configured feature policies configured.
Client group users can view any assigned policy and change its configuration. We recommend you only enable this feature if the client has their own custom policies setup. This allows the client to manage their own policies, without affecting other client devices.
We recommend you not allow clients to view or manage shared policies because any changes made by one client will affect all devices using that policy, not only the devices of the client that made the change.
Prerequisites
- To add and manage client groups, sign into N-sight RMM using an Agent Key, a Superuser role, or a user with the Client Groups permission enabled.
Manage policy access for client groups
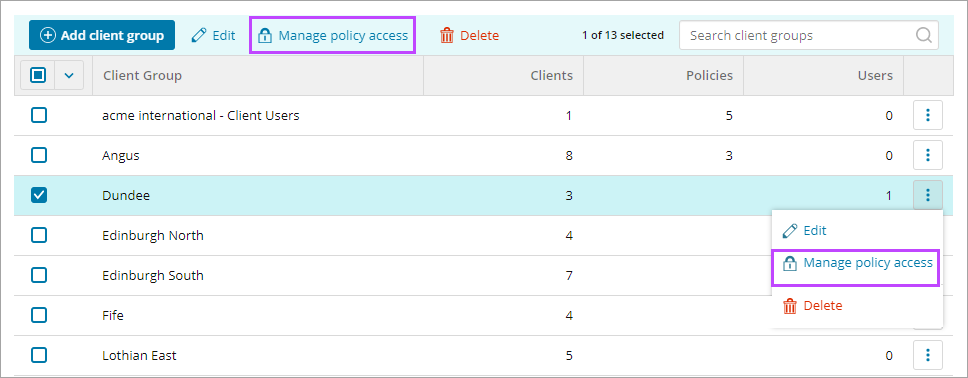
- In the All Devices view, go to Settings > Users > Client Groups
- Select the tick box for the client group. To find the group, you can use Search to filter the Client list.
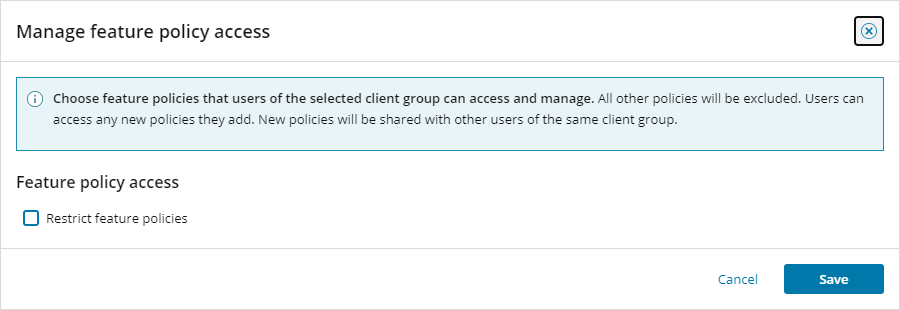
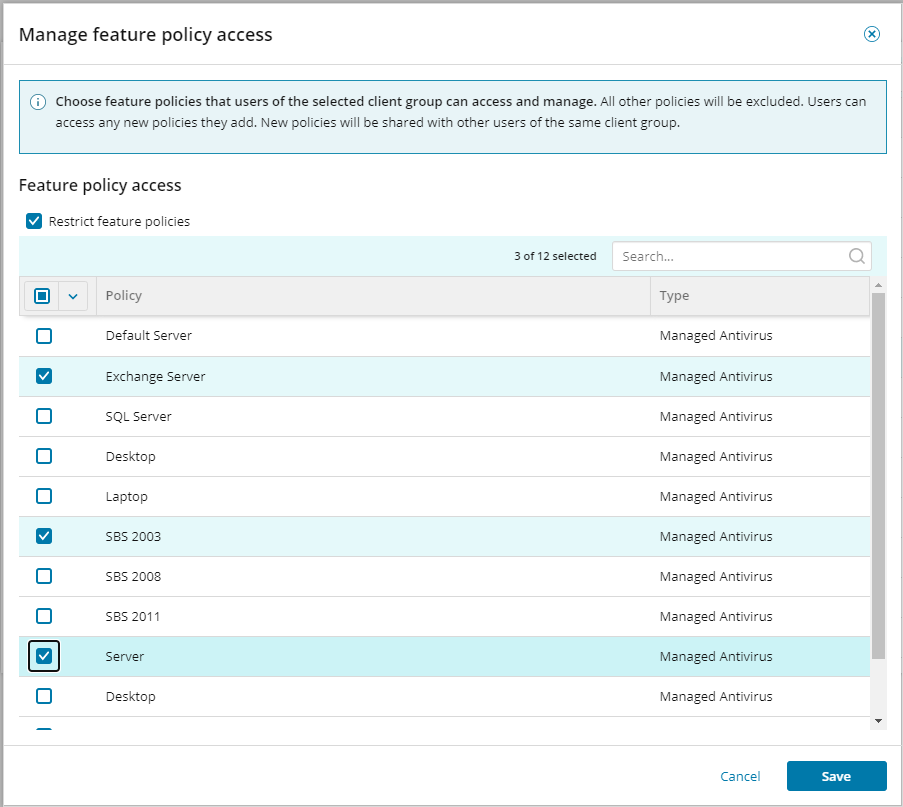
- Select Manage policy access in the action bar at the top of the dialogEnable the Restrict feature policies tick box
- Click the tick boxes for the policies you want users of the selected client group to access and manage
- Select Save to apply
The number of policies available for a group are displayed in the Policies column in the Client Group dialog.
Edit policy selection and remove feature policy access
- In the All Devices view, go to Settings > Users > Client Groups
- Select the tick box for the client group. To find the group, you can use Search to filter the Client list.
- Click the Manage policy access in the action bar at the top of the dialog
- Change the policy selection to match your new requirements
- To remove client group access to feature policies, untick the Restrict feature policies box
After you disable Restrict feature policies, users in the Client Group can no longer view or manage feature polices. However, if you enable the setting again for the Client Group, its previous policy selection is retained.
- Select Save to apply
Client group changes apply in the next session after the user restarts their browser and signs in again.
What do you want to do?
- Learn about Client groups
- Add a client group
- Edit a client group
- Delete a client group
- Read about Managed Antivirus and its View and Configure Managed Antivirus Protection Policies


