
Add client users—assign role and client group
You can add an N-sight RMM user account for each of your clients. You assign the customer user to a role that only has client related permissions and to a Client Group with only the one client added to it.
Each user generates their own Two-Factor Authentication (2FA) access code and their N-sight RMM actions are recorded using the User Audit Report.
Prerequisites
- To add a user, you must be signed into N-sight RMM using an Agent Key, a Superuser role, or a user account with the Roles & Permissions permission enabled.
Add an N-sight RMM client user
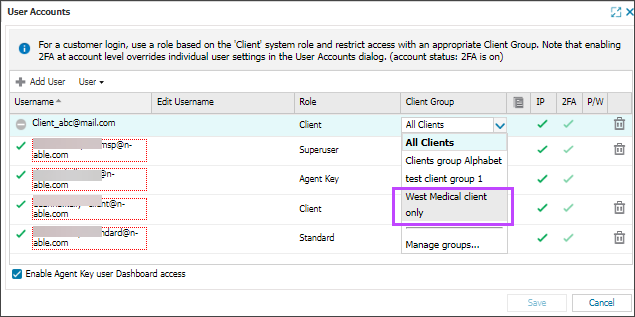
- In the All Devices view, go to Settings > Users > User Accounts.
- Select Add User.
- Select the Username column to enter an active and valid email address for the user.
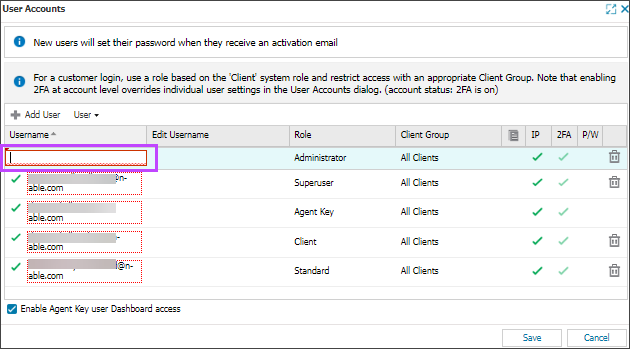
Ensure all usernames in the system are active, valid email addresses.
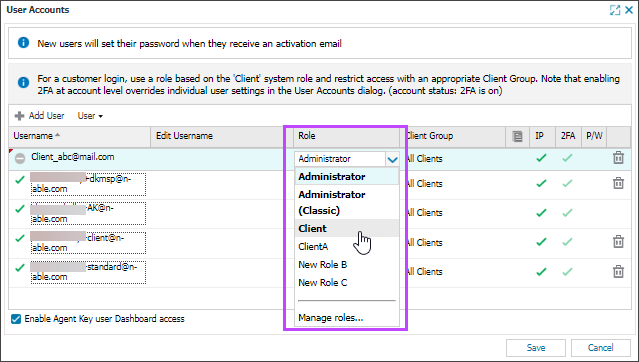
- Click the Role column and use the drop-down menu to select a client role. If you need to add a new role, select Manage Roles... to open the Roles and permissions dialog.
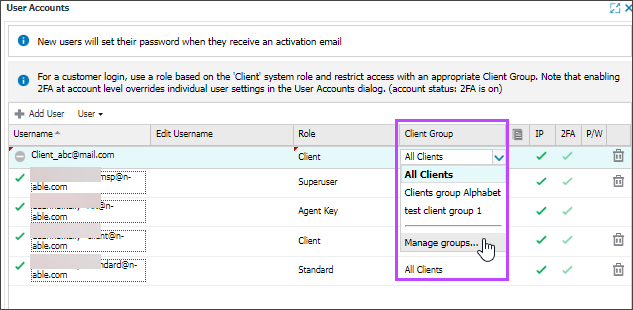
- Select the Client Group column and use the drop-down menu to select Manage Groups... to open the Client groups dialog and add a new client group specific for the client.
If you already created the client group for this client, select it from the drop-down menu.
- In the Client groups dialog, select Add client group.
- Enter a name for the client's group and then select the client.
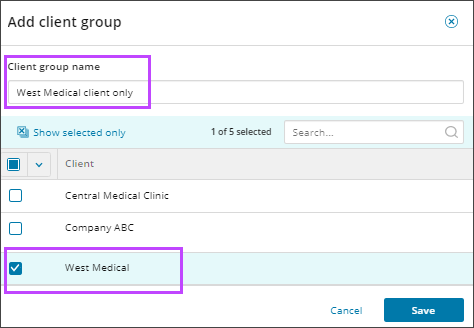
- Choose Save and review the changes, then select OK to confirm.
- When you are back in the User Accounts dialog, select the Client Groups column and use the drop-down menu to choose the new Client Group.
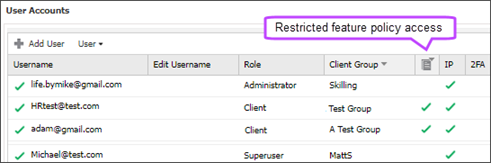
The User Accounts dialog indicates when a client group has restricted feature access. To open the User Accounts dialog, go to Settings > Users > User Accounts on the All Devices view.
- Click Save and review the changes, then select OK to confirm.
The new user is sent a verification email with a link to set their password and the user password status is displayed in the P/W (Password) column. A green tick indicates a password is set and an empty tick indicates a password is not set.