
Set up your Microsoft 365 monitored mailbox
The initial configuration of your Microsoft 365 monitored ticket mailbox is a crucial step in setting up your MSP Manager account. Your M365 ticket mailbox enables you to receive reported issues and requests from your customers via email.
Combine your ticket mailbox with workflows and routing rules and configure your ticket routing settings so that emails from your customers are automatically converted to tickets and assigned to the correct customer and technician within your company.
Configure your mailbox reply settings to ensure full control over email security, and avoid issues with DMARC and DKIM authentication. This also helps to indicate MSP Manager mail is safe.
Before creating your M365 mailbox, make sure you have configured the M365 integration from your account settings.
Configure permissions for creating ticket mailboxes
Make sure all technicians who need to configure ticket mailboxes have the necessary permissions to do so.
- Navigate to Settings > Users & Permissions > Roles.
- Click
 next to the Role you would like to edit.
 - Select the MSP Company Management section to expand and view it's options.
- Make sure the Configure Ticket Mailbox option is checked.
- Click Save Role to add the ability to configure ticket mailboxes to all users in that specific Role.
You can only connect one M365 mailbox to your MSP Manager account at a time.
Set up your M365 monitored mailbox
M365 mailboxes are monitored via the Graph API, which supports Multi-Factor Authentication.
- Navigate to Settings > Tickets & Workflows > Ticket Mailboxes.
- Click the mailbox drop-down menu
 in the top right corner of the page and select Add M365 Mailbox.
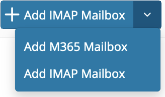
- Select the M365 email address from the list.
- Select Default Reply Mailbox (fallback) to use this as the 'reply as' mailbox for customers not assigned to a mailbox. Learn more about the 'Send reply using this mailbox' setting.
- Click
 to save the M365 Mailbox and send a confirmation message to the specified email address.
Assign a ticket mailbox to specific customers
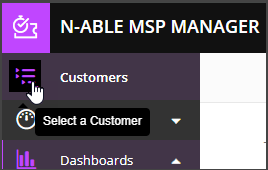
- Select the Customer icon
 in the left navigation to view your customer list.
- Choose a customer from the list to show that customer's menu.
- Click Actions > Edit Customer.
- Select a default mailbox from the Send Emails From list.
- Click Save Customer.
Send responses from any mailbox inside tickets
Image files sent as attachments can be no larger than 10MB.
- Navigate to Helpdesk, and select a ticket to edit it.
- Click Add response.
- In the New Response window, click the From field to specify a mailbox.
In some cases, you may receive the ticket notification before the ticket or ticket request gets created in MSP Manager .
What do you want to do?