
Configure an individual Microsoft account as your ticket mailbox
Configure your own personal Outlook or Microsoft 365 mail account as a ticket mailbox in MSP Manager.
Configure permissions for creating ticket mailboxes
Make sure all technicians who need to configure ticket mailboxes have the necessary permissions to do so.
- Navigate to Settings > Users & Permissions > Roles.
- Click
 next to the Role you would like to edit.
 - Select the MSP Company Management section to expand and view it's options.
- Make sure the Configure Ticket Mailbox option is checked.
- Click Save Role to add the ability to configure ticket mailboxes to all users in that specific Role.
Create a ticket mailbox from your individual Microsoft account
- Navigate to Settings > Tickets & Workflows > Ticket Mailboxes.
- Click the mailbox drop-down menu
 in the top right corner of the page and select Add Individual MS Mailbox.
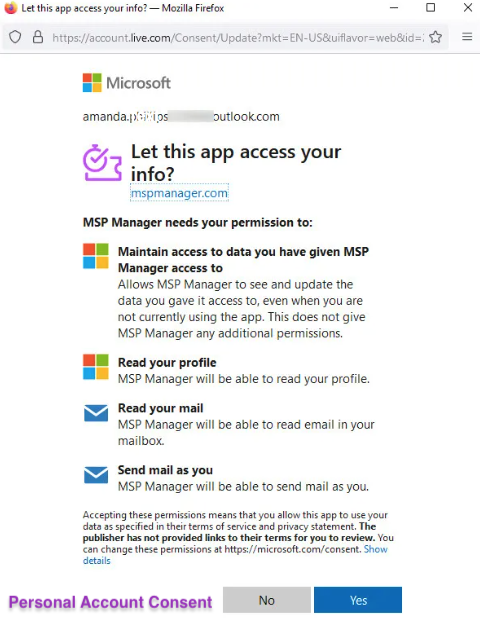
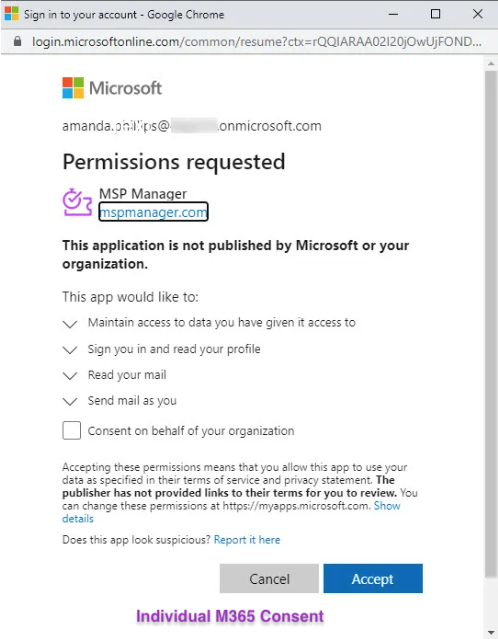
- In the Microsoft pop-up window, select your account if visible in the list to sign in, or select Choose Other and enter your Microsoft Outlook or M365 credentials if you are not signed in.
- When prompted, grant consent for MSP Manager to read from the mailbox. Depending on the type of account you choose, the consent prompt may look slightly different. Click Yes to grant personal account consent or Accept for individual M365 account consent.
- After successfully logging in, view the mailbox's connection settings window where you can select the checkbox next to Default Reply Mailbox (fallback) to use that mailbox as the default 'reply as' mailbox for customers not assigned to a ticket mailbox.
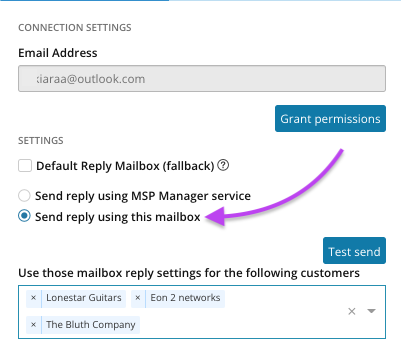
- Choose whether to Send replies using the MSP Manager service or from the address previously selected in the Email Address field.
- Add specific customers to the Use those mailbox reply settings for the following customers field to ensure replies come from that mailbox for the selected customers.
- Select Test send to test the connection and you will receive a confirmation message at the bottom of the screen.
- Click Save
 to complete the addition of the mailbox.
The new mailbox is saved to your list of ticket mailboxes.
From your Microsoft account, navigate to the Security menu where you can edit the MSP Manager mailbox to view all information MSP Manager has access to. Click Edit and on the next page select Remove these permissions to revoke MSP Manager's access to the Microsoft account. 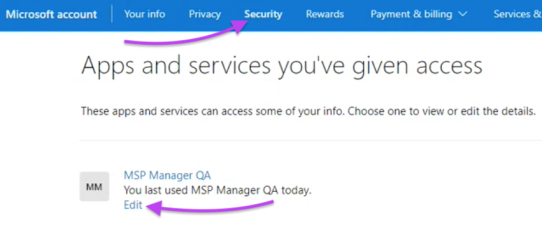
What do you want to do?