
Configure your IMAP ticket mailbox
The initial configuration of your monitored ticket mailbox is a crucial step in setting up your MSP Manager account. Create an IMAP enabled mailbox to receive reported issues and requests from your customers via email.
Configure permissions for creating ticket mailboxes
Make sure all technicians who need to configure ticket mailboxes have the necessary permissions to do so.
- Navigate to Settings > Users & Permissions > Roles.
- Click
 next to the Role you would like to edit.
 - Select the MSP Company Management section to expand and view it's options.
- Make sure the Configure Ticket Mailbox option is checked.
- Click Save Role to add the ability to configure ticket mailboxes to all users in that specific Role.
Set up your IMAP enabled mailbox
As of January 2025, IMAP is automatically enabled for Google mail (Gmail) accounts, and no action is required to manually enable IMAP settings for your Gmail account.
Additionally, make sure to add enhanced security to your Gmail mailbox by creating an App Password.
- Navigate to Settings > Tickets & Workflows > Ticket Mailboxes.
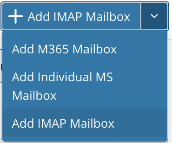
- Click the mailbox drop-down list in the top right corner of the page and select Add IMAP Mailbox.
- Enter credentials for email address, server address, and server port.
- Click Use SSL, if required, and enter your user name and password.
- Select Default Reply Mailbox to make this the default ticket mailbox for customers without an assigned ticket mailbox. Learn more about the 'Send reply using this mailbox' setting.
- Click save
 to apply the mailbox settings.
Users must use complex passwords for app logins, simple passwords are no longer permitted.
Assign a ticket mailbox to specific customers
With multiple ticket mailbox configured in your MSP Manager account, you can assign different mailboxes to specific customers.
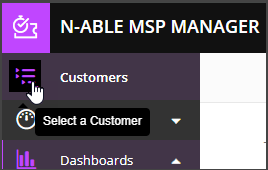
- Select the Customer icon
 in the left navigation to view your customer list.
- Choose a customer from the list to show that customer's menu.
- Click Actions > Edit Customer.
- Select a default mailbox from the Send Emails From list.
- Click Save Customer.
Send responses from any mailbox inside tickets
Image files sent as attachments can be no larger than 10 MB.
- Navigate to Helpdesk, and select a ticket to edit it.
- Click Add response.
- In the New Response window, click the From field to specify a mailbox.
In some cases, you may receive the ticket notification before the ticket or ticket request gets created in MSP Manager .
What do you want to do?