
Get started with MSP Manager
MSP Manager is cloud-based service management software that helps you support customers and run an effective IT service business.
Organize and manage all of your customers' information in one place, including locations, contacts, program levels, service items, knowledge, and billing information.
Get started by adding new users
Navigate to Settings > Users & Permissions > Users > Add User, and enter the new user's information.
N-able's Single Sign-On (SSO) service is a convenient way for you to access our SSO products (including N-sight RMM, Take Control and Cove Data Protection) with a single set of login credentials.
Please be aware that any changes to your SSO credentials, including. username and password updates, will apply to all of our SSO supporting products and the Partner Success Center.
You can also create Roles for MSP Manager users, and assign them to Access Groups to limit the user's access to a specific group of customers.
Add the User List Widget to your Workspace page to easily add new users to your account and filter existing users by status or by the customer to whom they are assigned. Learn more about configuring Widgets in your Workspace Pages.
Add new customers to your account
Use the New Customer Setup wizard to add customers to your account, create program levels and service item contracts, and assign locations and contacts to the new customers.
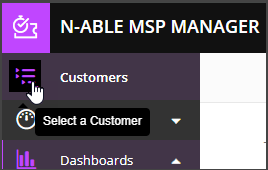
- Select the Customer icon
 in the left navigation to view your customer list.
- Select Add Customer.
- Enter the customer's General Information - Customer name, Phone number and Email domain:
The Email domain should not include the @ symbol. For example, use mydomain.com.
- The Status check-box is enabled by default, and can be unselected to deactivate an active user. Additionally, you have the option to add an Access Group to the new customer.
- Enter the customer's Notification information by selecting a Language and Email Format, then select a mailbox from the Send email from drop-down. This is the default ticket mailbox used to send correspondence and replies in tickets.
- Optionally enter their Advanced Settings by selecting from the following options, then click Next.
- Time Zone - customer's office time zone
- Assigned Users - add assigned users to customers and configure Ticket Routing rules to automatically assign inbound tickets to them.
- Customer Since - track start date of customer
- Lead Source - for internal and sales tracking purposes
- Accounting Reference - can help accommodate any internal accounting practices
- Customer Reference ID - helps to accommodate any internal CRM processes or other internal practices
- Select a Program Level and click Next to view the Service Items generated by your Program Level. Click Add Service Itemto add a customer specific service item to the Program Level, you can also click the edit button next to each service item to edit its details.and to add customer specific Service Items to the Program Level if needed. Click Next.
- Select Add Locations and enter the customer's location name and information. Add Assigned Users to the customer, specify whether this is the Default location for the customer, and whether to display the location on the customer's dashboard. Click the Save icon
 to save the location and click Next.
 - Select Add Contact to create a contact for the new customer. Select Portal User or Portal Admin to grant the contact access to your customer portal.
- Click the Save icon to save the contact and click Next.
- Click Finish to view the new customer's information from the Customer Dashboard.
New portal users receive a welcome email with login instructions and an auto-generated password.
When adding a contact to a customer, leave the Location field blank to create a Customer Level Contact, which assigns the contact to the customer and not to a specific location.
The same contact email can be used within multiple companies in MSP Manager, so you can add your contact's email even if it exists in another MSP Manager account.
The new customer information, Program Level, Service Items, Locations, and Contacts are saved to your account.
To edit existing customers, select the customer and click Actions > Edit Customer.
What do you want to do?