
Deploy a script
You deploy scripts from the All Devices view to one or multiple devices as Script Checks (24x7 or daily frequency) or as Automated Tasks.
The following steps cover adding a Script Check and adding an Automated Task on a single device. For information about adding a Script Check and an Automated Task on multiple devices, see Set up Script Checks and Set up Automated Tasks.
Add a Script Check
- In the All Devices view, select the device in the North-pane.
- In the South-pane, go to the Checks tab.
- Select Add Check, choose the check frequency, then select Script Check.
-
Choose a script, then select Next.
Scripts are grouped by default script categories (if applicable). On Linux, only user-defined scripts are supported.
- Configure script parameters, including the Command Line for custom scripts (if required).
To prevent the removal of a leading zero in command-line arguments, any part of the command that begins with 0 is wrapped in \ so the full argument is preserved during execution or processing.
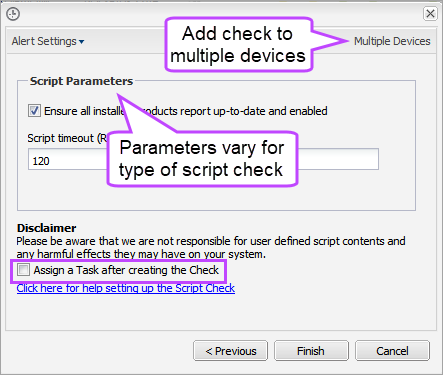
To add the check to multiple devices, select Multiple Devices.
- To run an automated task when the check fails, select Assign a Task after creating the Check.
- Select Finish to save and apply the check.
If you selected Assign a Task:
- Choose the Automated Task script.
- Select Next to configure parameters.
- Enter any required Command Line or Script parameters.
- (Optional) Set maximum permitted execution time for the script.
- Select Finish to save and apply the task.
Add an Automated Task
Automated Tasks run based on the local time of the computer where the Agent is installed.
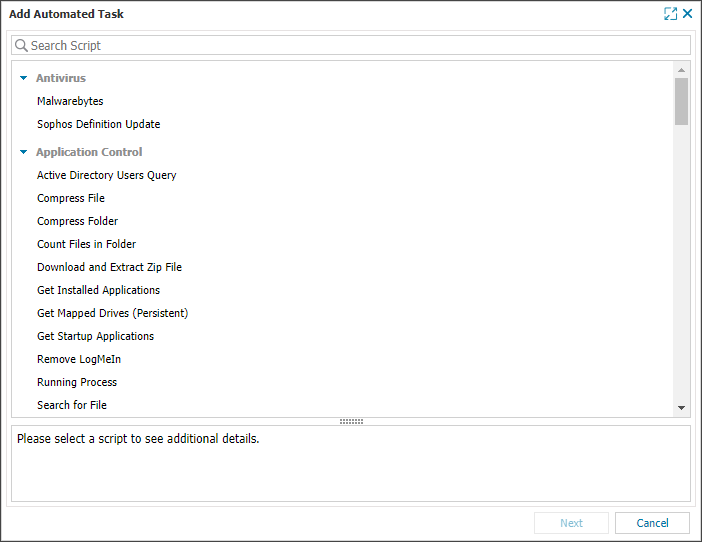
- On the All Devices view, right-click the device in the North-pane and select Task > Add.
- Select the script from the expandable sections that list the available scripts and click Next.
Only scripts that are uploaded for Automated Tasks and are associated with the device's Operating System are displayed.
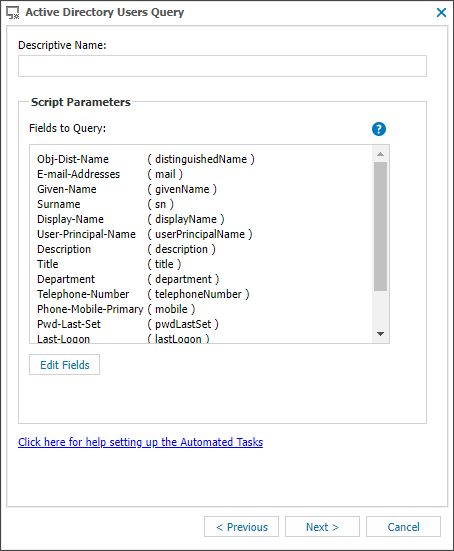
- Enter a name for the task and any required parameters required and then select Next.
For example, the Active Directory Users Query task requires these parameters:
-
From the Select Frequency Method list, choose how often the task runs. Configure the Schedule Settings if needed, then select Next.
- Once per day: Select the days and time to run the task. To run the task weekly, select a single day.
- Once per day: Select the day of the month and the time to run the task.
- On check failure: Select the check failure that triggers the task. If available, configure additional options in With these settings...
- Manual: Select Run Automated Tasks on demand. The task runs in near real time and uploads results within a few minutes.
-
Choose and set the frequency options:
- Run Task for a limited period: Select the start and end date and time (available for once per day and once per month).
- Set maximum permitted execution time: Enter the maximum number of days, hours, and minutes the task can run before it is canceled.
- (Optional) Select Run task as soon as possible if schedule is missed (available for once per day and once per month frequencies).
- Select Finish.
This option respects the Run Task for a limited period setting and will not execute tasks outside of that window.
What do you want to do?
- View the supported script types
- Check the requirements for returning Script results to the UI
- Determine whether the end user can interact with the script
- Parse Command Line Arguments to the script
-
Upload the Script to the N-sight RMM UI
- Learn about the Windows Automation Manager
- View script Troubleshooting suggestions
- Read our scripting FAQs