
Add customers, locations and contacts on the fly from inside a ticket
You can add new customer information from within an open ticket in MSP Manager without leaving the ticket editor. This will save time by adding the new customer to your account when they don't appear in the system. You can also add new locations and contacts to your account from an open ticket.
- Select Helpdesk > Add Ticket, or select an existing ticket.
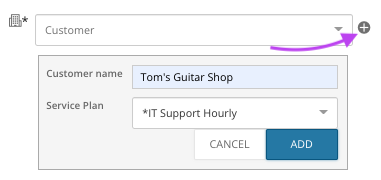
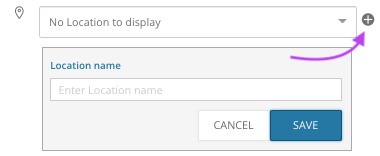
- Click the Plus icon
 next to each field you want to edit.
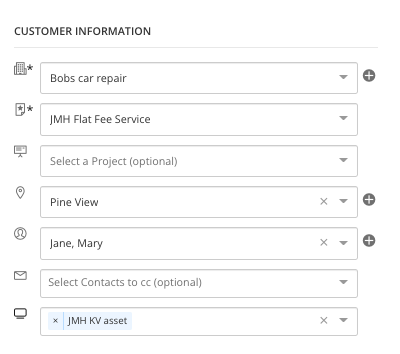
- To add a customer on the fly, enter the customer name, select a Service Plan to assign to the customer and click Add.
- To add a location on the fly, enter a Location name and click Save.
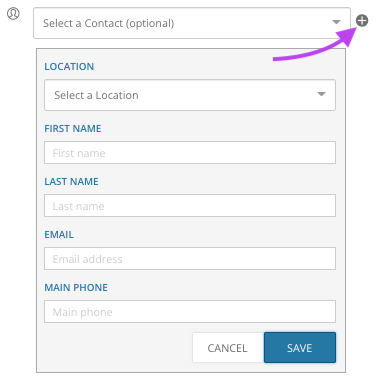
- To add a contact on the fly to both the ticket and the customer to whom the ticket belongs, enter the necessary info for the new contact and click Save.
- Select Save Ticket after you have completed your updates.
When selecting an existing ticket, click anywhere inside the top section of the ticket to edit the ticket's information.
The information added to the ticket on the fly is saved to the ticket as well as your MSP Manager account.
When inside a ticket, hover your cursor over the ticket's Contact to view a pop up window with the name, phone number, and location for that specific contact.
Add Locations and Contacts to a ticket
When a new contact is added to a ticket, leave the location field blank to create a Customer Level Contact that is assigned to the customer without a specific location.
- If no Location has been selected for the ticket, the Contacts list includes all contacts associated to the ticket's customer.
- When you select a Contact that is associated with a Location, then the Location field is automatically populated with that contact's location.
- When you select a Location, the Contacts list includes contacts for the selected Location and Customer Level Contacts only. It does not include Contacts associated to other Locations.
What would you like to do?