
Custom Ticket Time Entry Work Types
Create your own customized Work Types, based on the different types of work you perform. Use one or multiples of those work types when tracking time on a single ticket.
The default Work Types cover several common types of work, but now you can create and customize your own, tailored to how you interact with your customers, and to the unique and complex services that your company performs.
Create your Custom Ticket Time Entry types from the Settings Menu
Before adding Custom Time Entries to your tickets, create different Custom Time Entry Types based on the different types of work you perform for your customers.
- Navigate to Settings > Tickets & Workflows and select Custom Ticket Time Entry Types.
- In the top right corner, click Add Ticket Time Entry Type.
- Enter a name and description for the Ticket Time Entry type and click Save.
The new Ticket Time Entry Type is now visible in the list.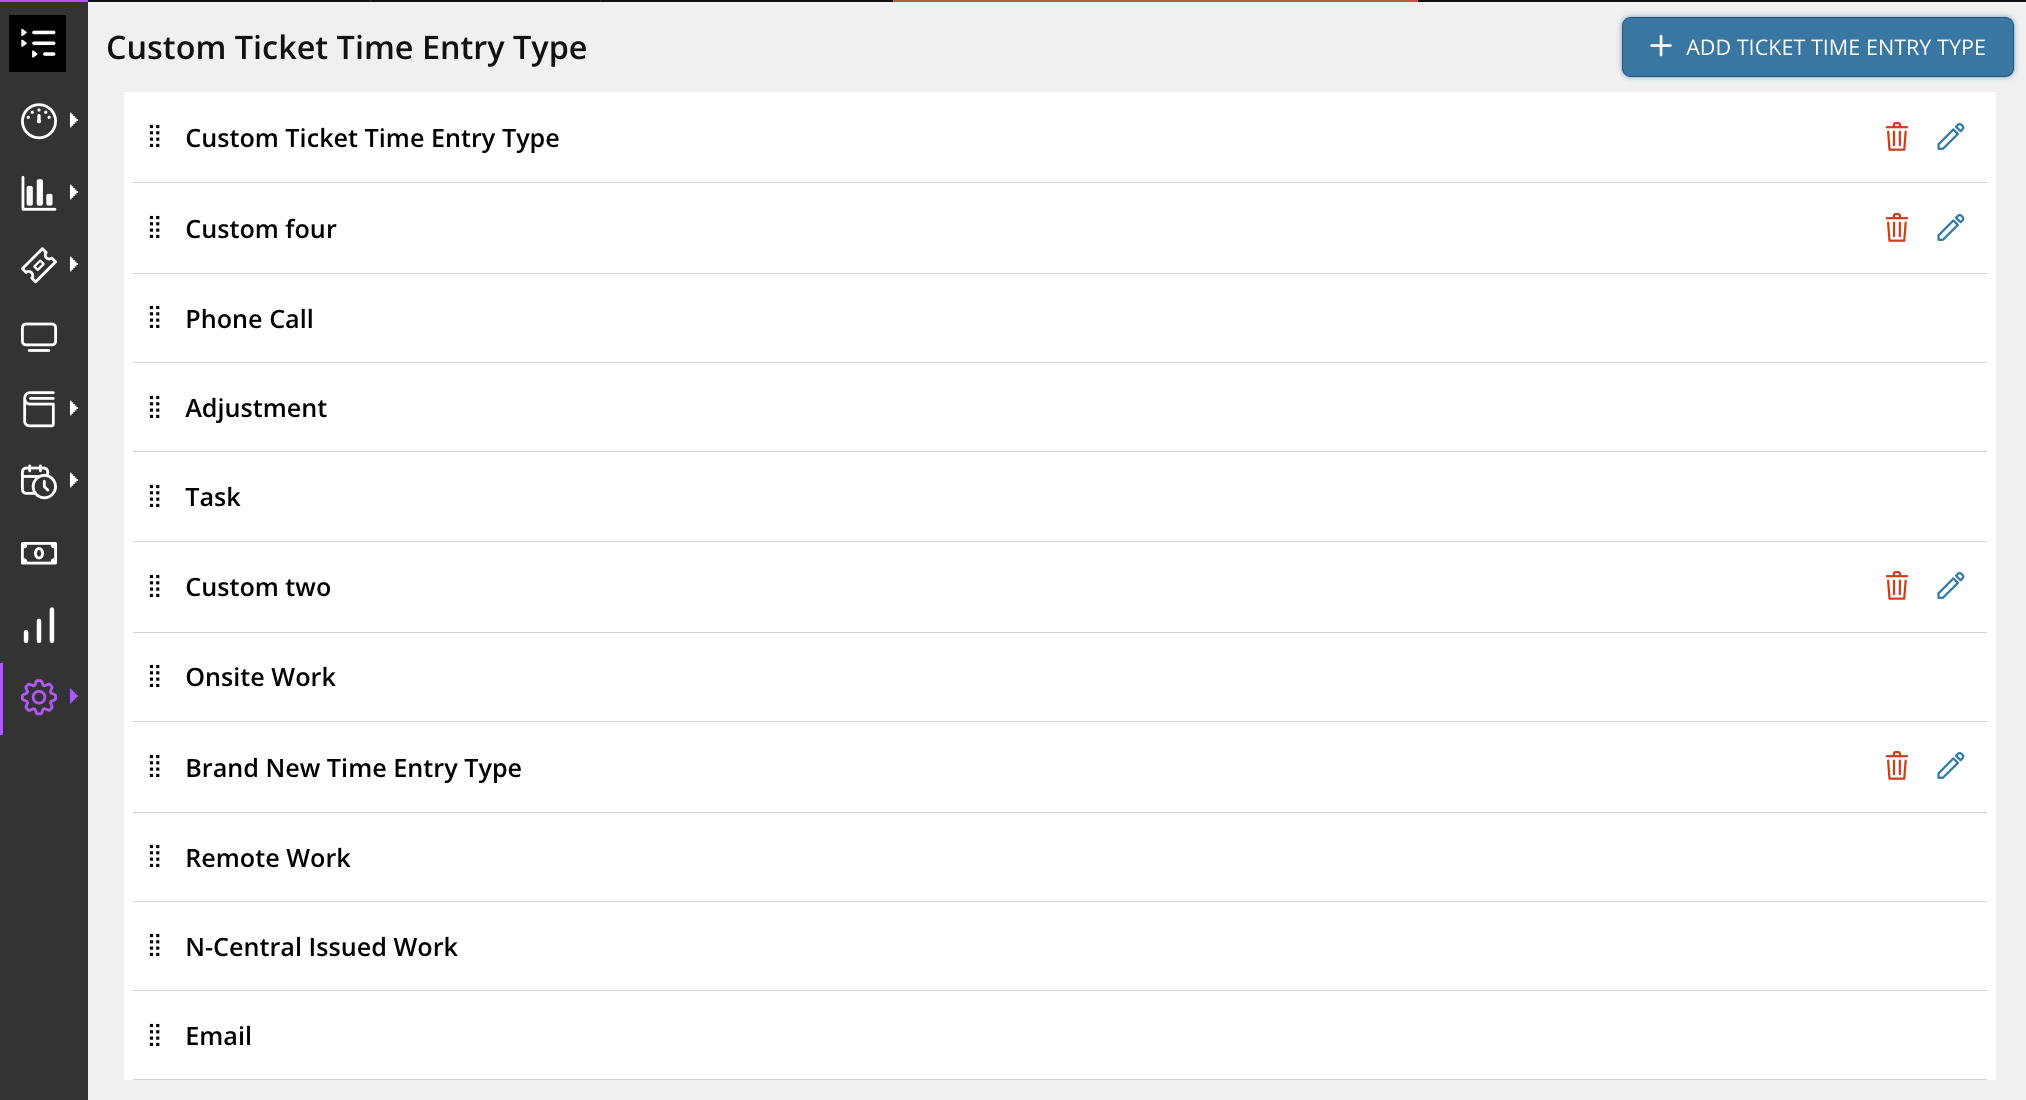
Use the Delete or Edit buttons to remove or update the Ticket Time Entry Types in the list, or drag and drop them to re-order the list.
If a Custom Time Entry type is being used in a ticket, then it can not be deleted.
Add Custom Ticket Time Entries to a ticket
After initially creating and saving a ticket, you can select the new Custom Time Entry type when adding a new time entry to the ticket.
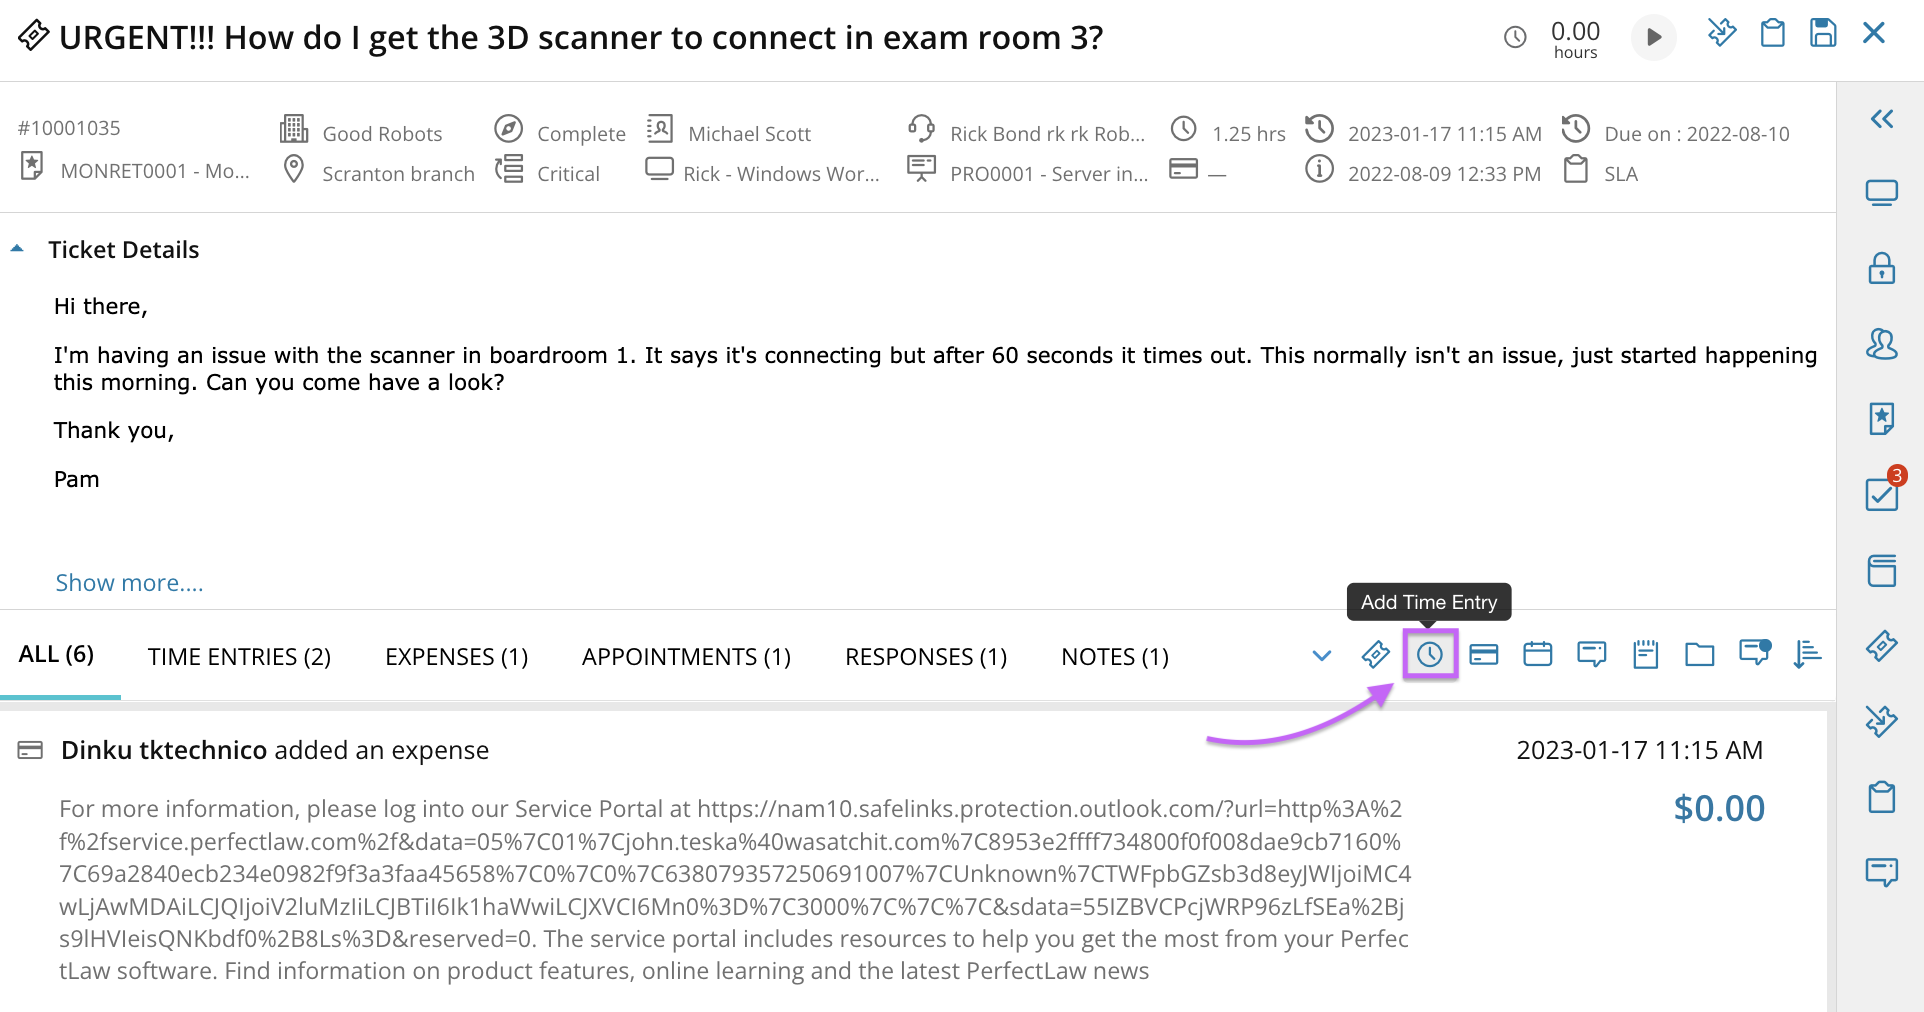
- Open an existing, in-progress ticket, or create a new ticket and click Save.
- From inside the Ticket Editor, click the Add Time Entry button.
- Enter the number of hours spent working, along with a description.
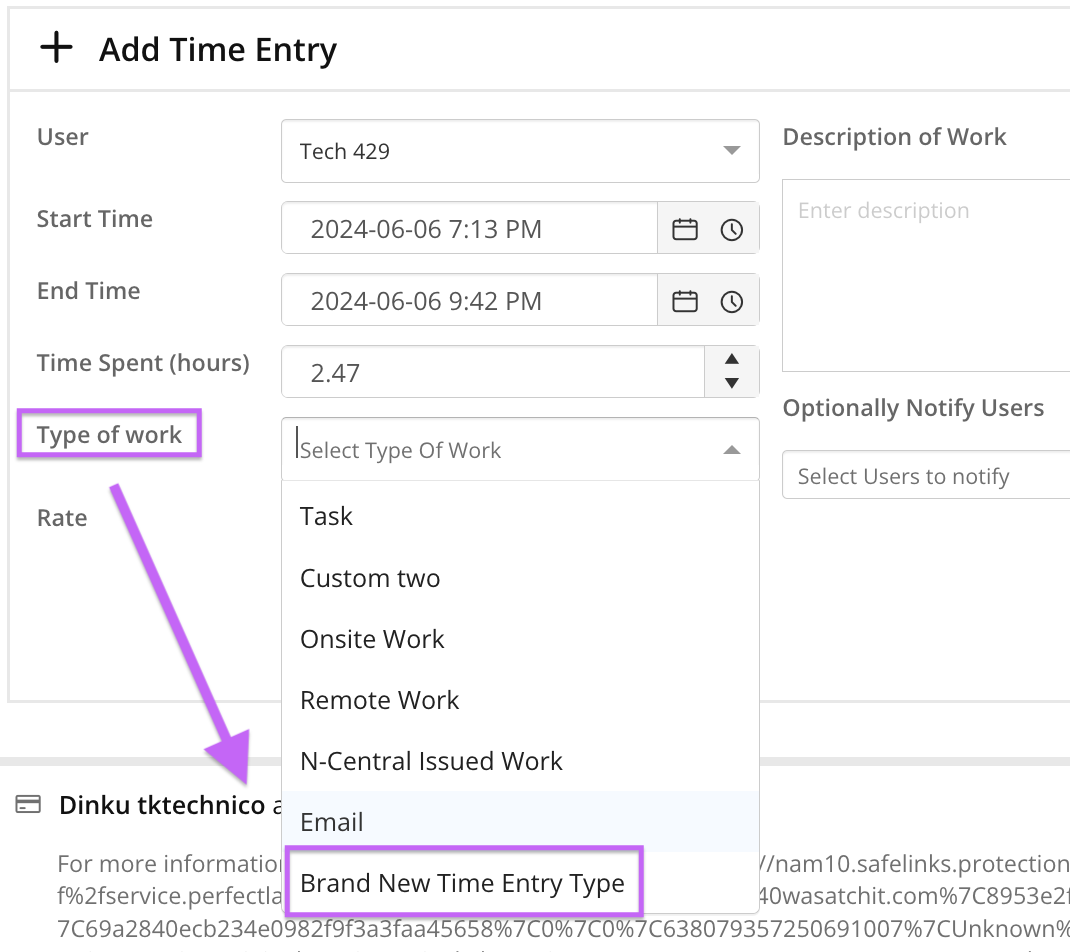
- From the Type of Work list of options, select the new Custom Ticket Time Entry Type.
- Save the time entry to confirm the addition of the new Custom Time Entry type to the ticket.
Continue to add and utilize different Custom Time Entry Types based on how your company does business.
What would you like to do?