Install the Take Control Linux Agent
Install the Linux Agent from the Admin Area or Technician Console for devices using a Linux operating system to permit unattended access to that device.
Review the Take Control system requirements to ensure your Linux version is compatible with the Take Control Agent.
Download the Linux Agent from the Admin Area
Before getting started, navigate to the Downloads tab in the Admin Area and download the Linux RPM or Linux DEB installation package.
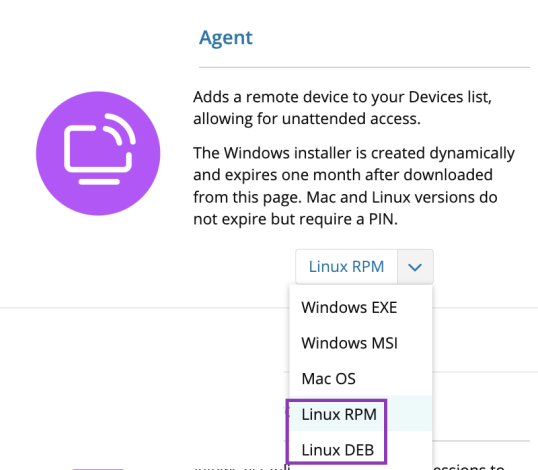
For Fedora 9 or newer, select the Linux RPM package. After the download is complete, go to your Download folder and install the Take Control Agent following these commands:
cd download_folder/
sudo yum install ./tkc_agent_standalone_version.deb
For Ubuntu 18.04 or newer, select the Linux DEB package. After the download is complete, go to your Download folder and install the Take Control Agent following these commands:
cd download_folder/
sudo apt install ./tkc_agent_standalone_version.deb
In the middle of the installation for both packages, the installer will ask for a new PIN code. Follow these steps to add the device to Take Control and generate a PIN code from either the Admin Area or Technician Console:
Install the Linux Agent from the Admin Area
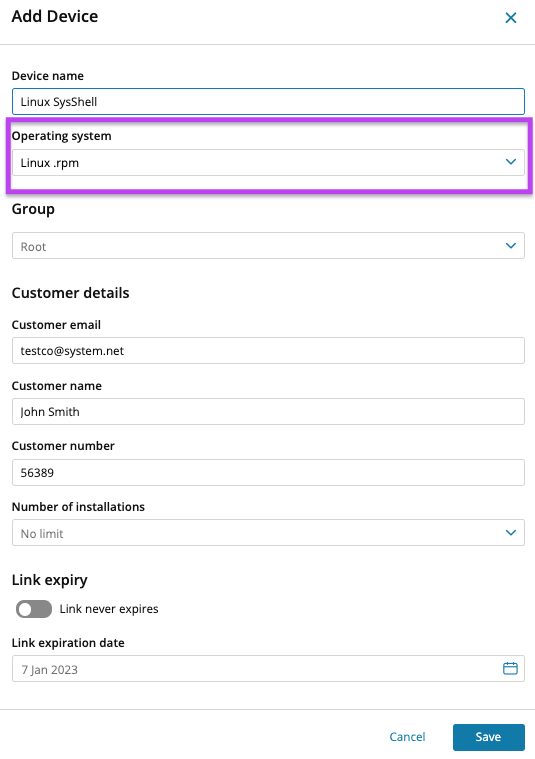
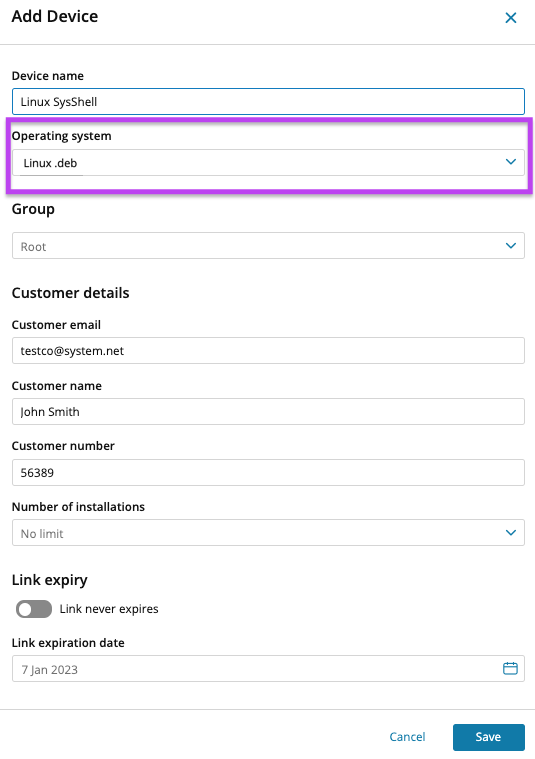
- Navigate to the Devices page of the Admin Area and click Add Device.
- Enter the Device name, select a Group to which the device belongs and enter the Customer details.
- Select an Operating system:
- Specify the number of installations and whether the installation link expires or not.
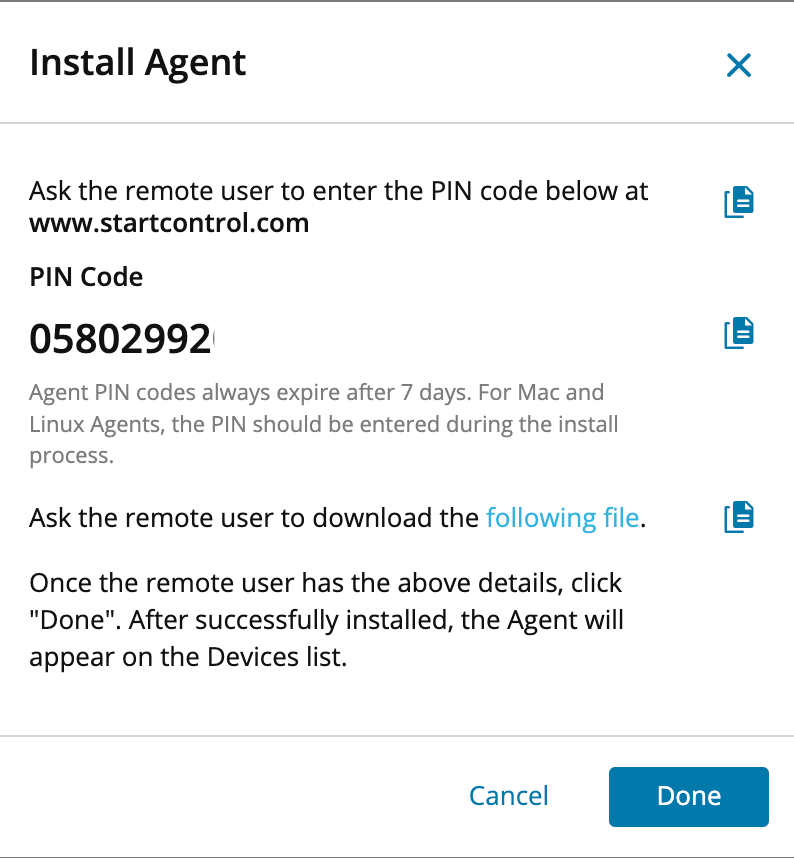
- Click Save and the confirmation window appears where you can use the Copy icon
 next to each section to copy the URL, the generated PIN code or the link to the installation file and share them to the device where you are installing the Take Control service.
Install the Linux Agent from the Technician Console
- From the Technician Console, select the My Computers tab and click Add Computer.
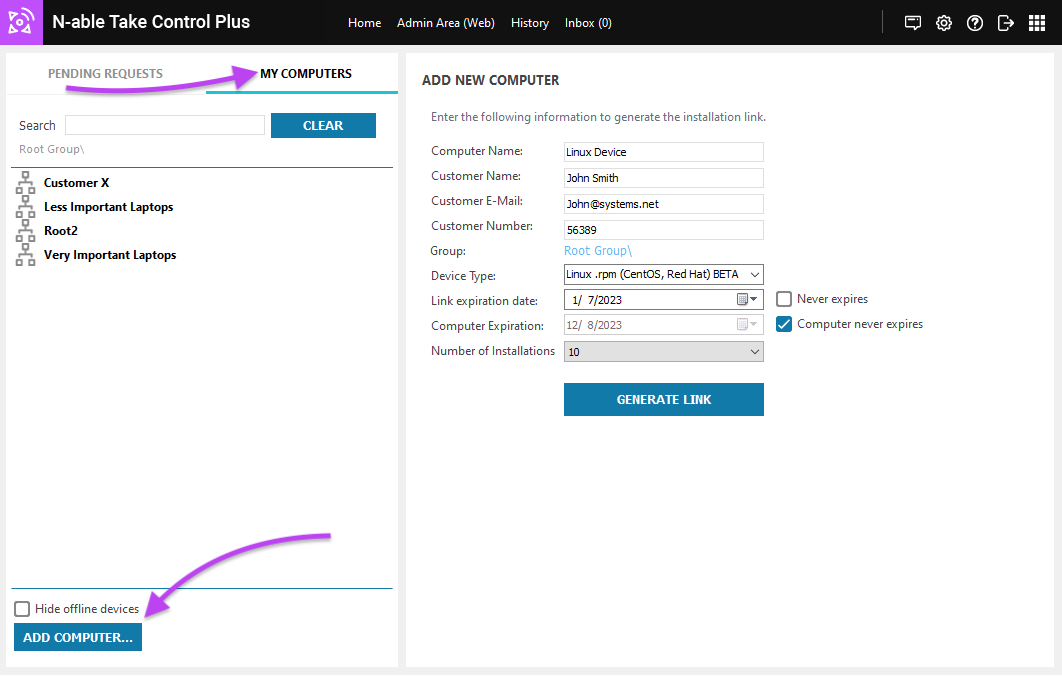
- Enter the Customer information fields and select a Group.
- From the Device type field, select Linux.rpm if you are using Fedora 9 or newer, or select Linux.deb if you are using Ubuntu 18.04 or newer.
- Choose both a Link expiration date and a Computer expiration date, or select Never expires for either option.
- Click Generate Link and the confirmation window is viewable at the bottom of the Console window.

- Click the Email icon
 to send the installation link using your default email client.
After the installation process is complete from either the Technician Console or Admin Area, share the installation link to the device where you are installing the Take Control Agent and start an unattended remote session to the new Linux device.
What do you want to do?

