
Create End User accounts in Take Control
Multi-Factor Authentication (MFA) is mandatory for all Take Control user accounts.
End User accounts are restricted to the End User Area where they can only access devices to which they have been granted permission.
After downloading the Take Control Viewer, End Users can remotely access their computers and devices, and open Deferred Support Requests for any of those devices.
During remote access, these users are limited to the Remote Desktop, and File Transfer tabs, as well as the Computer, Session, View, Commands, and Interactions menus in the Viewer.
You can configure End User accounts to give restricted access to customers, allowing them access to their computers and devices with a limited set of features and permissions.
Add an End-User
End-Users are counted separately from your normal technician licensing. For example you can have a license for 1 Corporate Technician and 10 licenses for end users.
- In the Admin Area, go to Management > Technicians.
- Select Add at the top of the Technician list.
- Enter the Name and Email for the End-User.
- Choose End User from the Permissions Group dropdown menu.

- Set the Language, Time zone and Date and Time Format for the End User.
- (Optional) Toggle Account never expires on or off as needed.
- (Optional) Toggle Access FTP on or off as needed to allow or prevent the End User transferring files during remote access sessions.
- Select Add technician to save the new End User and send them an SSO (Single Sign On) invitation email with instructions on how to Create a N-able Login Account and log in to the End User Area.
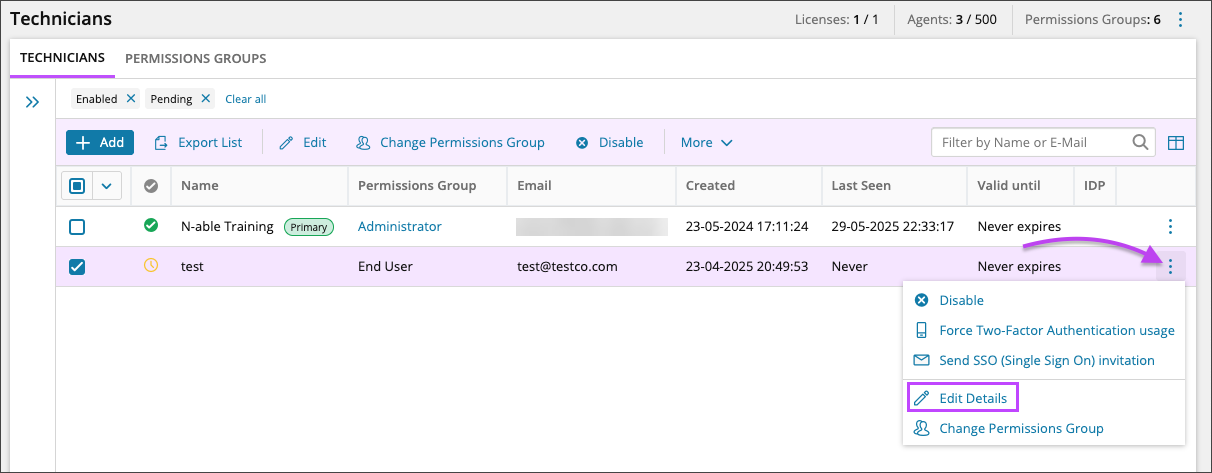
- Set which devices the newly created user can access via the Ellipsis icon
 > Edit Details > Computers tab.
 - Select the checkbox next to each computer, and set the Custom Name field for each computer the end user requires access to. Each device's Custom Name is displayed in the End User area.
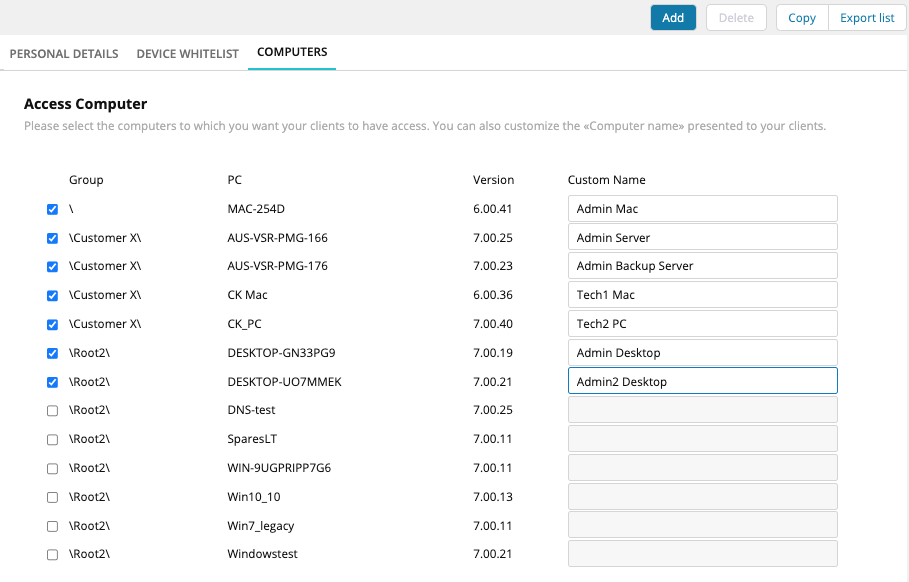
- Save your changes to grant the End User access to the selected devices.
After the new End User is authenticated using the invitation email, they can log in to the End User Area.
From the Technician List, you can re-send the SSO invite by clicking the Ellipsis menu icon next to the End User in the list and selecting Send SSO (Single Sign On) Invitation.

Create a N-able Login Account and log in to the End User Area
The new End-user will receive an Enrollment Notification email and they can use the Create N-able MSP SSO Account button in the email to set their password and create their new End-user account. 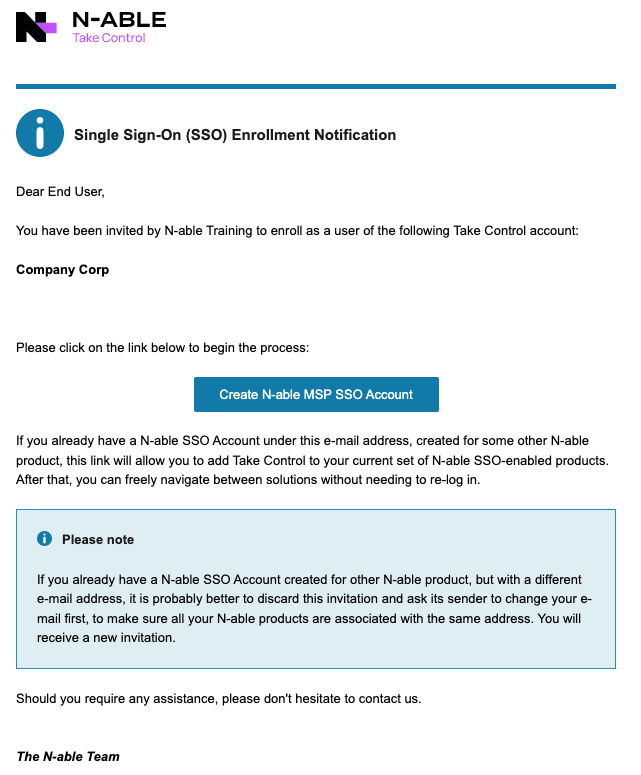
After the new End-user account is created, the user is prompted to download the Take Control Viewer. 
Make sure you have disabled any pop-up blockers in your browser to ensure the user is able to view the prompt and download the Viewer.
After downloading the Viewer, the user is logged in to the End User area where they can view the devices to which they were granted permission to access.
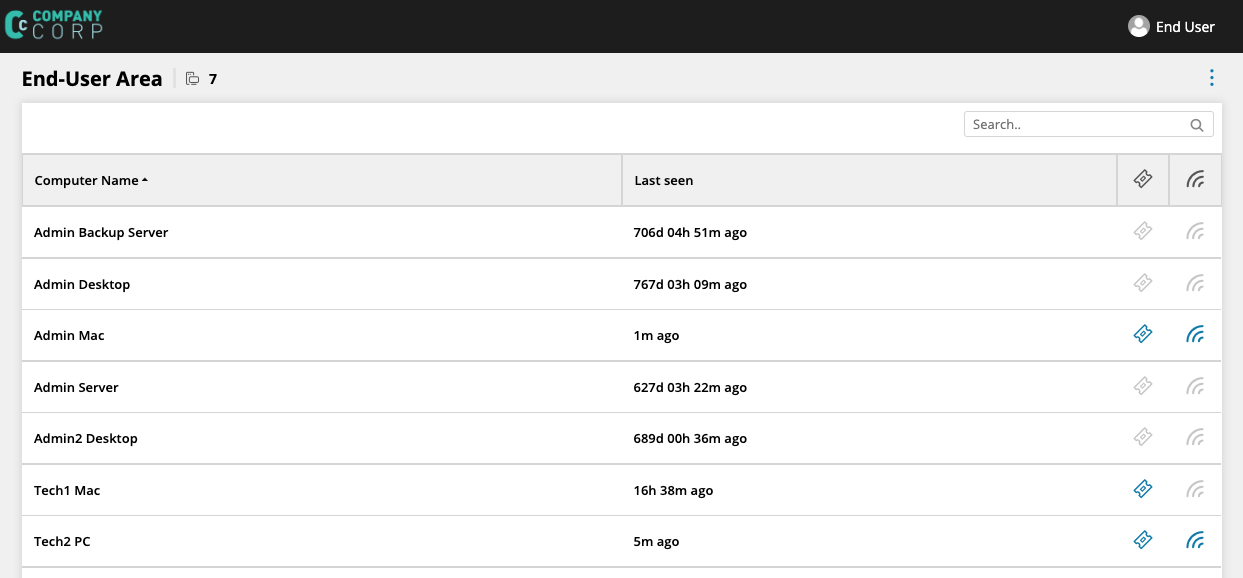
End user actions
- Use the Connect icon
 next to the relevant device to start a remote session. During a session, the end user is restricted to the Remote Desktop and File Transfer tabs, as well as the Computer, Session, View, Commands and Interactions menus.
 - Select the Ticket icon
 next to the relevant device to generate a Deferred Support Request without establishing a remote session. Learn more about Deferred Support Requests from End Users.
 - Choose the Ellipsis icon to re-download the Viewer or refresh the device list.
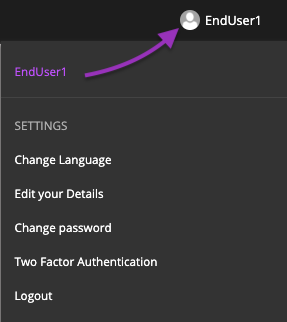
- The End User can select their username in the top right corner of the End User Area to access their Settings Menu where they can change their language, edit their information, change their password, or log out of the End User Area.
Where a device is offline, the connect icon is grayed out.
If the ticket icon is not displayed next to a device, it means that device is not configured to create Deferred Support Requests. To grant an End user permission to create Deferred Support Requests, navigate to the Devices section of the Admin Area, select the device from the list and select Edit to access the Edit Device dialog. In the Permissions section, make sure Remote user can create Deferred Support Request is turned on.
What do you want to do?