
Bare Metal Recovery
If Backup and Recovery options do not appear in N-sight RMM, use Cove instead.
To start a 30-day free trial of Cove:
- Open the app switcher in the Product Bar.
- Select Cove Data Protection (Cove).
Bare Metal Recovery (BMR) is a part of Backup & Recovery and is designed to recover a system directly to bare hardware, i.e. a machine without an Operating System installed, by utilizing a custom recovery distribution running from a bootable media (USB or CD).
Bare Metal Recovery is available on devices running Windows 7 and Windows 2008 or later. Please be aware that this Operating System requirement applies to both the source computer and the device the bootable media is created on.
Backup Requirements
As Bare Metal Restore is used to rebuild a failed Windows system backups of both the System State and a Files and Folders selection of the whole system disk (depending on the computer setup this may be C:\) are required.
Additional data may be backed up with data in the Files and Folders data source recovered together with the system disk. Other data sources can be recovered after the Bare Metal Recovery process has complete by using the Restore option in the Backup Manager.
Target Computer Hardware Requirements
Bare Metal Recovery is used to recover the data (including Operating System) from the source (the device experiencing a problem) to a target computer.
To successfully complete this process the target computer must meet the following hardware requirements:
- The target computer should be the same as the source computer (same model and configuration). Any differences in the manufacturer, processor, architecture, network interface controller, storage controller etc. could prevent the bare metal recovery process from completing successfully.
- The number of physical disks on the target computer should equal or exceed the number of disks on the source computer.
- The physical disks on the target computer should have the same capacity as the original disks or larger. If the total size of a source disk exceeds the size of the replacement disk on the target computer, the Bare Metal Recovery Tool will try to shrink it. This is possible if the last partition on the source disk has enough free space.
- The physical disks on the target computer should be clean (no data and no partition into logical disks). If you are not sure whether an existing disk partition has been completely removed, please start cmd.exe and run the "diskpart clean" command.
- The physical disks on the target computer should have the same partition table as the disks on the source computer: MBR (BIOS firmware) or GPT (UEFI firmware). Where the physical disks on the source computer were partitioned using a GPT Partition Table the target computer must utilize UEFI firmware and be booted in UEFI mode to restore any GPT disk configurations. If the physical disks on the source computer were partitioned using an MBR Partition Table, then both BIOS and UEFI firmware are supported on the target machine.
- The target computer should be connected to the Internet using a network cable.
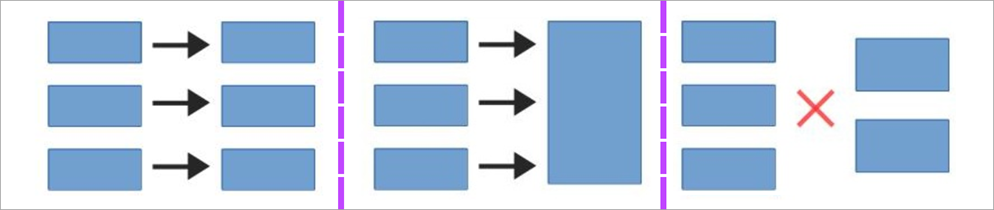
- Backup & Recovery includes the option to use one large physical disk for bare metal recovery. It is automatically formatted using the same partition table (GPT/MBR) that was used on the system disk of the source computer. The feature works if the target machine contains only one physical disk. For example, it isn't currently possible to restore 3 physical disks to a machine with 2 physical disks.
- Note that for disks using an MBR partition table the total size of the dynamic volumes must not exceed 2TB.
Multiple Disk Recovery
Note
There are two solutions available where the target computer does not meet these hardware requirements.
Virtual Disaster Recovery: this is based on virtual disk creation and does not have any specific hardware requirements.
Backup Manager Restore: rather than perform a Bare Metal Recovery, another option would be to manually install an Operating System on the target computer then recover the data (except the System State data source) using the Backup Manager.
Create the Boot Media
Depending on the hardware configuration of the devices the boot media may be created using a USB drive or CD.
Create a bootable USB drive
To ensure there is sufficient space to store the catalog and log files we would recommend using an 8 GB or larger USB drive which should be recognized as removable media.
Please note that all of the data on the USB drive is overwritten so please remove any files on the drive before proceeding with this process.
- Start the source computer or any other Windows computer that meets the Operating System requirements.
- Connect the USB drive to this computer.
- (optional) Disconnect all removable hardware from the computer (USB thumb drives, memory sticks, and flash drives). This will prevent the accidental selection of the incorrect attached device and subsequent deletion of its data during the Bare Metal Recovery executables installation.
- Download the USB Bare Metal Recovery tool from the monitoring Dashboard.
- Go to Backup & Recovery > Downloads > Bare Metal Recovery.exe
- The latest version of this file is also available from the Backup & Recovery Tools page
- Start the installer and install the Bare Metal Recovery tool to the USB drive.
- When the installation is completed, disconnect the USB drive from the computer.
Create a bootable CD
- Start the source computer or any other Windows computer that meets the OS requirements.
- Insert a blank CD media into an attached burner.
- Download the .ISO Bare Metal Recovery tool from the monitoring Dashboard. Go to Backup & Recovery, Downloads, Bare Metal Recovery.iso the latest version of this file is also available from the Backup & Recovery Tools page.
- Use a third-party CD burning tool to burn the .ISO file to the blank CD.
-
Eject the CD once the burning process is complete.

Recover the Source system on the Target Computer
- Insert the boot CD or connect the USB drive to the target computer.
- Turn on the computer and select CD or USB drive as the boot option. NOTE: Please ensure that the computer is booted in the appropriate mode (BIOS or UEFI). If booted into a mode that is not compatible with the firmware used on the source computer, the restore session will fail.
- Setup or confirm network settings using the command line options.
- Configure a path to network storage if booting from CD.
- A Backup Manager installation wizard will open in a browser.
- Follow the set-up wizard entering the Device Name, Password and Security Code (Encryption Key) contained in the Backup Account Info section under the monitoring Dashboard's Request Encryption Key when prompted. Covered in Device Name, Password and Encryption Key
- In the Backup Manager go to Restore > Bare Metal Recovery and adjust the settings as required.
-
Select the session and data to restore. The selection should be sufficient to boot the system.
-
(Optional) Enable the restore-only mode. Where this option is selected the Backup Manager will function in restore-only mode on the current computer after recovery (no new backups are performed).
-
(Optional) Limit the recovery to the currently selected volumes. This can be useful if the target computer lacks physical disks to restore data to or if one of the source disks is an iSCSI disk, not a physical one. After the bare metal recovery process is completed, such disks can be attached as iSCSI disks to the restored system.
- Start the recovery (Restore)
- When the recovery process is complete, eject the USB drive or remove the CD then reboot the computer.
Recovery: UEFI mode not available from Boot menu
Where the system to be recovered uses a GPT, the target device must be booted in UEFI more and if the UEFI option is not available from the boot menu or an error message is returned stating that the source disk configuration is not compatible with the target machine firmware it may be necessary to select the UEFI boot file manually. Information on the process is available from the Microsoft Technet article: WinPE: Boot in UEFI or legacy BIOS mode
Note
After rebooting the system an error message (Windows Error Recovery) may be displayed. This can occur if Windows detected an unscheduled shutdown and it may be resolved by selecting Start Windows Normally.
Limitations
Please be aware that when more than one source hard drive has a boot partition, bootmgr (Windows Boot Manager) may not restore correctly. This condition can occur on systems that are configured for dual boot or systems built with OEM recovery partitions.
Please note, that we are not responsible for the content of external sites.