
Generate invoices from your Billing Workspace
When it comes time to bill your customers for work in a given week or month, use the billing and invoicing options available in your MSP Manager Workspaces to view all your customers' service items, including all their completed tickets.
Configure your workspace billing widgets to show the customer's invoicing information you want to view and filter by service item, customer, or view invoices for a specific date range.
When you are ready to create a new billing batch, select the customers you want to invoice, or select all customers, and combine their services into a single invoice for each customer, then export them to your Quickbooks or Xero accounting system.
Create and customize your Billing Workspace
Before creating a billing batch, you can configure your filters in the invoice explorer to show specific services or customers you want to bill. Then you are ready to start the invoicing process by selecting the services to bill, generating your invoices and exporting them to your accounting tool, or as a CSV file.
After the Billing workspace is copied over to your personal workspace pages, you can add additional widgets, edit and customize the page.
- Navigate to Workspaces > Template > Billing.
- In the upper right corner of the Invoice Explorer, click Export as Personal.
- Select the new Billing Workspace from your Personal Workspace pages by clicking Workspaces > Personal > Billing.
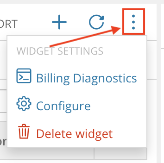
- To configure the filtering options in your Billing Workspace, click the Widget Settings Menu in the top right corner of the Invoice Explorer and select Configure from the list of options.
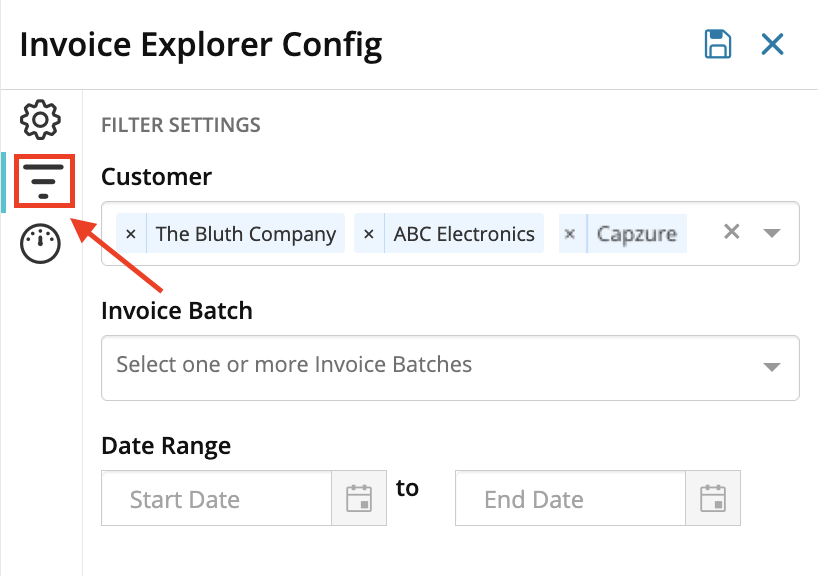
- In the Invoice Explorer Config window, select the Filter Settings option from the icons on the left. Here, you can specify one or multiple customers for whom you would like to see services and invoice information, or choose an existing invoice batch within a certain date range.
- Select the Billing Filter Options icon and with the available filtering options, you can view all retainer services for a few select customers, for example, or exclude tickets to only bill for retainer and flat fee services during a specific date range.
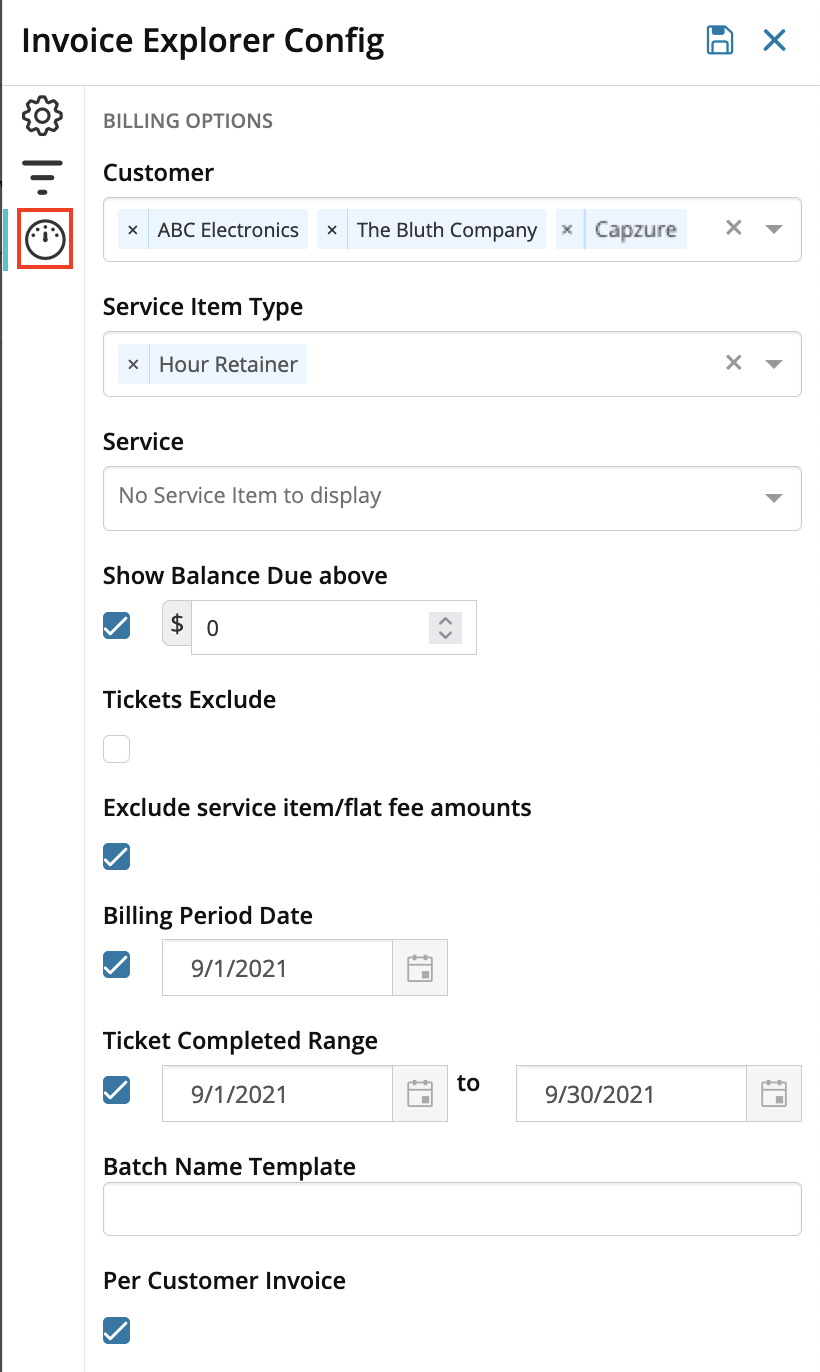
- Select Per Customer Invoice to generate one invoice per customer that includes all of their services for the current billing period. You can also enter a Batch Name Template to save the billing batch as a template for easy access during the next billing period.
- Click
 at the top of the filter configuration window to save the filters settings.
You can work in the Billing Workspace Template, but will not have the ability to edit or customize the page or it's widgets.
View and create invoices from your Billing Workspace
After initially creating an Invoice Batch, you can use the search option in the Invoice Explorer to search for customers and view which services have a balance to be included in the new Invoice Batch. Use the Invoice Batches and Invoice History workspace pages to view past billing history.
- From your Invoice Explorer, select the Invoicing tab and click New Invoice Batch then enter an Invoice Batch name. You can also add invoices to a previous billing batch by clicking Add to existing batch.
- Select the service items to be included in your invoice batch by clicking the check-box to the right of each service item to add it to a billing batch, or click the arrow
 to the left of the service item to expand and view it's information. You can also use the select-all option at the top right corner of the Invoice Explorer columns to select all invoices in the list.
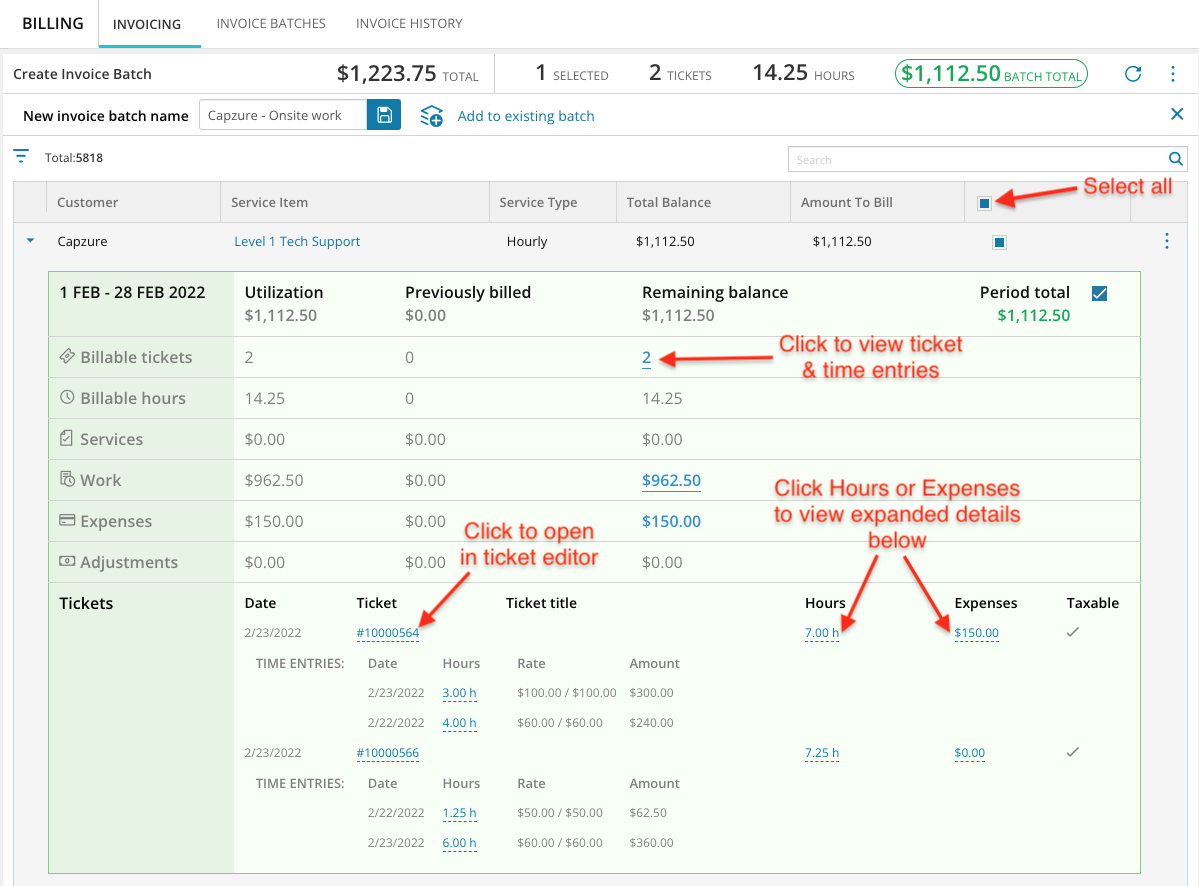
- In the Billable tickets row, click the number of tickets (in this example there are 2 tickets attached to the service item that are ready to invoice) to expand the ticket details in the Tickets section below.
- Then, you can select the Ticket number to open the Ticket Editor and make changes on the fly to the selected ticket if needed, or click the Hours or Expenses to view time entry and rate details of the tickets, as well as expense items included in the ticket. You can also click the Ellipsis icon
 to the right of the service item to open the service item editor and update the service item on the fly.
 - Click Save
 next to the batch name to save the Invoice Batch.
Wait until you have selected your items to invoice before clicking the Save button  .
.
Export your invoices
After creating and saving your invoices, you can select how you want to export them. Choose from QuickBooks Online, QuickBooks Desktop, Xero or export as a CSV file.
Disable the pop-up blocker in your browser before getting started.
- After saving your invoice batch, the next page shows your generated invoices. Click the arrow
 to the left of the Invoice Date to expand and view the invoice information.
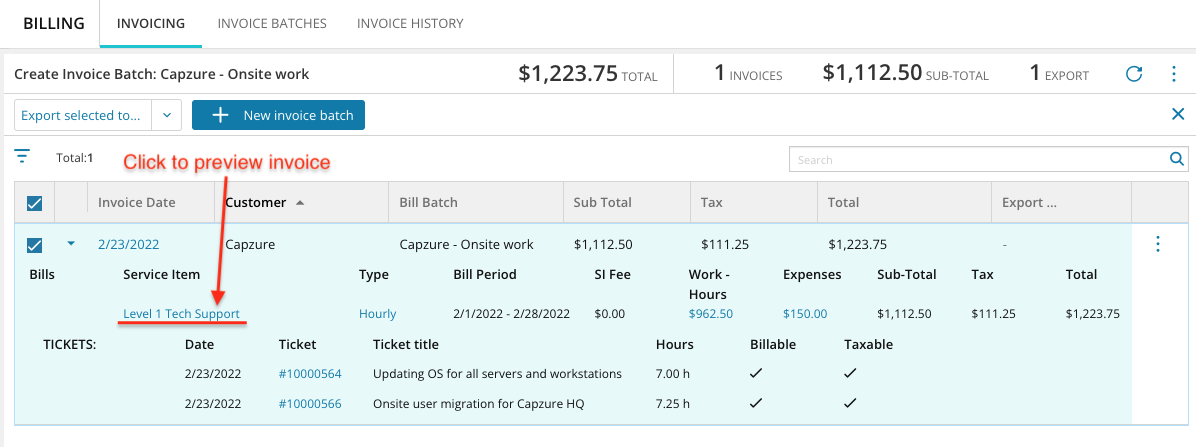
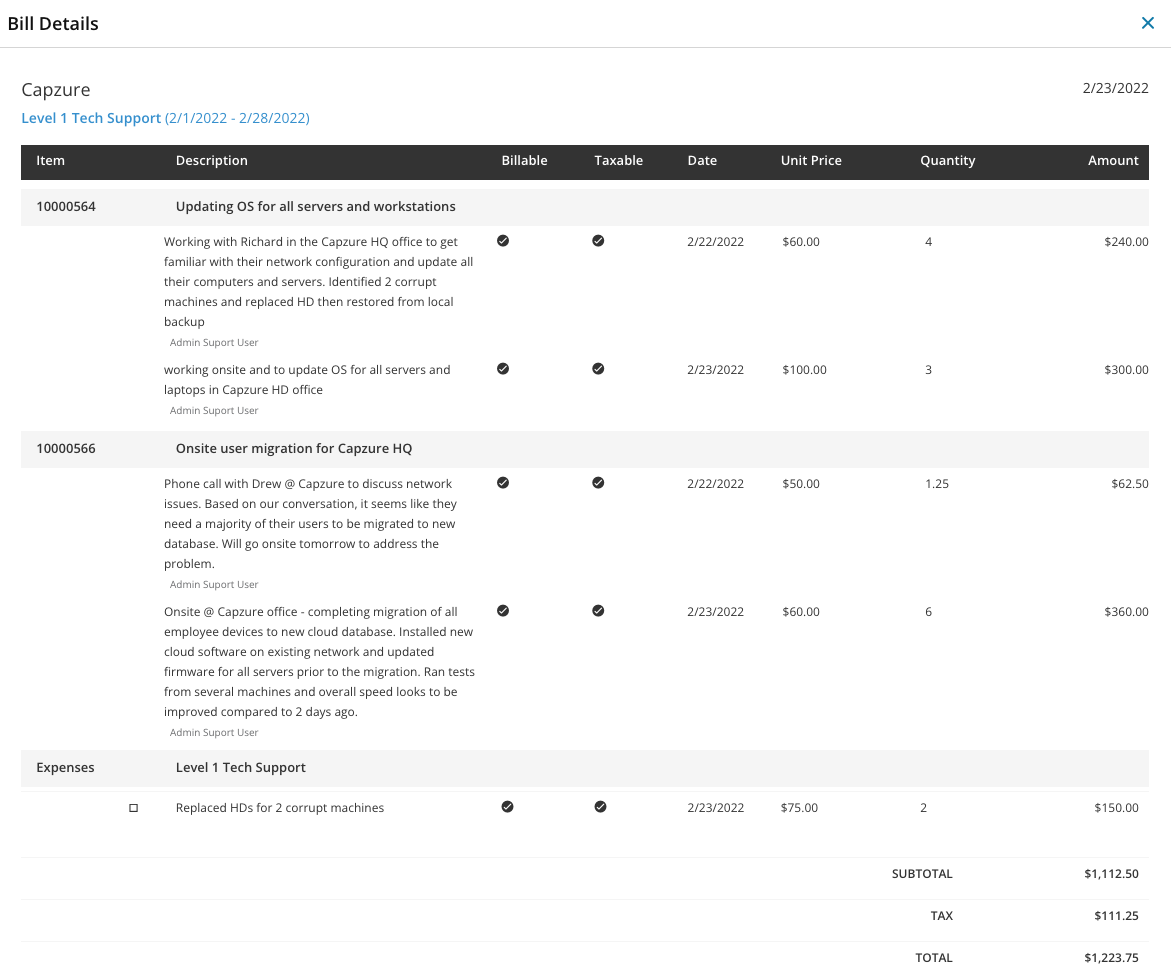
- Click the blue links to view information about the ticket or service item, or select the Service item name to see a preview of the generated invoice, including details of the time entries and expenses for each ticket.
- Select the Export Option drop-down and click how you would like to export your invoices: QuickBooks Online, QuickBooks Desktop, Xero, or export as a CSV.

After making your selection, the export process begins. This will prompt a pop-up window where you can log in to your Xero or QuickBooks online account, or the CSV download will begin in your browser.
If you are using QuickBooks Desktop, make sure you have configured the integration with your QuickBooks Desktop account.
MSP Manager 's functionality stops at billing. If you are using an integrated accounting tool (QuickBooks Online or Desktop, or Xero) then your accounting program is responsible for sending invoices to your customers, and collecting their payment.
What do you want to do?