
Integrate MSP Manager with QuickBooks Desktop and export your invoices
Follow the steps below to set up the integration between your Quickbooks Desktop and MSP Manager accounts.
Disable the pop-up blocker in your browser before getting started.
Download and configure QuickBooks Desktop Web Connector file
Before getting started, make sure QuickBooks Desktop is running, and that you have the correct company file open.
- In MSP Manager, navigate to Settings > Company Settings > Integrations and select Configure QuickBooks Desktop.

- Click the QuickBooks Web Connector link to learn about and download the Web Connector file.
- After the download is complete, open and unzip the file, and install the QBWebConnectorInstaller.exe file.
- Navigate through the steps in the installation wizard and click Finish to finalize the process.
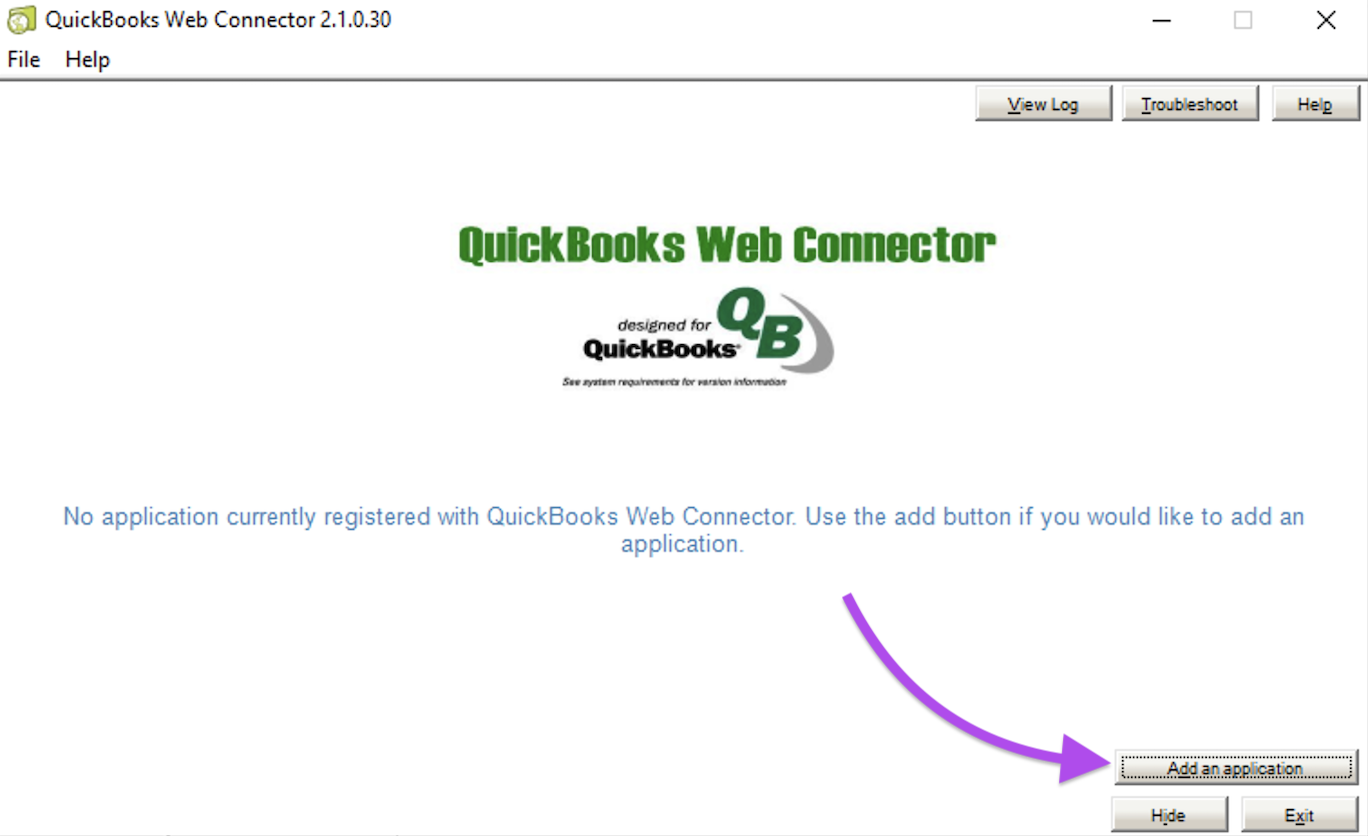
- Download the MSP_QBD.qwc file, then from the QuickBooks Web Connector, click Add an application and select the recently downloaded MSP_QBD.qwc file to add it to the Web Connector.
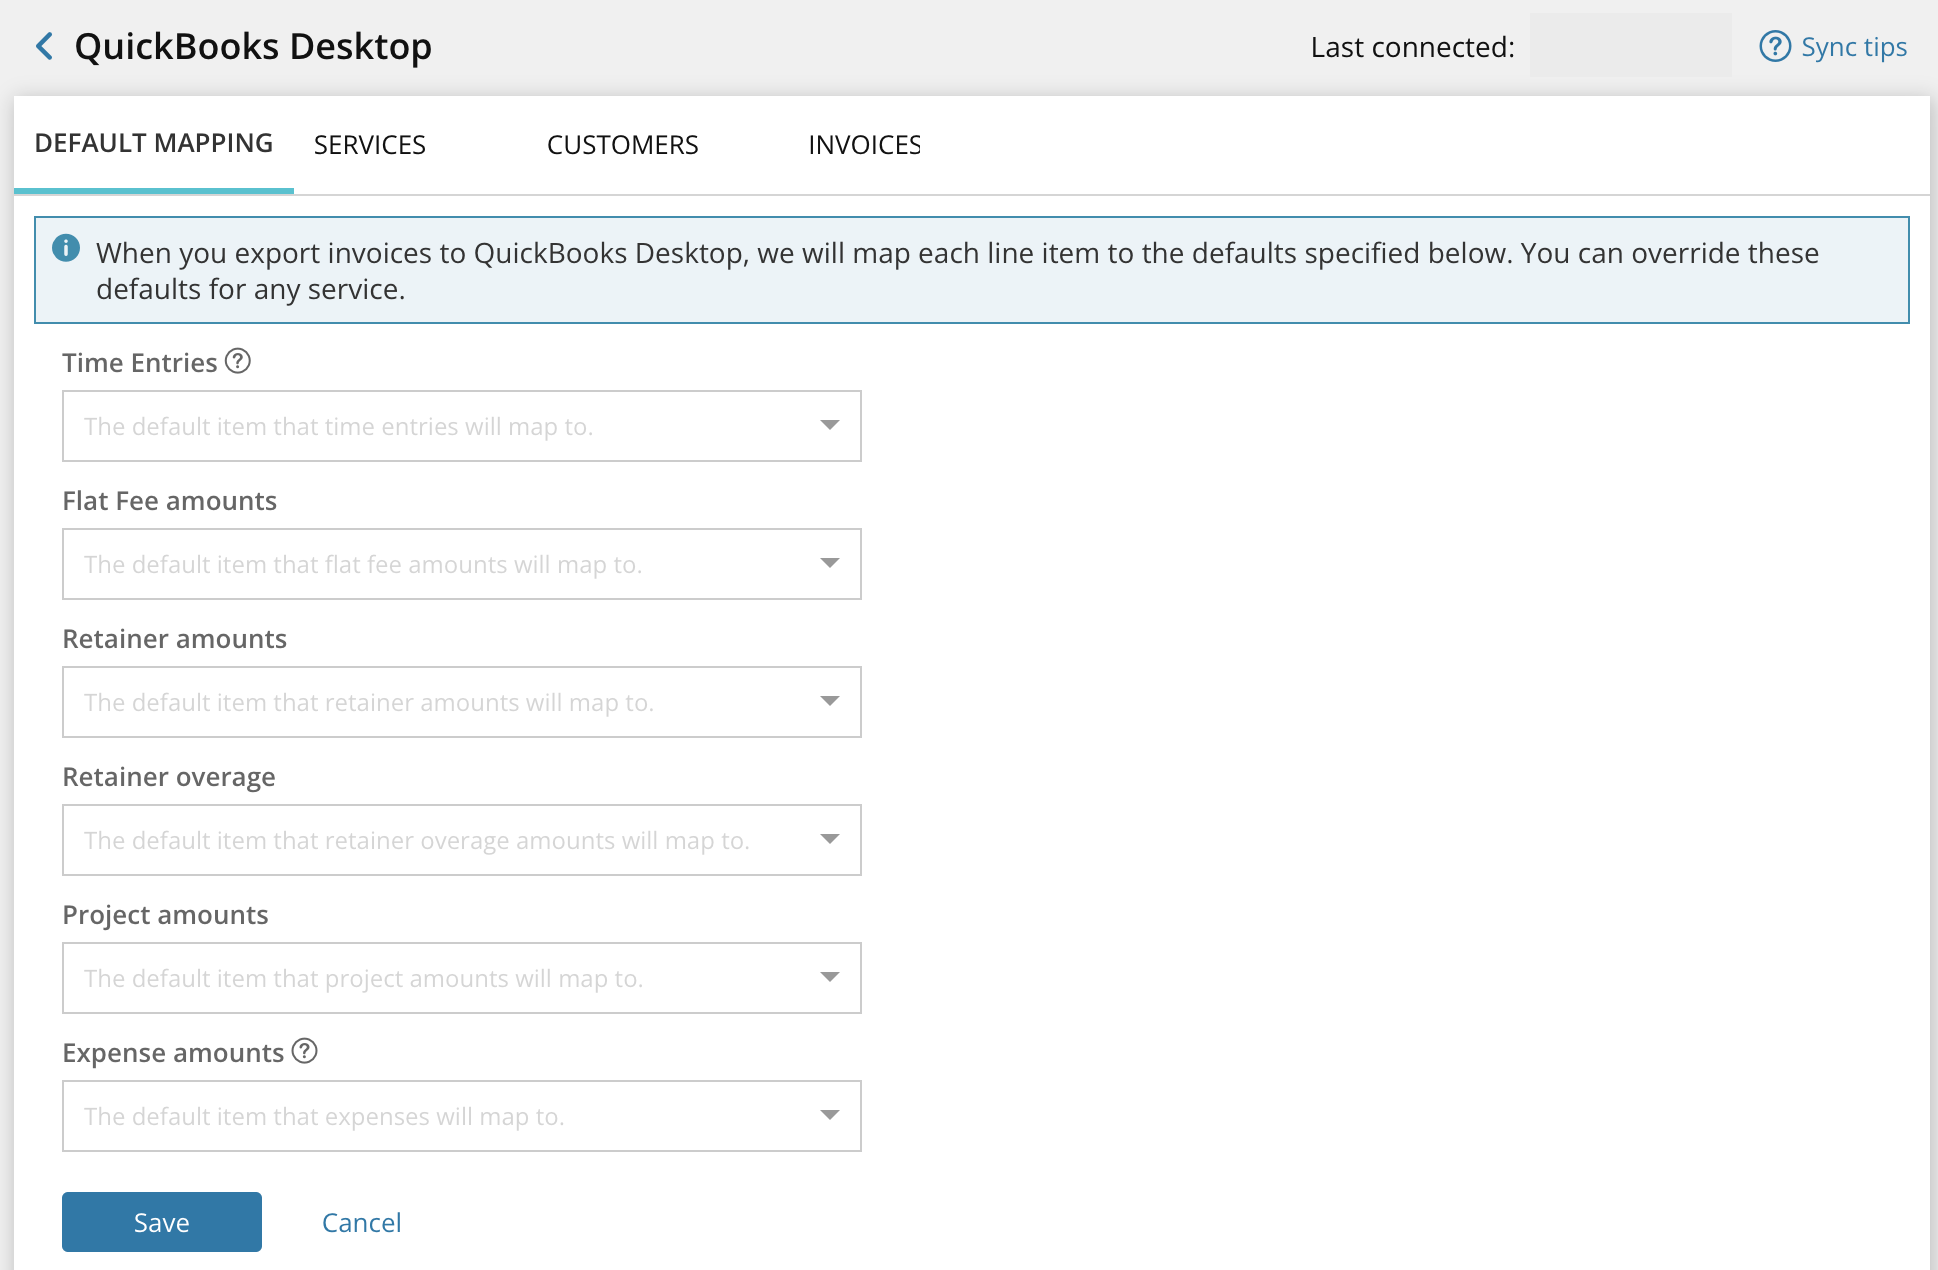
After the file is successfully added to the Web Connector, configure your default mappings in MSP Manager to complete the integration.
Map your MSP Manager Service Items, Rates and Customers to QuickBooks
For each category listed, select an Item from QuickBooks to map to each of the MSP Manager services.
- Open your MSP Manager account and navigate back to Settings > Company Settings > Integrations > Configure QuickBooks Desktop.
- In the Default Mapping tab, select a default item for each category.
- Navigate to the Services tab and use the filters on the left to view specific MSP Manager Item Types (Service Plans, Service Items, Rate Templates or Rates). You can also filter the list of services by MSP Manager Customer or Template, QuickBooks Category or Mapping Status.
- Select an item from the Accounting Service column to map to each MSPM Item in the list. This overrides any default mapping previously configured and allows a specific rate or rate template, for instance, to be mapped directly to an item in QuickBooks.
- Click the Filter icon
 and select from different filter options to view specific Service items or Program Levels, Customers or QuickBooks Categories. Its helpful to use the Mapping Status filter to view inactive QuickBooks items, or items that are missing a mapped accounting item, as well as those that have been successfully mapped.
 - Navigate to the Customers tab and where applicable, select an Accounting Customer by clicking on missing and selecting how to invoice that specific customer:
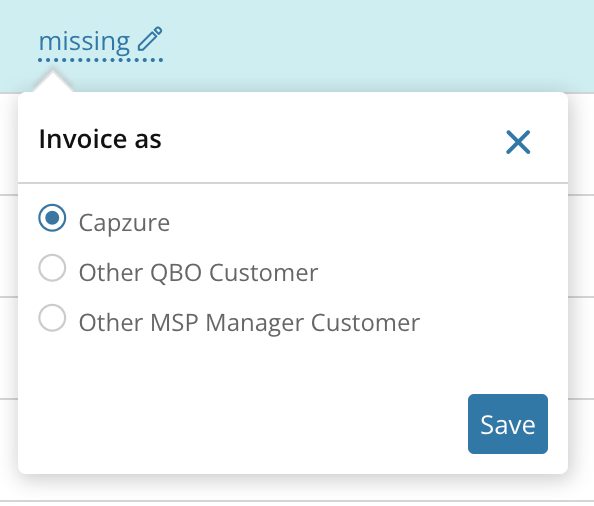
- Select the Customer Name to invoice that customer by the same name that exists in MSP Manager.
- Select Other QBO Customer and choose a QuickBooks customer from the drop down list that appears after selecting the item.
- Select Other MSP Manager Customer and choose a MSP Manager customer from the list.
- When all items in MSP Manager are successfully mapped to the appropriate accounting items in QuickBooks, navigate to the Default Mapping tab and click Save.
Export an invoice to QuickBooks Desktop for the first time
Make sure QuickBooks is open and your company file is selected.
- In MSP Manager , navigate to Billing and create and run a new billing batch. You can also select an existing billing batch and navigate to the Review & Export Invoices tab.
- Select QuickBooks Desktop from the Export Format list, and click Export Invoices. This adds the invoices to a queue where the QuickBooks web connector can find and export them to QuickBooks.
- Select the QuickBooks Web Connector link to download the QWC file.
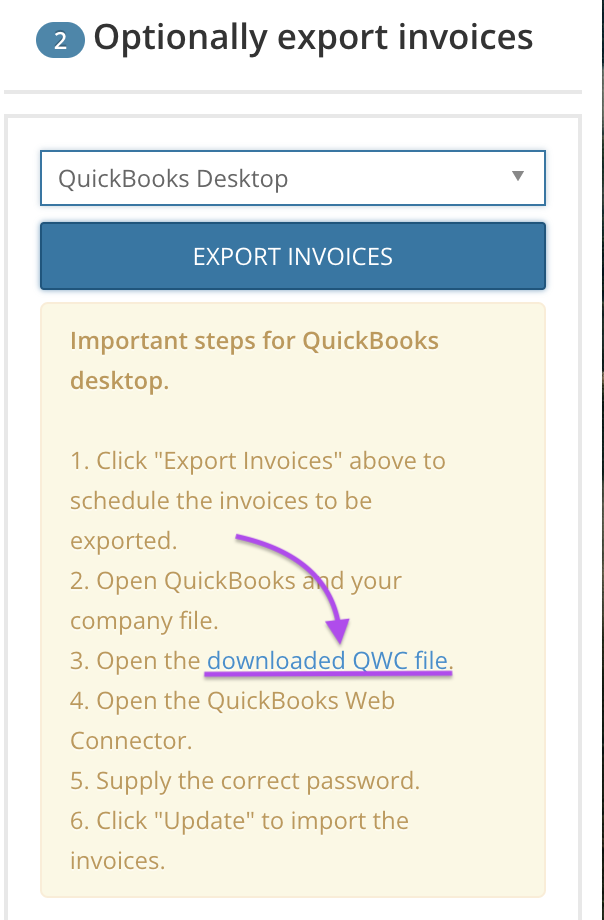
- Open the downloaded QWC file and select OKto authorize MSP Manager to connect with QuickBooks.
- In the Application Certificate window, select Yes, Always Allow Access Even If QuickBooks Is Not Running, and click Continue > Done.
- In the QuickBooks Web Connector, enter your MSP Manager password in the MSPManagerService field.
- Click in a blank portion of the window to confirm the addition of your password, and select Yesto save the password.
- Select the MSPManagerService check box, and choose Update Selected. This activates the web connector, locates the invoices waiting in the queue and exports them to Quickbooks.
Export an invoice to QuickBooks Desktop moving forward
- Navigate to Billing, and run a billing batch.
- Select QuickBooks Desktop from the Export Format list, and click Export Invoices.
- In the QuickBooks Web Connector, select Update Selected to run the web connector.
When the QuickBooks web connector finishes running, your invoices are available instantly in QuickBooks Desktop.