
Create Service Plans and apply them to multiple customers
A Service Plan is a service item contract that you can assign to multiple customers. Use Service Plans to manage services consistently across customers and simplify bulk updates.
Combine Service Plans with Program Levels to streamline service management.
- Go to Settings > Billing & Financial > Service Plans and select Add Service Plan.
- Select the Service type.
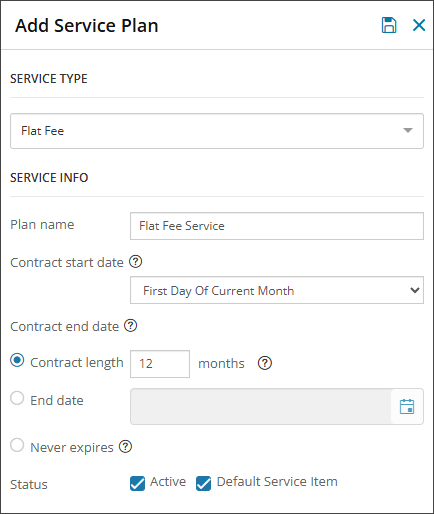
- Under Service Info, enter the Plan Name.
- Select a Contract Start Date.
- Set a Contract End Date.
-
(Optional) Select Default Service Item to make the Service Plan the default service item for customers to whom it is assigned.
Selecting Default Service Item overrides any existing default Service Plans or Service Items assigned to those customers.
- Configure the Billing, Rates, and Invoicing settings as needed.
- Select the Save Changes icon.
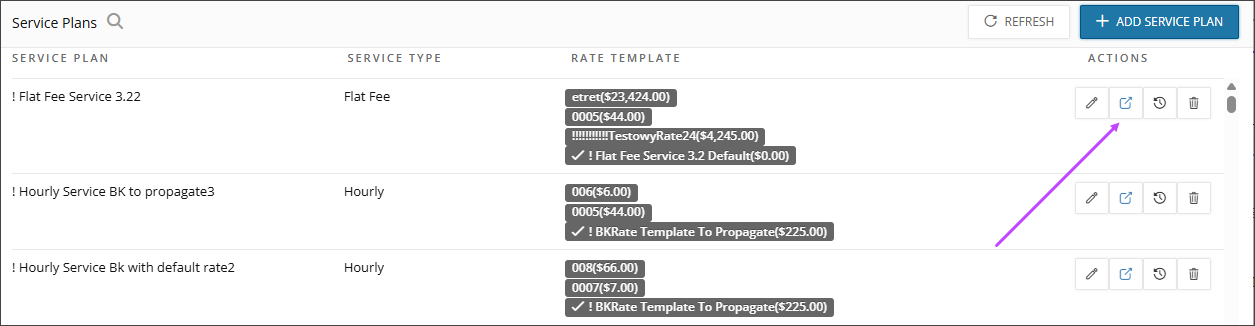
- From the list of Service Plans, select
 to apply to multiple customers.
- Select the customers to whom you want to apply the Service Plan, then select Assign Service Plan.
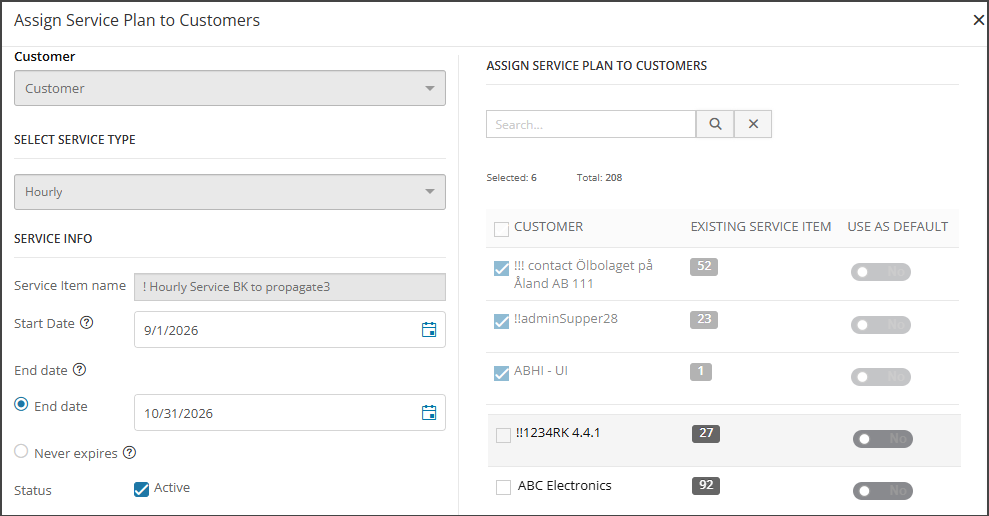
When you assign a Program Level, all Service Plans included in that Program Level are applied to each selected customer.
Set a service plan's contract duration
Choose how long the service plan runs. You can change this as customer agreements evolve.
- Go to Settings > Billing & Financial > Service Plans, then select the pencil icon for the plan you want to change.
- Under Service Info, select a Contract start date.
- Under Contract end date, select one of the following:
- Contract length: Enter the number of months the plan runs for.
- End date: Select the calendar date on which the plan expires.
- Never expires: MSP Manager extends the plan by a further 12 months, 90 days before its current end date, so it stays active.
- Select the Save Changes icon.
The contract duration is saved and applies to the service items created from this plan.
Related topics