
Add assets to your MSP Manager account
Create new assets to add things like computers, workstations, printers, servers, switches, routers and other device types to your MSP Manager account. You can manage and remotely access your N-central or N-sight RMM integrated assets, or chat directly with Take Control integrated assets from the Assets section of your MSP Manager account.
When adding a new asset, the asset editor opens on the Overview tab, where you can add a customer to whom the asset belongs, as well as a specific location, service item, asset class, asset status and asset tags, which can make searching for and sorting assets much easier. Each additional section of the asset editor provides the option to enter network, operating system, manufacturer, hardware or miscellaneous information about the asset, as well as general notes and an N-sight Features section for configuring assets integrated with N-sight RMM, N-central or Take Control.
Specifically for assets integrated with Take Control, you can initiate a chat session directly from the asset, or from the asset list widget in your workspace page.
Within a single asset, you can also add one or more contacts from the customer to which the asset belongs. This simplifies the process of searching for a contact if an asset is associated to a ticket or an outage.
Additionally, you can Associate contacts to multiple assets from the Contact editor.
Add the Asset list and Contact list widgets to your workspace page and link them together to more easily filter assets by contact. Learn more about linking workspace widgets for easier filtering of your asset list.
Before getting started with adding assets to your account, make sure you have the correct permissions configured to not only create assets, but also to do things like create Asset Statuses and Custom Asset Class fields.
Create a new Asset
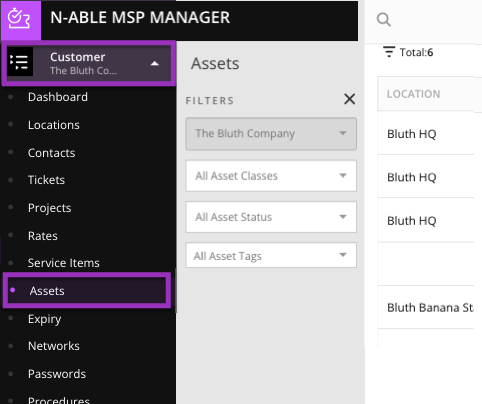
- From the left navigation menu of your MSP Manager account, select Assets. Or navigate to a specific customer and select Assets from that customer's menu options.

- Click Add Asset in the top right section of the page.
- Enter a Name for the asset and select the Customer to which it belongs.
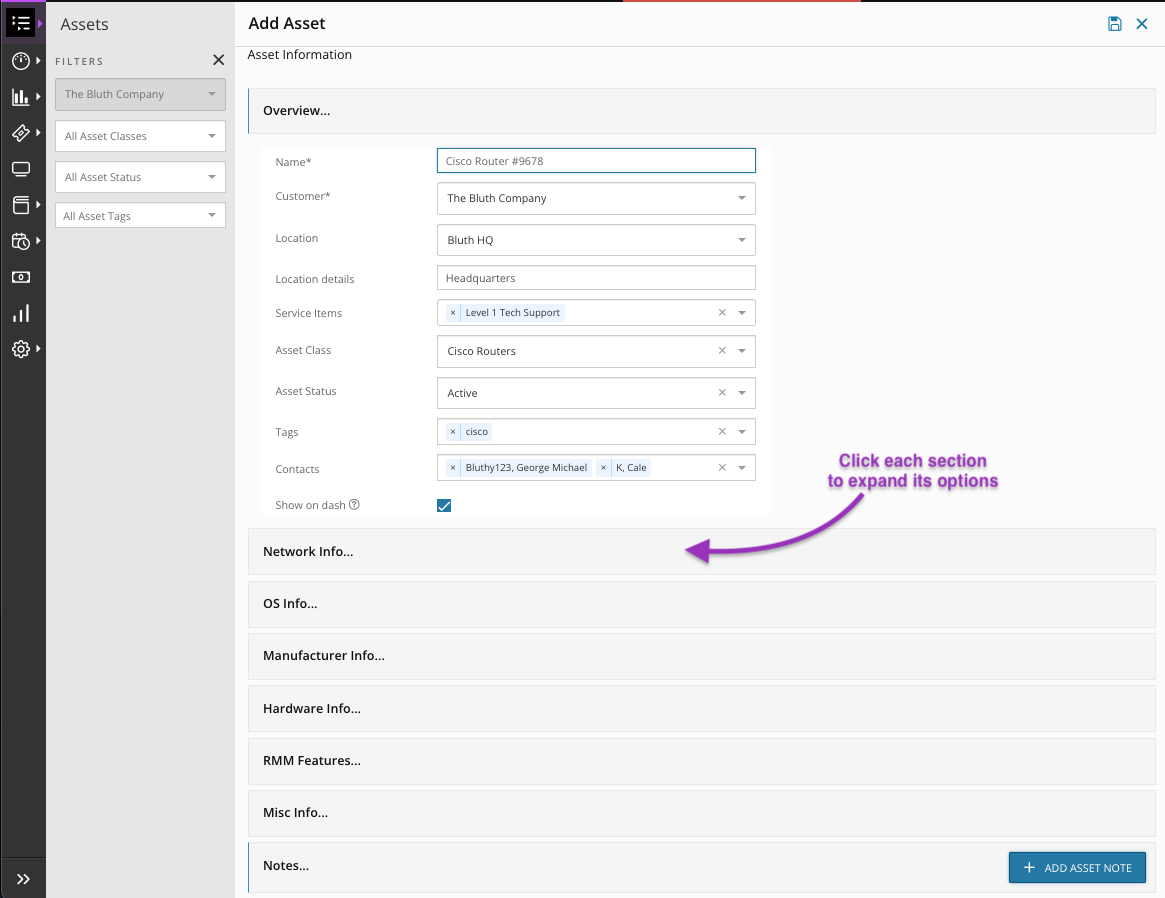
- Select a Location for the previously selected Customer, and enter any necessary Location details.
- Choose one or more Service Items to attach to the asset.
- Optionally select an Asset Class and Asset Status to add to the asset. Learn more about configuring asset classes and asset statuses.
- Select multiple Tags to apply to the asset, which can help with searching and filtering assets. Learn more about Asset Tags.
- Add multiple Contacts to the asset.
- Click each additional section (Network Info, OS Info etc.) to expand its options and enter any other necessary information depending on the type of asset being created.
- Click Save
 in the upper right corner of the editor to save the new asset.
You can also select a customer, navigate to that customer's Contacts, and edit a contact to view any associated assets or add multiple assets to that particular contact.
Associate contacts to multiple assets
Rather than adding multiple contacts to a single asset, you can also add multiple assets to a contact from the Contact Editor. From here, you can set a default asset for a contact in addition to 1 or more associated assets.
This is especially helpful when a contact raises a ticket request and their associated assets are automatically added to the ticket. Similarly, manually adding the contact to a ticket adds their associated assets to the ticket.
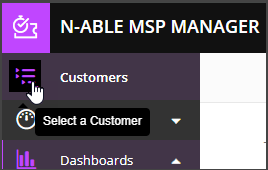
- Select the Customer icon
 in the left navigation to view your customer list.
- Choose a customer from the list to show that customer's menu.
- Select Contacts.
- Click the Ellipsis icon
 and select Edit Contact or click Add Contact.
 - Enter the contact's information, and in the Associated Assets section, select multiple Assets to assign to the Contact.

- Click on the Associated Assets dropdown menu to view and select assets to add to the contact

- The Default Asset drop down menu is populated with the assets listed in the Associated Assets section. Select a Default Asset from the list.
- Click Save in the upper right corner of the Contact editor when finished.
The selected assets are now associated to the Contact. When that contact is manually selected from the ticket editor or sends a ticket request, their Default Asset is automatically added to the ticket.
What do you want to do?