
Disable automatic updates to the Agent (Windows only)
In certain instances, you may want to disable the ability of the agent to auto update. Take Control recommends against this setting, as it is intended to assist with specific audit, security or compliance requirements, but it is possible for both technicians as well as users to disable auto updates.
For Take Control technicians
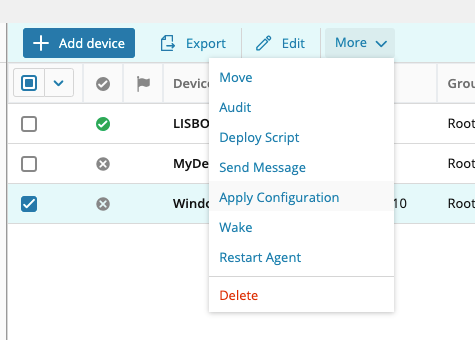
- Navigate to the Devices page of the Admin Area and click the check box next to the device for which you would like to disable automatic updates.
- From the options at the top of the Device Page, select More and click Apply Configuration.
- In the permissions section of the Apply Configuration window, select Block automatic agent updates and read the warning to ensure you have an understanding of when to enable this setting.
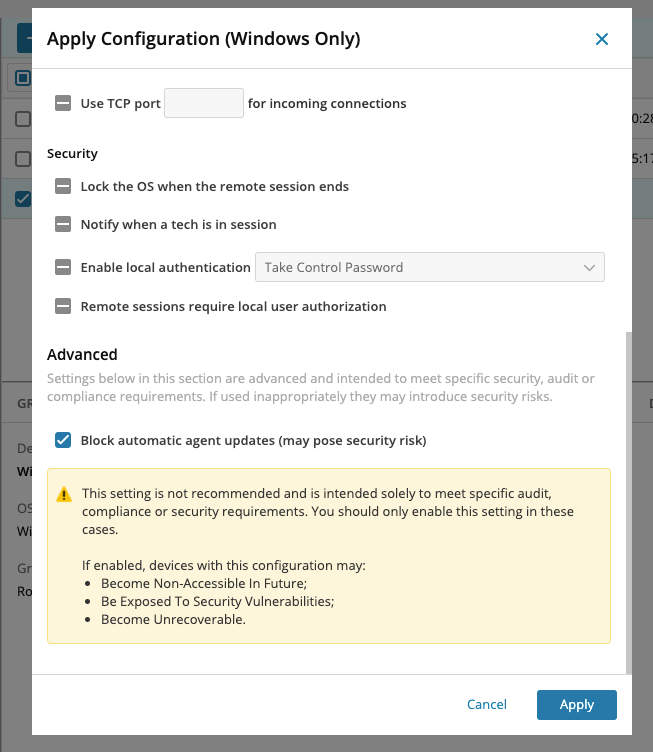
- Click Apply to save your changes.
For Take Control users
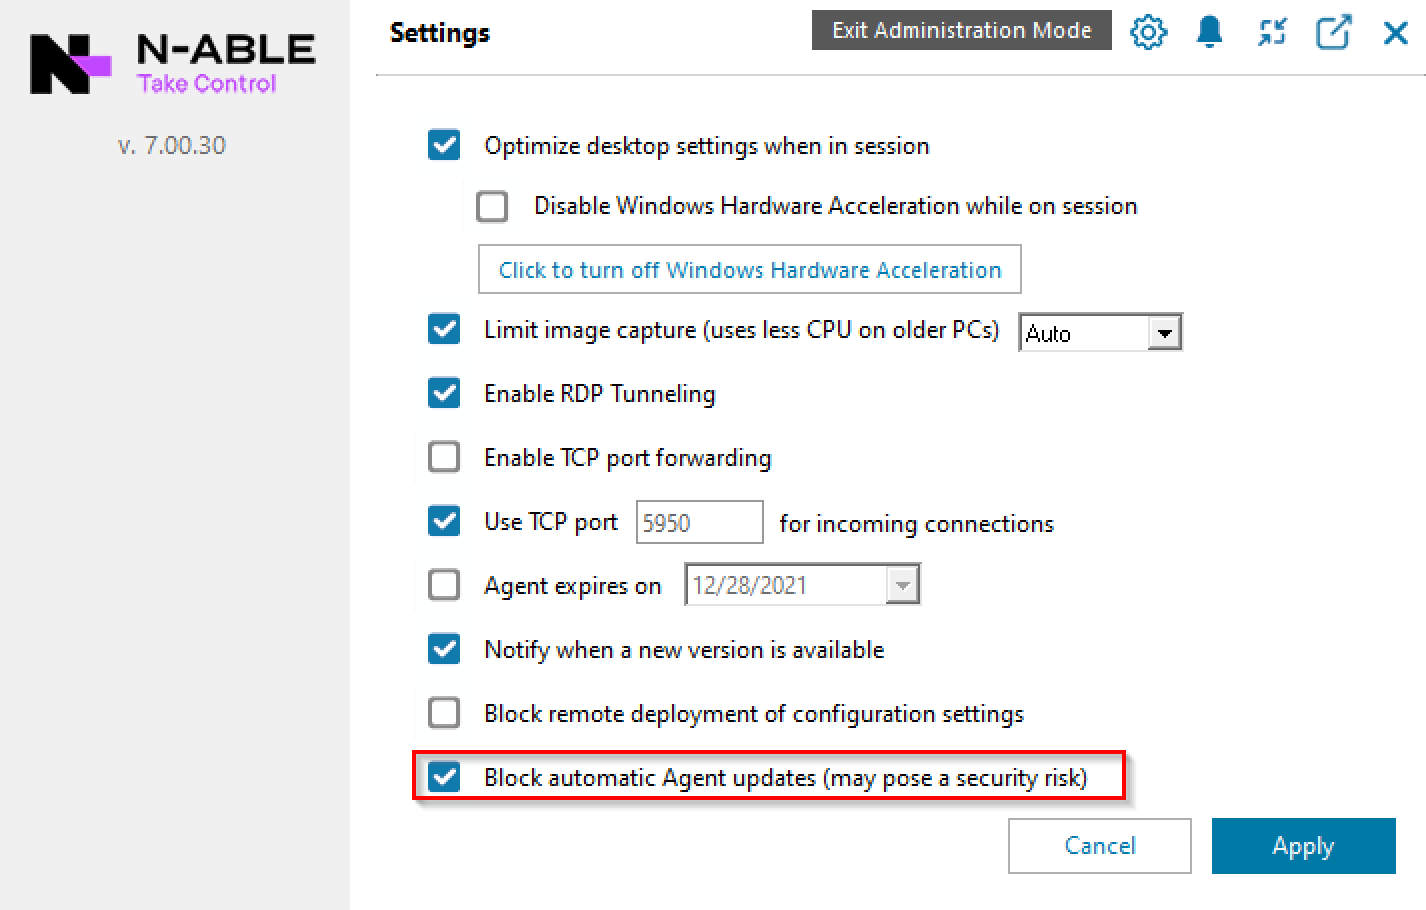
- Open the Agent Configuration Window and if you are not using administrative privileges click Enter Administration Mode.
- Click the Advanced Setup menu icon
 and select Settings.
 - Select Block automatic Agent update.
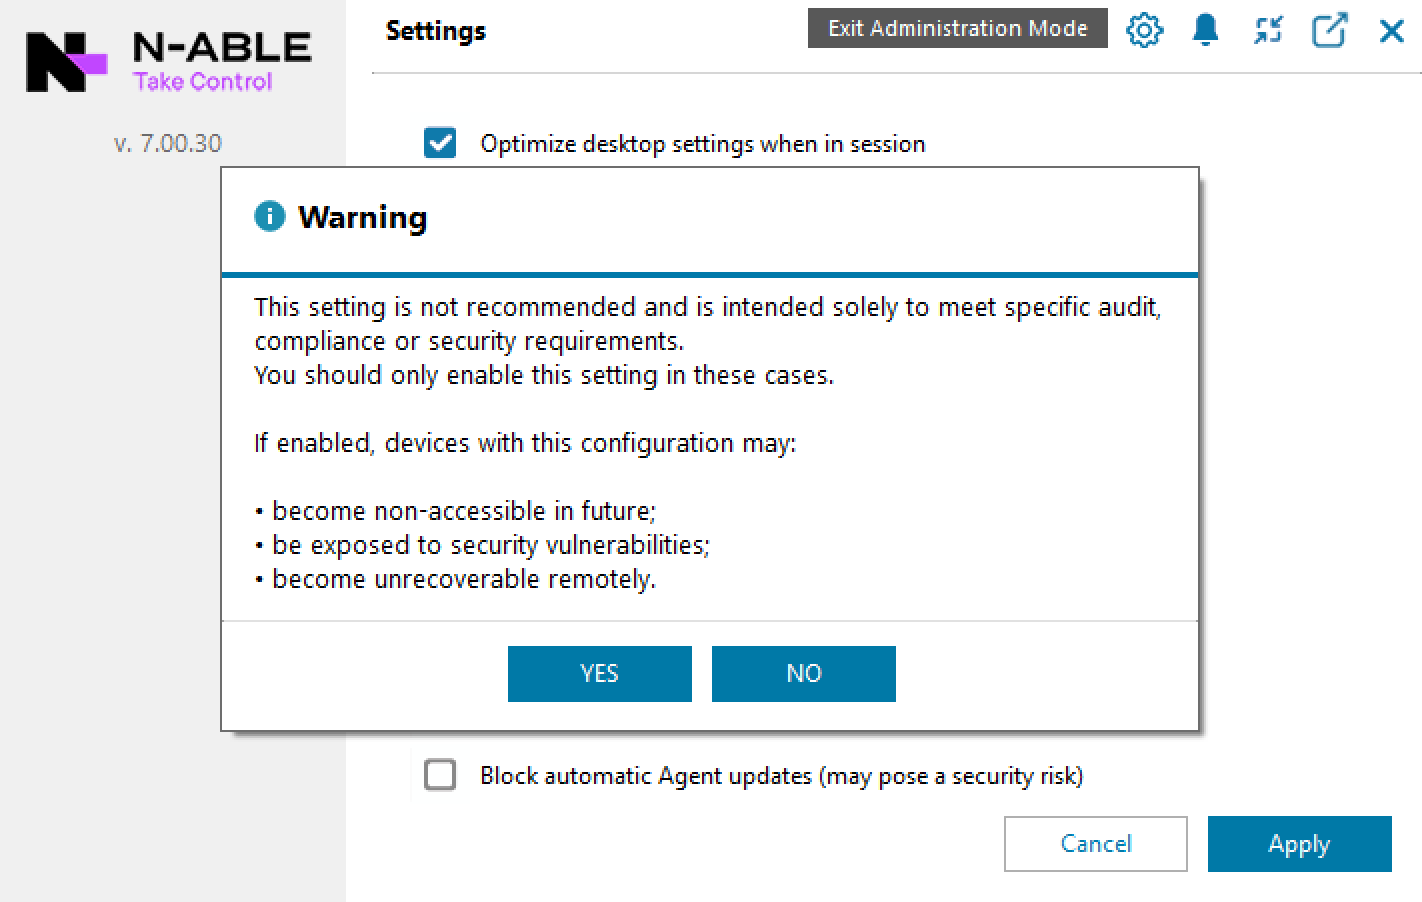
- Select Yes to acknowledge that this is not a recommended action, and click Apply to confirm the changes.
What do you want to do?