
Configure the Agent
After installing the agent, log in to the Admin Area, navigate to Profile > Agent Setup and click Settings to configure the following settings in the Agent configuration window:
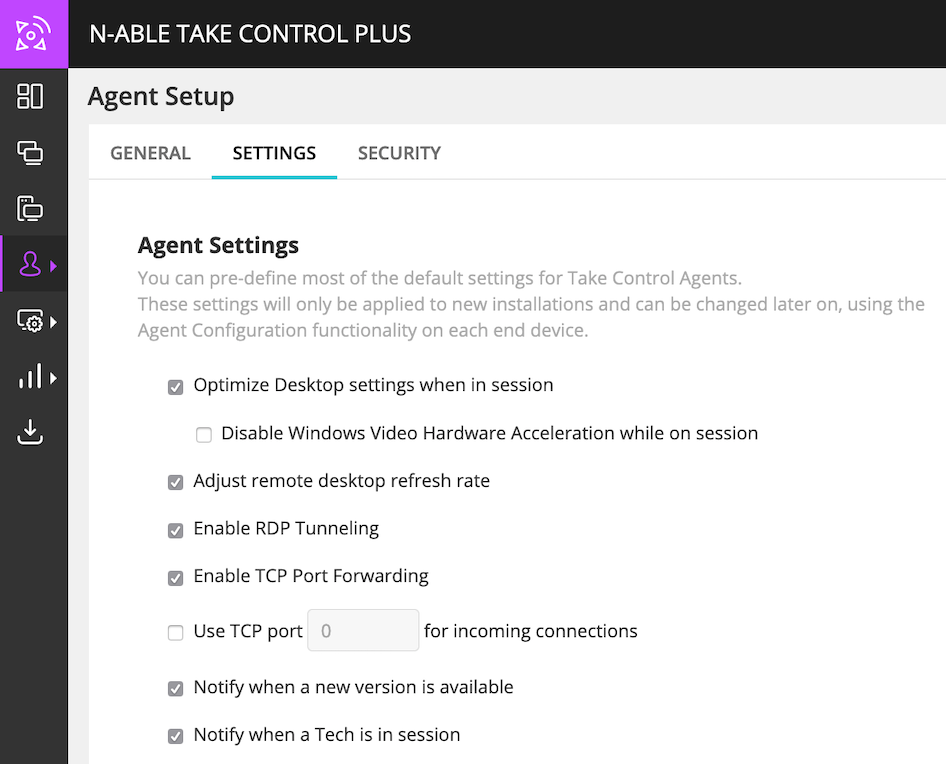
- Optimize desktop settings when on session – removes the desktop background, and disables themes and graphical enhancements.
- Adjust remote desktop refresh rate – adjusts advanced display options and optimizes the refresh rate of the display to the best performance for image capture while on a session.
- Enable RDP Tunneling – enables the automatic creation of port forwarding that is used with the RDP protocol. Click here to learn more about RDP.
- Enable TCP Port forwarding – enables the TCP Port forwarding setting and configures the corresponding port. For more information, see Configure Port Forwarding.
- Use TCP port – enter a port number for incoming connections.
- Notify when a new version is available – disables update notifications to the Agent to avoid bothering the users who do not have permissions to update it.
- Notify when a tech is in session – updates user when technician is accessing the device for a support session.
After changing any setting, click Apply to save the Agent's settings.
What do you want to do?