
Change visualization options during a support session
The View menu in the Remote Desktop tab includes visualization options that technicians can use during a support session to adjust the settings of the remote computer.
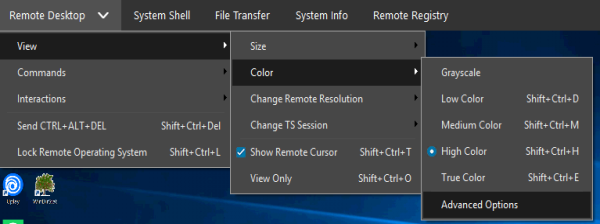
- Size – changes the image size of your customer’s desktop within your session window. Re-size the remote screen between 10% to 200% of its original size. Choose Always fit to Window to adjust the remote screen to the size of the Viewer’s window.
- Sharpen the image when downscaling - nested in the Size menu, select this option which is automatically activated when the Viewer window size is smaller than 100% of the remote resolution. This adds significant quality to scaled down text, but it will slightly increase the CPU consumption.
- Color – selects a color mode, some of which are optimized for low bandwidth. Technicians can explore the settings and find those that work best for each scenario.
- Change Remote Resolution - alter the resolution of the remote device during a support session.
- Change TS Session – remotely controls the local Terminal Services (TS) session using the Agent. If the computer is a Terminal Server with multiple concurrent users, this feature cycles through different TS sessions. Take Control can only control active sessions where a user is interacting with the TS session. This is available on the Agent only.
- Show Remote Cursor – allows the technician to view the remote mouse cursor.
- View Only – disables local input to the customer’s machine. Use this option to monitor screen activity without disrupting the activities being performed on the remote computer.
If you scale down the picture using a specific value (from 10% to 90%), the amount of data transmitted during the session is decreased to improve performance. For slow connections, make sure Always fit to Window or Downscale to Window are NOT used.
What do you want to do?
- Configure a customer's monitors during a support session
- Send commands to the remote computer
- Interact with the remote computer during a support session