
Manual Installation—Mac Agent
N-sight RMM Trials are limited to 10 device installations. To install more devices or extend your trial, please contact us.
To manually install the Mac Agent on a Mac workstation use the following instructions:
Download the Mac Agent from the All Devices view
To download and install the Agent, you must have the appropriate N-sight RMM User account permissions. For details about agent permissions, see Default system roles and permissions. Depending on the device's configuration, you might need local administrator authorization.
- In the All Devices view, go to Agent > Download Agent.
- Select the version of the Mac Agent to download.
There can be two Agent types:
- General Availability (GA): Latest production Agent release.
- Release Candidate (RC): Extensive testing completed but may include minor bugs.
- Save the downloaded DMG file.
- You can now copy and then save the DMG file to as many workstations as required.
Install the Mac Agent on a workstation
To reduce installation time and ensure consistency in checks and Automated Tasks, see Configure installation templates for new device installation.
- On a Mac workstation, go to the directory where you saved the DMG file (available in the Finder sidebar or the Dock).
- Double-click the DMG file to open (for example. OSX_AGENT_3_8_0.DMG).
- Double-click Install to start the Mac Agent installation wizard that first checks to ensure the Agent can install.
- Choose to register the Agent now or after the installation.
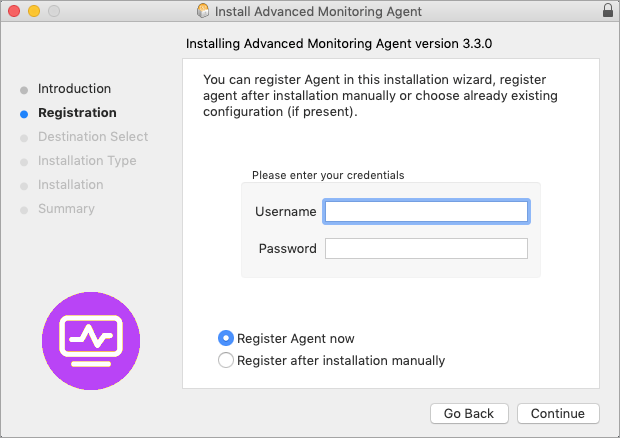
- Click Continue to proceed through each section of the wizard.
Register Agent now
- You are prompted to enter the N-sight RMM Username and Password.
- Enter a Description for the device and the Client and Site it should be registered under.
If required, configure the Proxy server settings when launching the Agent after installation.
Register after installation manually
- When you launch the Mac Agent after the installation is complete you are prompted to enter the N-sight RMM credentials and device information to register the Mac Agent.
- Click install and when prompted enter the password you used to log into the Mac workstation to authorize.
- Click Close once complete.
If a device is not enrolled in Device Management for Apple , make sure to Enable Privacy & Security settings for rmmagent for that device.
Register the Mac Agent with the N-sight RMM user interface
You only manually register the Mac Agent if you manually installed the Mac Agent, and selected Register after installation manually in the installation wizard above.
- You have the option to register the Mac Agent from within the Mac Agent or from the Terminal (Command Line).
Using the Mac Agent
- On the Mac workstation, open Finder .
- Go to Applications > Utilities
- Double-click Advanced Monitoring Agent.
- When prompted enter the N-sight RMM Username and Password.
- Complete the Proxy server settings (if required).
- Enter the Device Description and select the Client and Site combination from the drop-downs.
- Click OK to finish the registration process.
Using the Terminal (Command line)
Register the Monitoring Agent from its installation directory: /usr/local/rmmagent
- Click Finder > Go > Utilities.
- Double-click Terminal.
- Navigate to the Agent installation directory.
Enter the register command for the rmmagentd daemon either as root or by assuming root privileges by sudo, providing the computer's password where prompted. Complete the information then enter Yes to register the Agent with the N-sight RMM user interface.
$ cd /usr/local/rmmagent/
$ sudo ./rmmagentd register
*** Agent registration ***
Username:
Password:
Your current Clients:
0) Create new Client/Site
1) Alpha
2) Beta
Select the Client Number: 2
Sites for Client Beta:
0) Create new Site
1) Site A
2) Site B
Select Site number: 1
Device description: Bruce MacBook
Please check registration data:
Client: "Beta"
Site: "Site A"
Device: "Bruce MacBook"
Want to continue registration? Answer 'yes' or 'no': yes
Successfully registeredRegister Agent (quiet)
You can send the registration information to the N-sight RMM user interface using the quiet switch. Enter the register command for the rmmagentd daemon either as root or by assuming root privileges by sudo, providing the computer's password where prompted.
To avoid any command failures due to blank space or special characters, we recommend you encapsulate them in quotation marks.
$ sudo /usr/local/rmmagent/rmmagentd register --quiet --username=dashboard_user@example.com --password=Password321 --Client=Beta --Site="Site A" --desc="Bruce MacBook"
Registration succeeded.Information displays as plain text in the terminal when using this option.
Quiet Register Command Switches
The following switches are available when using the quiet option to register the Agent.
$ sudo /usr/local/rmmagent/rmmagentd register help
Application command line error: Unexpected option argument: help
usage: rmmagentd register [--quiet --username=<username> --password=<password> --client=<client>
--site=<site> [--description=<description>] [--create-client] [--create-site]]
Register agent
-q, --quiet Quiet registration
-u<user>, --username=<user> User name
-p<password>, --password=<password> Password
-c<client>, --client=<client> Client name
-s<site>, --site=<site> Site name
-d<desc>, --description=<desc> Server description (optional)
-C, --create-client Create client (and site) if not exists
-S, --create-site Create site if not exists
When these steps are complete, the Mac workstation displays in the All Devices view North-pane Workstation tab.

Any amendments to the Mac Agent (changes to the settings or Check management) are configured and performed from the All Devices view.