
Custom Scans
Create your own scans through the Risk Intelligence dashboard with specific configurations or search criteria.
This section covers
Accessing the Custom Scans dialog
To access this setting click on the Custom Scans button when in an N-sight RMM Policy dialog, or choose Risk Intelligence in the Product Bar application switcher then go the View and Manage > Scan Configurations section.
Click on the menu button to the right of an existing scan to "Edit", "Clone", or "Delete". Or click Add Scan Configuration in the bottom right of the dialog to open the new scan wizard.

Add Scan Configuration
To create a custom scan click on the Add Scan Configuration then follow the below steps to configure the scan.
Scan Types
Select the type of scan that to create from the five options.
| Scan type | Description |
|---|---|
| Security | Identifies operating system and application patch and security vulnerabilities by severity. |
| File Finder | Use a File Finder scan to find files on a device matching wildcard strings or MD5, SAH-1 or SHA-256 secure hash formats. |
| Data Breach Rick Scan | The Security vulnerability and a Data Discovery scan together. Highlighting the security vulnerabilities from the Security scan and identifying the most sensitive data on the device. The Data Discovery scan type may be customized to only look for specific data. |
| PCI and PAN | Payment Card Industry Data Security Standard (PCI DSS) is a set of security standards designed to ensure that all companies that accept, process, store or transmit credit card information maintain a secure environment. We scan devices and format a report that helps identify vulnerabilities and demonstrate PCI DSS 3.2 compliance. This is three scans combined: Security, PCI DSS and PAN. |
| Expanded Data Breach Risk Scan | Runs a security scan searching for Credit Card Numbers, dates of birth, government issued identification, and financial account numbers. Perform a Technical Safeguards Check, this queries the device's configuration and highlights settings that do not meet common baseline configurations. |

Choose the scan type, click Next to move on to "Options" and configure the scan.
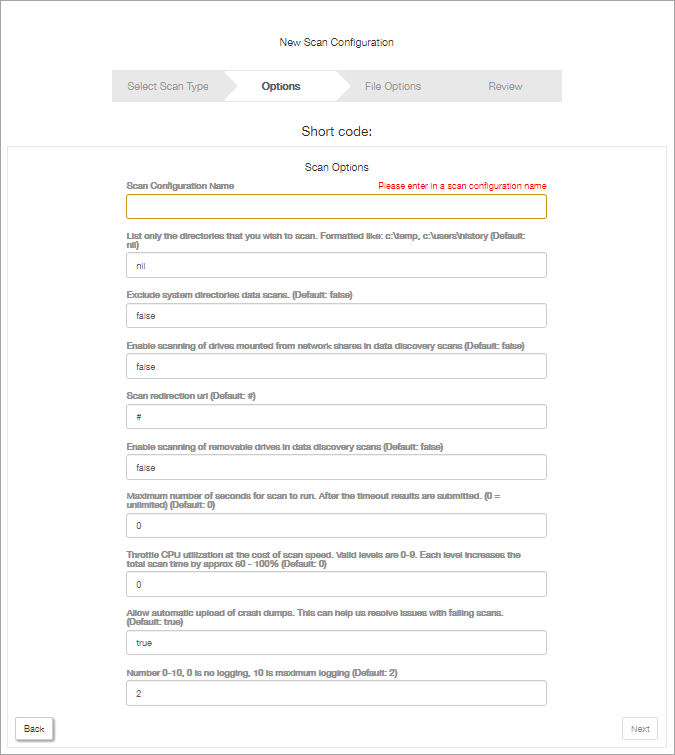
Options
Although there are several common settings, each scan has different configuration options.
Common settings include the scan name, permitting users to control when the scan starts, hiding the scan report from the customer, entering a help URL to display in the scan page, setting-up a scan redirection URL, and enabling logging.
For a breakdown of the options available for each scan type go to Custom Scan Options.
After configuring the options, the next stage for the "Security" and “PCI and Pan Scans” is the "Review".
However, for the "File Finder", "Data Breach Risk", and "Expanded Data Breach Risk Scans" we have a further step before reviewing the scan settings.
Set up what the "File Finder" scan searches for. Covered in File Finder Scan - Patterns and File Hashes.
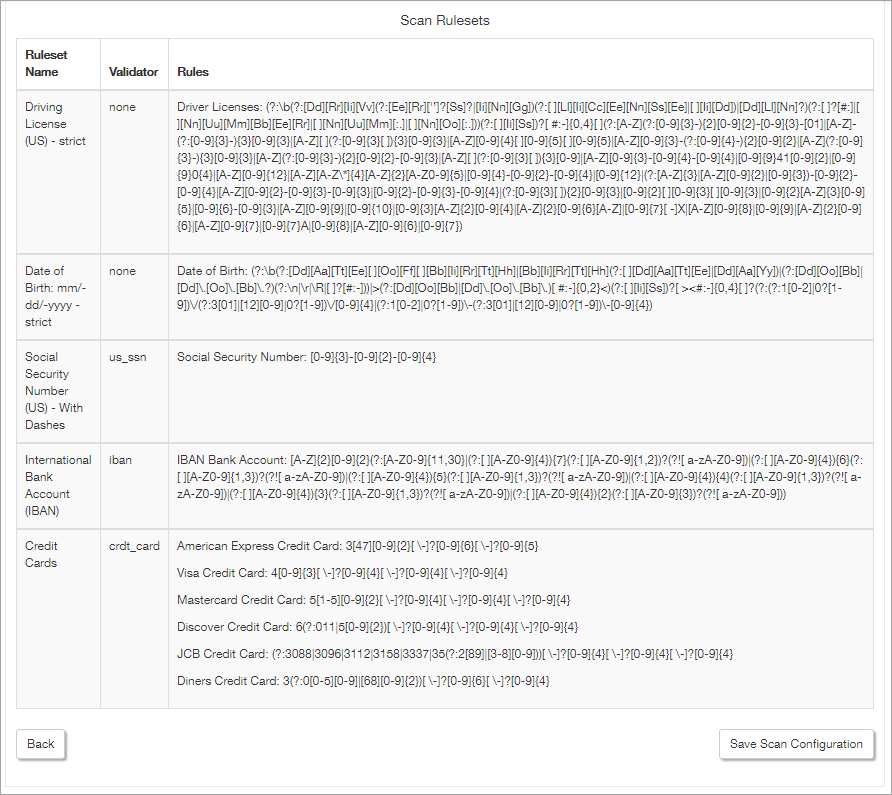
Configure the rules to apply in the "Data Breach Risk", and "Expanded Data Breach Risk Scans". Covered in Data Breach Risk Scans - Data Ruleset.
Review
The final stage for each scan is to "Review" its settings. To make any amendments click the Back button or where everything looks okay click on Save Scan Configuration. The scan will now become available for selection when configuring a policy.

What do you want to do?