
Antivirus Update Check
The Antivirus Update Check monitors the client's antivirus program's pattern file to determine if it is in sync with the vendor's latest published version. We receive a feed of this information on every vendor update, if a discrepancy exists the Check fails.
When you add an Antivirus Update Check you can add a check to query the Microsoft Security Center and other Supported Antivirus Products .
Our users use this to...
Antivirus checks typically fall into the 'every-unit-items' that our users deploy to cut their costs. The cost of the Antivirus Update Check far outweighs the cost of engineering time spent recovering from a successful virus attack and our users usually use this as a 'baseline' check and deploy it across their base to avoid that engineering cost.
You can suppress alerts until the number of consecutive check failures reaches the configured threshold. For details, see Configure alert thresholds to suppress alerts.
Antivirus Update Check URL
The Agent queries a CloudFront address over a secure connection to retrieve the information required to determine whether the installed Antivirus prodigious definitions are within the threshold or out-of-date.
To ensure the Agent can retrieve this information from CloudFront, we recommend you allow the following address in your firewall or web-filtering software.
https://dg5bj97jvb67q.cloudfront.net
Amazon's CloudFront Global Edge Network was utilized for this service, as it provides a consistent, high availability platform accessible from multiple geographically located download addresses.
This CloudFront address is strictly used to query and retrieve the Antivirus Update information, it is not used in any other capacity to receive or host data.
Check configuration
Add
- In the All Devices view North-pane, select the device
- Go to the Checks tab
- Click Add Check
- Choose Add DSC > Antivirus Update Check
Select the Supported antivirus product from the drop-down
- Choose the Days to run (we recommend running the check every day)
- To run an Automated Task when the Check fails choose Assign a Task after creating the Check
- OK to save and apply
- Where Assign a Task after creating the Check is selected:
- Select the script
- Click Next to configure
- Enter the Command Line parameters (if required)
- Set a Script timeout in the range 1 - 3600 seconds (default 120 seconds)
- Click Finish to save and apply
Edit
- In the All Devices view North-pane, select the device
- Go to the Checks tab
- Select the target Antivirus Update Check
- From the Check drop-down
- Click Edit Check (also available from the Check's right-click menu)
- Configure the settings
- Click OK to save and apply
Delete
- In the All Devices view North-pane, select the device
- Go to the Checks tab
- Select the target Antivirus Update Check
- From the Check drop-down
- Click Delete Check (also available from the Check's right-click menu)
- Review the summary and select OK to confirm removal
The Antivirus Update Check from Windows Monitoring Agent 10 utilizes the legacy Check processor and although the Check will run at the same schedule as the other Daily Safety Checks, it will report back a different time in the Date/Time column.
Display definition file information on the All Devices view
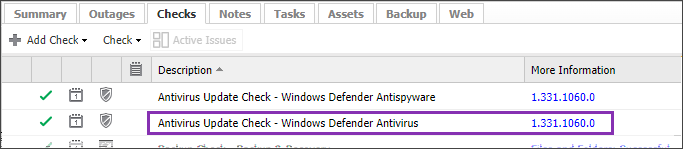
Information on the discovered definition file (version, release date etc.) is available by clicking the link in the More information column of the target Antivirus Update Check. This opens the More Information dialog with the discovered definition file highlighted. If we are unable to retrieve the definition file version, this is indicated in the dialog with a question mark.

The legacy Norman and CA products no longer display the version details in the More information dialog.