
Track your work with helpdesk tickets
Use MSP Manager to manage helpdesk tickets and track time easily. Start timers to track time accurately, bill your customers for partially completed work, or mark tickets complete and generate invoices at the end of the month. Export invoices to an integrated accounting system and send them to your customers.
If your accounting program doesn’t integrate with MSP Manager move tickets through the billing process to keep ticketing working properly. Create a billing batch and generate invoices, then leave the batch in the Billing section of your account. This moves tickets from a completed state to a billed state, so they will no longer appear by default in the Tickets or Helpdesk sections.
Set ticketing permissions
Before you create or update tickets, make sure you have the correct permissions in MSP Manager.
- Go to Settings > Users & Permissions > Roles.
- Select the Edit Role icon
 next to the role that needs ticketing permissions.
 - In the Permissions section of the Edit Role page, expand Help Desk.
- Select the permissions required for that role, or choose All Help Desk to select all available permissions.
- Select the Save icon
 when finished.
Add a new ticket
- In the left navigation, go to Helpdesk > Tickets, then select New Ticket.
- Enter customer information, ticket properties, and details.
- In Ticket Properties, you can select users and teams. When you select a team, the system adds the name of each team member.
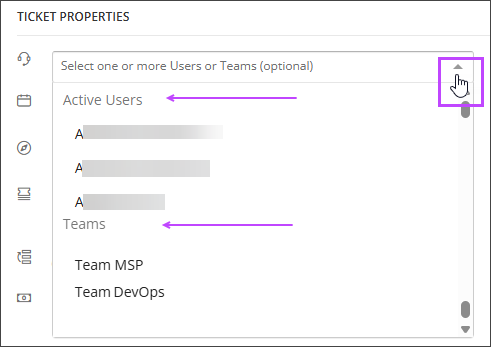
- In Ticket Properties, you can select users and teams. When you select a team, the system adds the name of each team member.
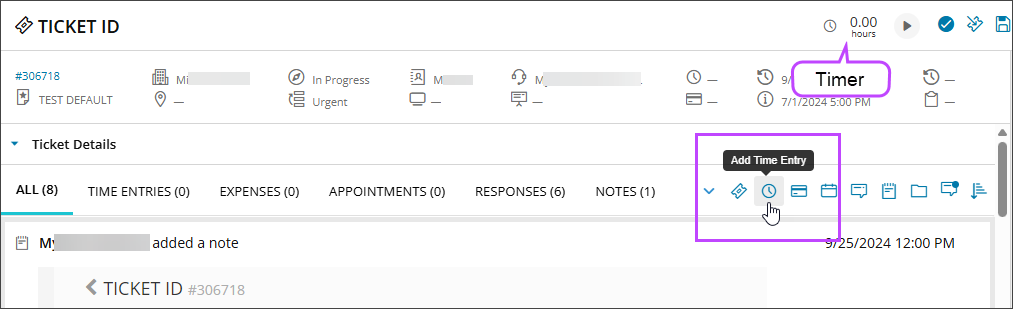
- To track time:
- Select Add Time Entry to add time manually, or
- Use the Timer to start tracking time.
- Select Save Ticket to save your changes.
- To add more details later, select the options menu
 next to the ticket in the Helpdesk.
The ticket subject is limited to 256 characters. Anything beyond that is truncated.
Display ticket details
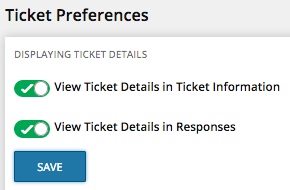
Choose how ticket details appear:
- In the Ticket Details section of a ticket.
- In the Responses section of a ticket (read only).
- In both sections.
To configure this setting, go to Settings > Tickets & Workflows > Ticket Preferences.
Customize your ticket number sequence
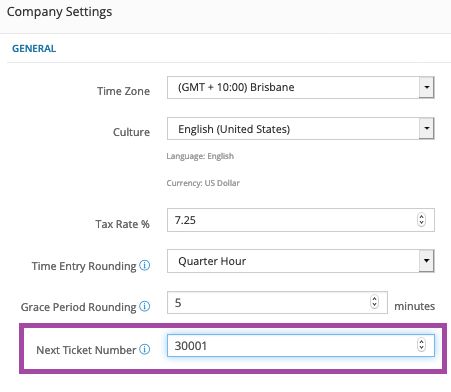
To customize your ticket number sequence, go to Company Settings > General, update the Next Ticket Number, and the next ticket will use that number.
What do you want to do?