
Integrate your N-sight RMM account with MSP Manager
If you do not have a N-sight account yet, click the N-sight link in the top Product Bar to start a new trial.
Integrate your N-sight RMM account with MSP Manager and the two products can work together to automatically create tickets, import your customers and users, and update your assets.
If you already have an MSP Manager account, you can integrate it with N-sight RMM. Contact your account manager so they can turn this feature on for you.
Import customers and users from your N-sight account, and apply Program Levels and Service Items to those customers in MSP Manager .
After the integration is complete, your MSP Manager account is populated with usable data like tickets, and customers that have Program Levels and Service Items assigned to them.
Only a single PSA integration can exist in N-sight RMM at a time.
-
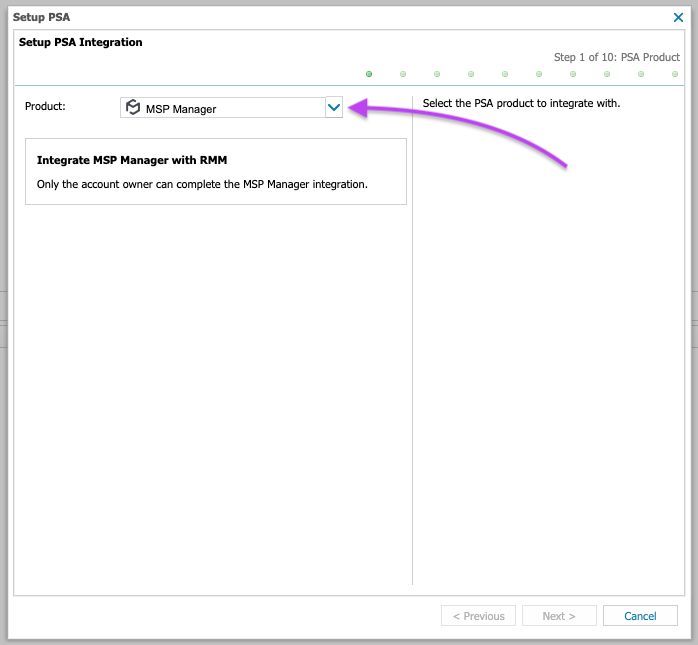
From your N-sight account dashboard, select Settings > PSA Integration > Setup. Select MSP Manager and click Next.
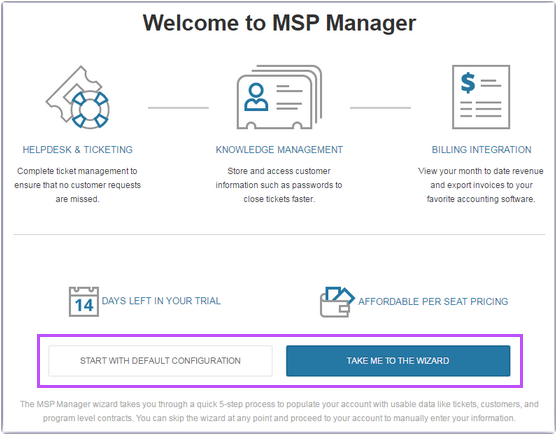
- In the next window, click Finish to continue to MSP Manager where you can choose to start with a default configuration or use the Setup Wizard to import all your N-sight customers, and assign program levels and service items to them.
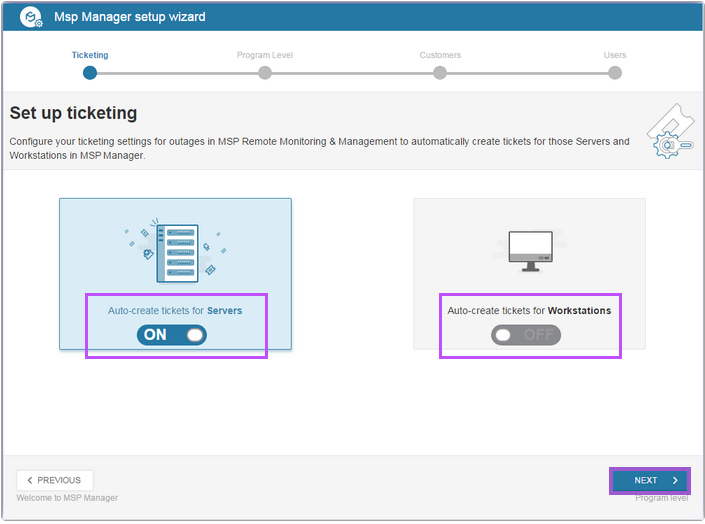
- Configure your ticketing settings to auto create tickets for servers and work stations. This allows outages for those devices in N-sight to automatically create tickets in MSP Manager . Click Next.
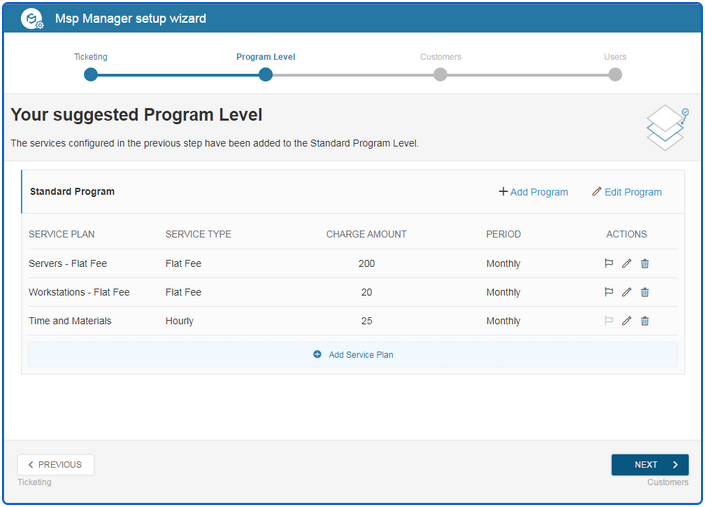
- MSP Manager creates a Program level based on your selections in the previous step. Modify the recommended Program Level by adding service items to it.
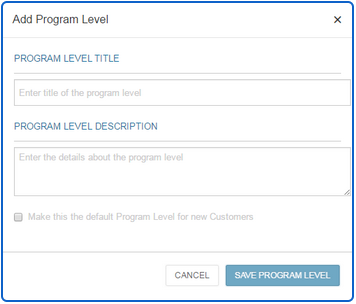
- Select Add Program to create an additional Program Level. Enter a name and description and click Save Program Level.
- Select Edit Program to modify the existing Program Level.
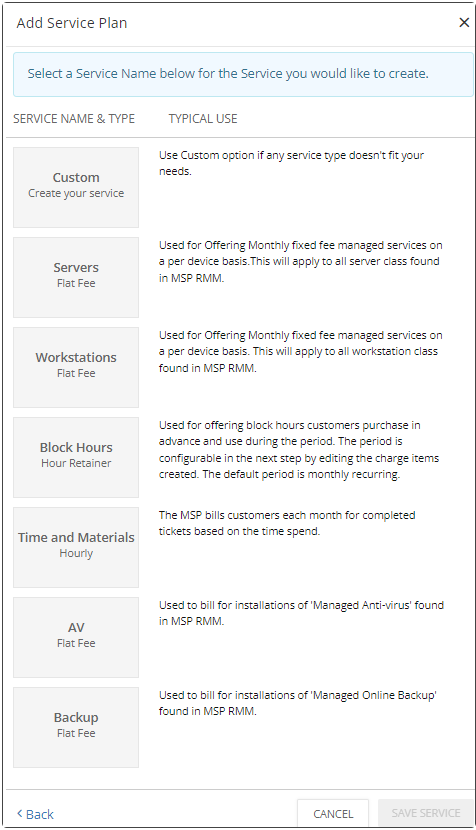
- Select Add Service Plan to add custom service items to the existing Program Level. Select one of the available service types and configure it to meet your billing requirements, or select Custom to create a new service type. Click Save Service to add it to the suggested program level in the setup wizard.
- Select Next when finished.
- Select Add Program to create an additional Program Level. Enter a name and description and click Save Program Level.
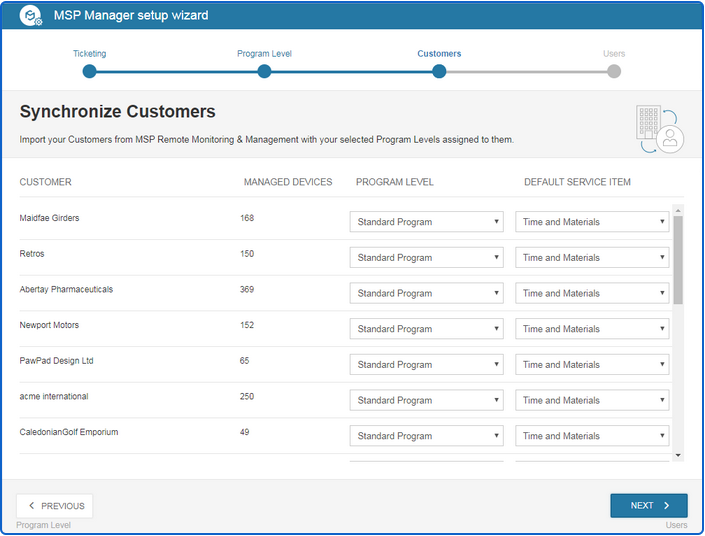
- The Customers section of the wizard imports your N-sight customers. Select a Program Level and choose a Default Service Itemto add to each customer, and click Next.
- Select an MSP Manager role (Administrator or Standard) to apply to your imported N-sight users, and click Next.
- The final page shows a summary of everything added to your account. Select the pencil icon
 next to each section to edit the information if needed.
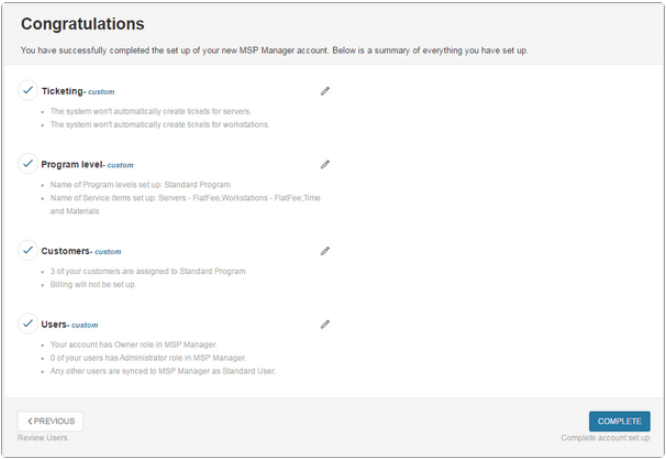
- Click Complete to finish the set up wizard.
If you only created one program level, it is automatically assigned to each customer. Select the correct Program Level for each customer if you created additional programs.
Any user without a role is imported with an inactive status, and can be activated later. MSP Manager assigns Administrator and Standard roles to these users by default. Add additional roles and permissions from your account settings.

After the synchronization is complete, all users and customers from your N-sight RMM account have been successfully added to MSP Manager and the Service Items in your selected Program Levels are assigned to your customers. Use the link at the bottom of the page to go directly to your MSP Manager account. 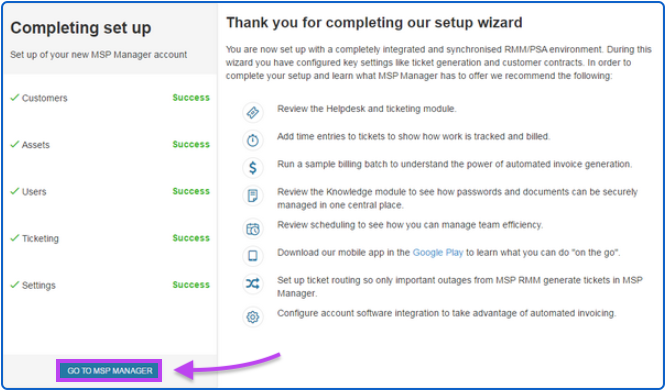
What do you want to do?