
Create customized knowledge to share with your company
Use the knowledge editor to create customized types of knowledge that fits your company's business model. Currently you can create and store things like passwords, procedures, serial numbers or any type of expiration date, but with the new knowledge types, you can add any type of information and store it in your MSP Manager account.
For example, you can create KB articles or notes for a specific customer to capture general information about their company and IT infrastructure, or new article types and sub types to organize information in a way that makes sense for your business.
Knowledge Permissions
Before you get started, make sure users have the appropriate permissions to access and create custom knowledge items.
- Navigate to Settings > Users & Permissions > Roles.
- Select
 to edit the role of the user that requires custom knowledge permissions.
 - Select the Knowledge Management section to expand it's options.
- Select the permissions to apply to the user's role or select All Knowledge Management to apply all permissions. Click Save Role when finished.
Create the Custom Knowledge Type
- Navigate to Settings > Knowledge > Knowledge Types.
- Select Add Knowledge Type, and enter a name for the new knowledge type.
- Choose who can access articles in this knowledge type by selecting a portal visibility option:
- Logged in users: Visible to users currently signed in to the portal.
- Public: Available to anyone.
- Specific customer(s): Select which customers can view the knowledge in their portal.
- Staff Members: Visible only to internal employees using MSP Manager.
- When you create a knowledge article, you can also choose Inherit to apply the visibility setting of the parent knowledge type to the article.
Mark the new Knowledge Type as Active when you are ready to display it in the Knowledge > Custom Knowledge section of your account.
- After creating the Knowledge Type, select Add new to add custom items to it.
- In the Knowledge Editor Window, select Add new and choose a Field type. There are additional options to configure in the Field Settings area depending on the Field type that is selected:
- Checkbox - enter a Field Label for the checkbox.
- Credential - used for passwords and login credentials. Enter information for system, login, password and note placeholders and field labels.
- Date - add a Field label and a Placeholder, like the suggested date format (i.e. mm/dd/yyyy).
- Dropdown - in addition to a Placeholder and Field Label, add options to be included in the dropdown menu. Select Add new option to add additional dropdown options.
- Expiry - enter System Field Label and System Placeholder. When applied to customers, the Expiry field displays a Customer field to select multiple customers, an Expiration Date and Notes field, and a Reminder field.
If the number of days in the Reminder field is different from the threshold listed in your knowledge notification settings, then expiry notifications for that asset are sent based on the number of days in the Reminder field.
- Numeric - add a Field label and a Placeholder that is displayed in the text box prior to the user entering information.
- Rich Text - enter a Field label. This field allows for things like bold font, bullet pointed or numbered lists, hyper links and inserted images.
Use drag and drop functionality to imbed images into rich text fields. Do not copy and paste as this will display a broken image.
- Section - enter a Field label and select a Section Layout. This allows for the addition of sub fields within each area of the Section Layout. Click Add new in each section to add additional fields.
- Text - the requirements for this field are the same as the Numeric field with the additional option to select whether the field is required or not.
- Select Save Field to confirm the addition of each new field, and click Save Knowledge Type to save the entire custom knowledge type.
Add Custom Knowledge items to customers
After creating your Custom Knowledge types, you can apply them to multiple customers.
- Navigate to Knowledge > All Knowledge.
- Click
 and select the Knowledge Type you want to add.
 - Enter a title and select the customers to which the new Knowledge Type is applied.
- Select a Tag if the new Knowledge Type applies to a specific asset, or a Role if the Knowledge Type applies to roles for specific groups of technicians.
- Depending on the selected Knowledge Type, enter any additional information (e.g. notes, attachments, etc)
- When the new knowledge item is complete, click
 to save the new knowledge item.
The new knowledge item is now available for the selected customers in the Knowledge > All Knowledge section. You can also import existing passwords into your custom knowledge templates.
Export Custom Knowledge items
Navigate to Knowledge > All Knowledge and select a knowledge item from the list. Click  in the top right corner to open the additional options available for that knowledge type and select Export to PDF.
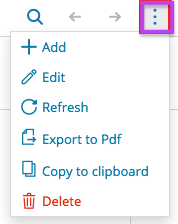
MSP Manager credentials have an a number of extra security features that work together to securely protect your data. For this reason, credentials (e.g. username, password) are excluded from the PDF export option.
Link custom knowledge items to tickets
After creating custom knowledge items, use the ticket editor to link the knowledge item to the ticket for easy access.
- Open the ticket to which you would like to add custom knowledge items and select the
 icon to the right of the ticket editor.
 - Click Search to search for custom knowledge items.
- Click next to the knowledge item you would like to add to the ticket and choose from the available options: Edit, Delete, or Link to Ticket.
After the knowledge item is linked, click and select Unlink to remove it from the ticket.
What do you want to do?