Use the System Shell to support your customers
There are some remote support and system administration tasks that do not require a full remote desktop connection. For these scenarios, a command line is not only faster and more flexible, but it also requires less bandwidth. There are also situations during support sessions, in which the remote graphical environment may be damaged or unresponsive. Take Control provides a real-time command line environment that can speed up common tasks.
You can use the System Shell as a standard windows CMD prompt or a PowerShell prompt. Both options have full administrative privileges and can run batch files or WSH (Windows Scripting Host) scripts.
With the latest update to both the Command Prompt and PowerShell environments, clicking the System Shell tab of the Viewer launches an Interactive Command Prompt, and also gives you the ability to start an Interactive PowerShell. The new interface contains tools and capabilities such as, command history, tab-to-autocomplete, copy/paste, control-commands (CTRL/C to stop a ping, etc.) and command shell colors.
System Shell menu options
Select the Advanced Options menu to choose from actions to restart the shell or execute commands:

- Restart Shell – terminates the shell process and starts another.
- CTRL + Break – stops a process from executing inside the shell, without terminating the shell.
- Clear Output – clears the current output of the shell.
- Run Local Batch – executes a script loaded from the technician’s computer. This is compatible with any Windows Scripting Host languages.
- Standard Command Prompt (Compatibility Mode) - switches to a standard command prompt running in compatibility mode.
- PowerShell (Compatibility Mode) - switches to PowerShell running in compatibility mode.
- Start Interactive Command Prompt – launches real-time command line environment.
- Start Interactive PowerShell – launches real-time PowerShell environment.
For the Mac Remote Viewer, these options are available by clicking End at the bottom of the System Shell window.
The Shell Type option defines the type of shell to be executed. Changing from one type to another terminates the first type. It is not possible to have two shell types open simultaneously.

- Windows PowerShell – uses the Windows PowerShell, if available. Take Control is compatible with any version of PowerShell.
- Standard Command Prompt – uses the Windows Command Processor (cmd.exe).
For the Mac Remote Viewer, these options are available by clicking Type at the bottom of the System Shell window.
Press Enter to execute the command.
Use the following keys to access the command history in the command box:
- Ctrl+Home – displays the first command inserted.
- Ctrl+End – displays the last command inserted.
- Ctrl+Up – displays the previous command history.
- Ctrl+Down – displays the next command history.
System Shell Recording (Windows only)
For IT professionals, maintaining detailed and accurate records of system activities is crucial for auditing, troubleshooting, training purposes and many other reasons. The latest update to the Take Control Windows Viewer introduces an automatic recording feature for sessions using the System Shell.
This feature ensures that all activities performed in the System Shell are captured, providing a reliable record of the session that is easily accessible from the Admin Area.
-
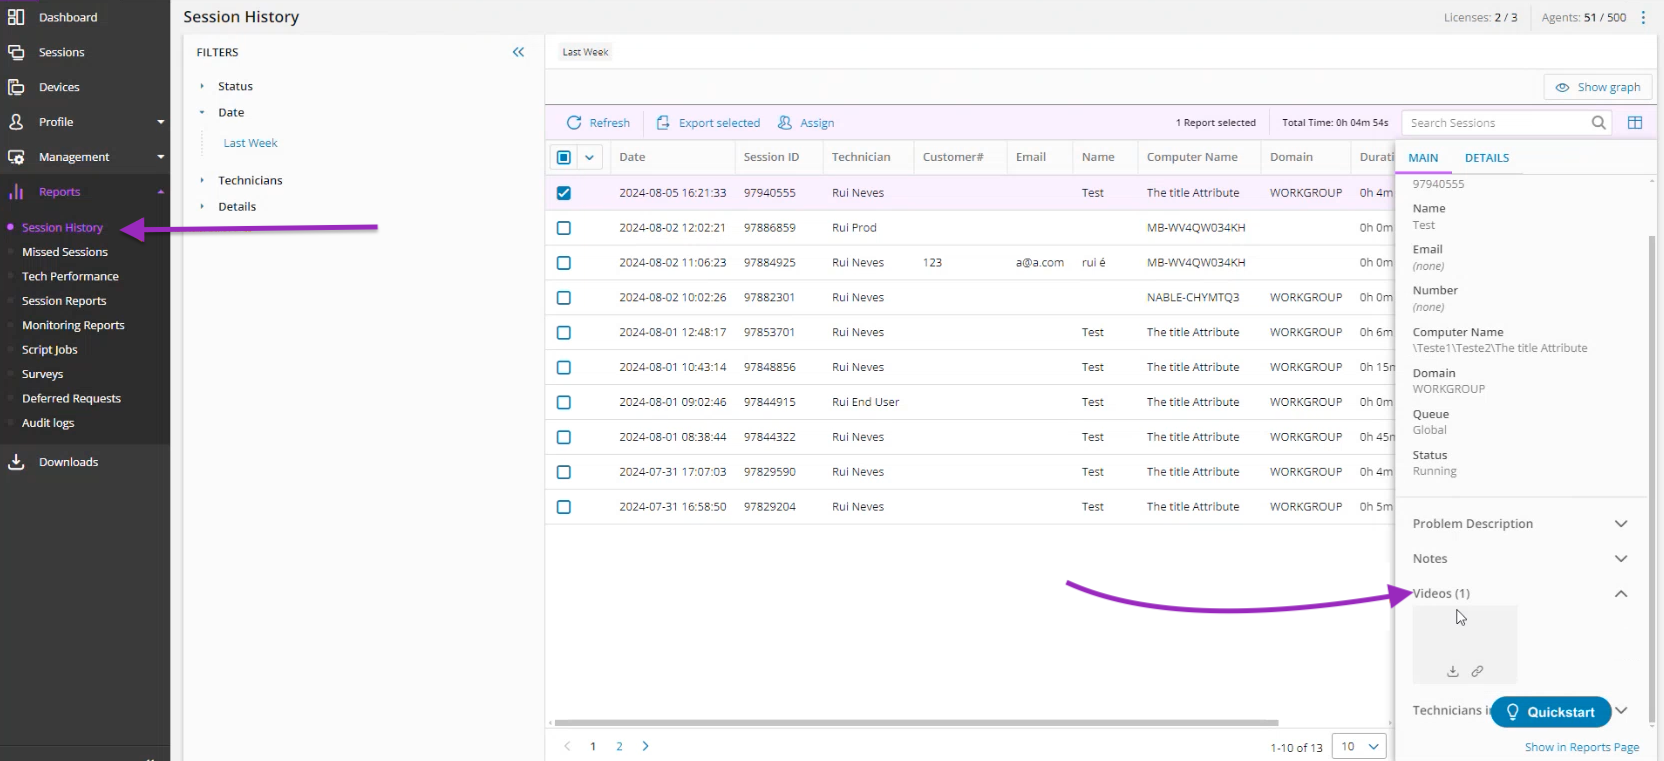
Each activity in the System Shell is automatically recorded. To access those recordings, select Reports from the Navigation Links on the left of the Admin Area and click the Session History Report.

-
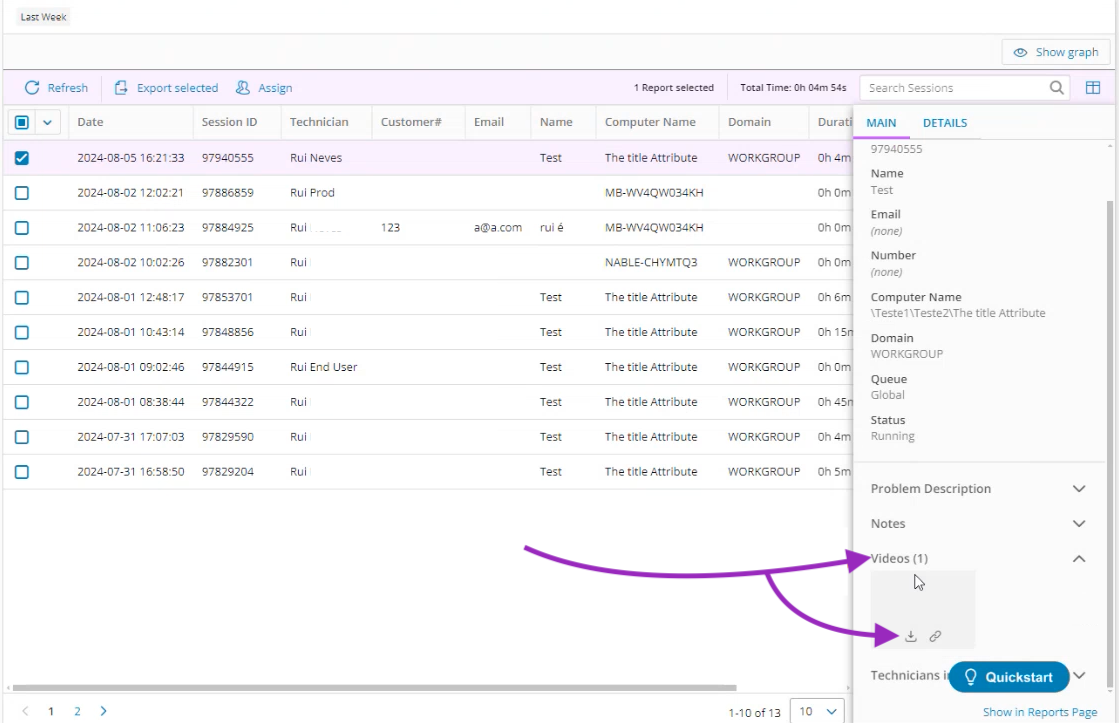
Select a recording from the list to view its details, and click the Videos section to expand its content. Click the Share Icon on the video to share the link.
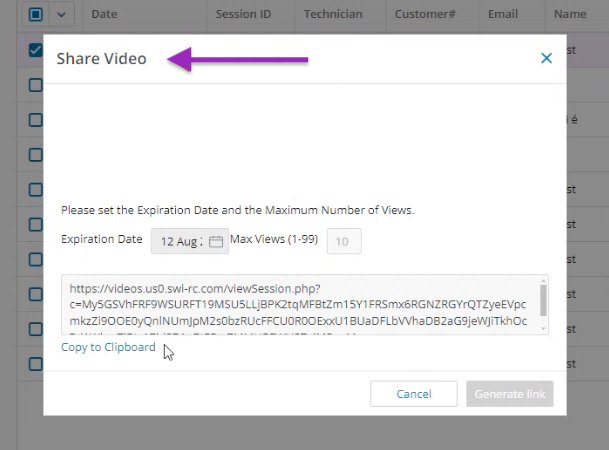
- Enter the Expiration Date and the Max Views (maximum number of views allowed) for the video, and click Generate.


Use the Copy to Clipboard option to quickly copy and share the video link.
What do you want to do?
Reviewed: April 11th 2025 by Cale
