
Enable Web Protection and assign Policy

Web Protection is now disabled by default for:
- New customer accounts.
- Existing customers who have not previously enabled Web Protection.
See Web Protection for details.
You can deploy Web Protection to match your requirements by using Protection Policies and enabling Web Protection where you need it. You can deploy Web Protection for all your clients on every server and workstation, you can deploy it for selected clients or sites, or you can deploy it on individual devices.
When you enable Web Protection, you assign the Protection Policy you need. The Protection Policy controls all aspects of Web Protection including the message displayed to a user when a website is blocked, the schedule when users can access blocked sites, sites that are allowed or blocked, and the Web Protection information displayed on the All Devices view and in Reports.
When you enable Web Protection, you can Run checks now to initiate the installation process outside of the Check cycle.
Enable Web Protection on multiple devices, clients and sites
- In the All Devices view, go to Settings > Web Protection > Settings.
- Select the Entity type to apply the configuration (overall device type, Client or Site).
- Using the Settings drop-down menu, select On or Use Parent (if On).
- Use the drop-down menu to select the target Protection Policy.
- Select OK to save.
Status indicators help you understand how a feature is configured:
- Green - Enabled for all devices under the entity.
- Grey - Disabled on at least one device.
- Orange – Configuration differs between parent and child entities. If a Client only has one Site, its status reflects that of the Site.
For more information, see Feature and Functionality Settings Icons.
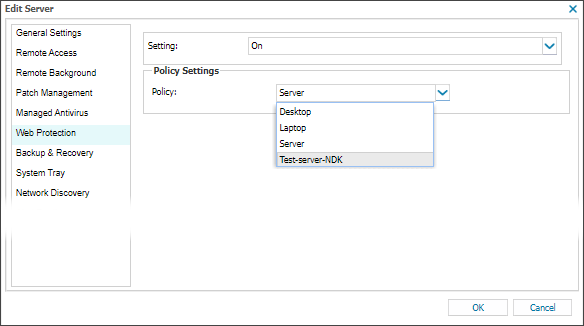
Enable Web Protection on an individual device
- In the All Devices view North-pane, go to the Servers or Workstations tab.
- Right-click the target device and select Edit Server or Edit Workstation.
- Select Web Protection.
- Using the Settings drop-down menu, select On or Use Parent (if On).
- Use the drop-down menu(s) to select the target Protection Policy.
- Select OK to save.
After Web Protection is deployed, it uploads information from the device on an hourly basis, although any updates from the All Devices view (changes to the settings, policies, etc) will be actioned the next time the Agent communicates with the All Devices view.