
Place Network under Management
After the Network Discovery Agents are deployed on the network, you place the network under management, which automatically runs the Network Discovery scan to discover all attached devices. The discovered information displays in the Connected Devices section under the Networks tab on the All Devices view.
- In the All Devices view North-pane, go to the Networks tab
- Click the Networks button
- Select Manage a New Network
- Choose the Show networks seen in the last threshold
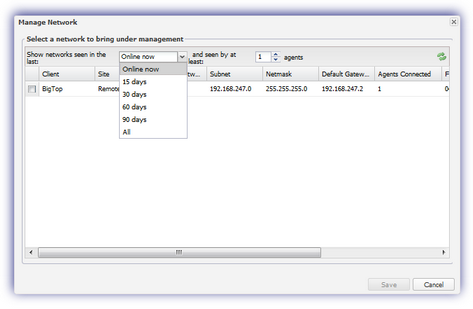
- Select the target network from the list and Save
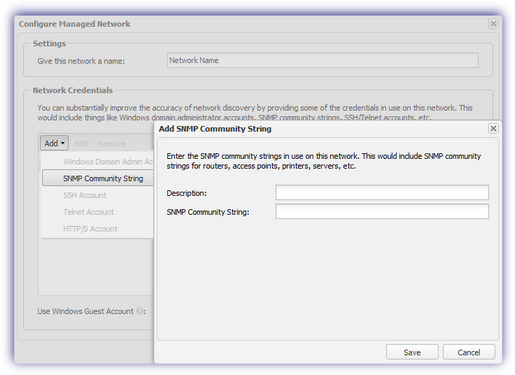
The Configure Managed Network dialog opens.
- Enter a name for the network to identify it on the All Devices view
- Click Add in Network Credentials to configure the network’s SNMP credentials
- Add > SNMP> Community String
- Provide a Description of this setting for identification
- Enter the SNMP Community String in use on the network (case sensitive)
- Save to apply and configure additional SNMP Community Strings where required
- Click OK to apply the settings and begin the scan of the network
Network Device Monitoring uses SNMP to retrieve information and run checks against the monitored devices.
Ensure the SNMP Community Strings are configured to match all of the SNMP security credentials in use throughout the network.
By default, we add a Public SNMP Community String, and for each additional SNMP Community String:
Edit
You can edit a network. For example, you may add another SNMP Community string or change the current setting.
- In the All Devices view North-pane, go to the Networks tab
- Right-click the target network and select Edit selected network
- Edit the settings
- Click Save to apply