Restore the Exchange Store
If Backup and Recovery options do not appear in N-sight RMM, use Cove instead.
To start a 30-day free trial of Cove:
- Open the app switcher in the Product Bar.
- Select Cove Data Protection (Cove).
When restoring the Exchange Store, the current database must be:
- Dismounted
- Replaced with the restored database (we would suggest making a copy of the current database first)
- The restored database mounted
The database mount and dismount process varies between Operating Systems with the basic steps outlined below:
Exchange Store restoration process
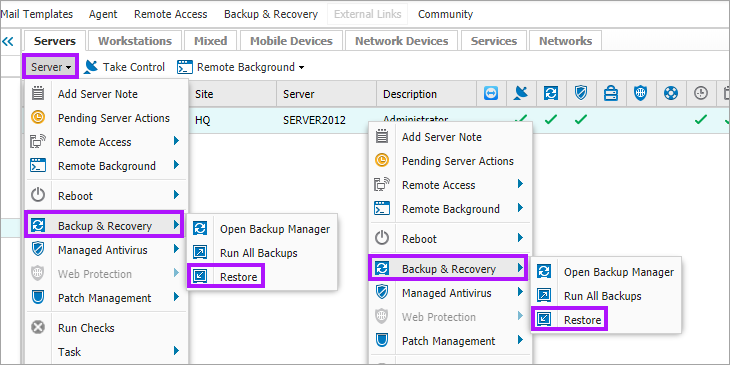
The first step when performing a restore is to select the device the data is to be restored from on the Dashboard and open the Backup Manager:
North-pane:
- Right-click on the target device in the North-pane of the Dashboard (or from the Server or Workstation drop-down)
- Go to Backup & Recovery
- Select Restore
South-pane - Backup tab:
- Highlight the device in the North-pane
- Navigate to the Backup tab in the South-pane
- Highlight the backup session to be restored
- Right-click the selection or click the Backup & Recovery drop-down
- Select Restore From This Session
A connection is then established to the remote device and opens Backup Manager at its Restore tab.
- Highlight the Exchange stores from the Data location drop-down (if not already selected)
- Select the data set to restore from in the Backup time drop-down.
- Once this information has loaded, in the North-pane expand the Exchange server plugin (data source) tree to select the required backup
- click Restore to restore to the original location or click Browse to navigate to the target folder and click Restore
The option to restore to another location is restricted to logins with enhanced privileges, such as Superusers or the Agent Key (where this has Dashboard access enabled).
For more information on this process, see MS Exchange recovery.
Please note we are not responsible for the content of external sites.


