Devices cannot be added to a Recovery Testing plan if already assigned to a Standby Image plan to Hyper-V or Standby Image to Azure plan.
Recovery Testing is currently only available for Windows devices.
From Main Dashboard
To enable Recovery Testing on a device from the Management Console's main Dashboard, follow the steps below:
- Log in to the Management Console under a SuperUser or Manager account
- In the Backup Dashboard, tick the checkbox to the left of the device(s) you wish to assign a plan to
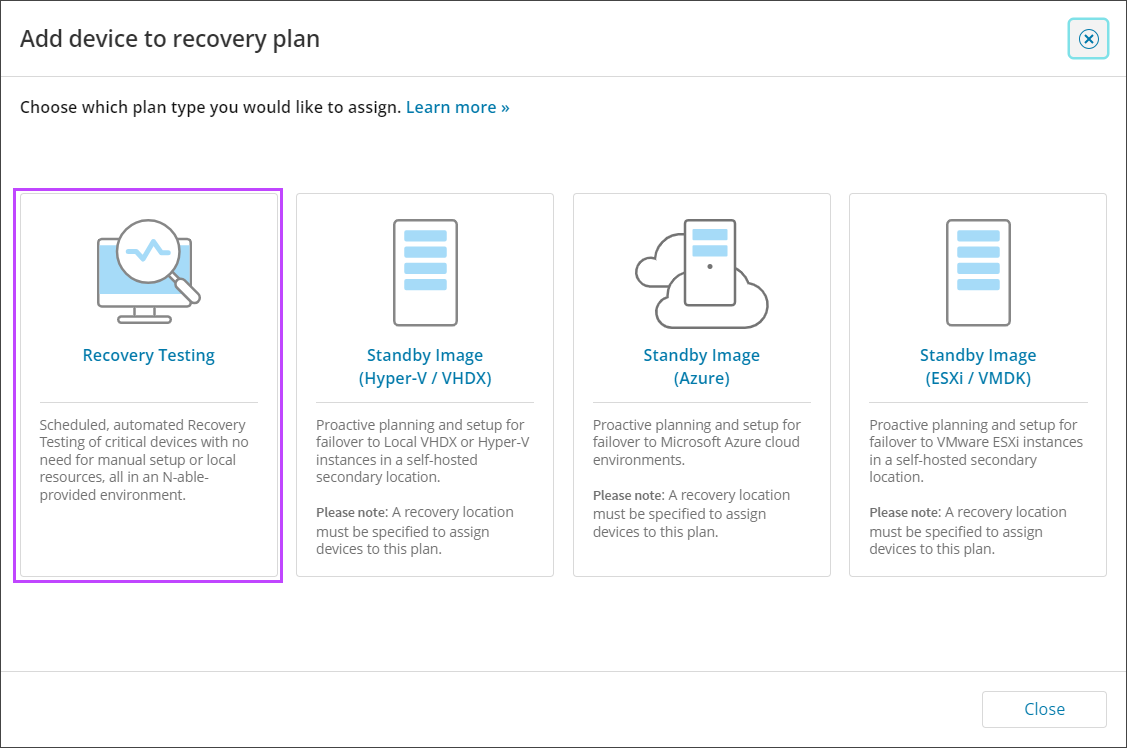
- Click Add to recovery plan from the Toolbar

- Select Recovery Testing
- Select the customer from the dropdown
- Choose the frequency of the plan to assign:
- Biweekly - This will automate the recovery with fortnightly boot testing and screenshot creation (every 14 days)
- Monthly - This will automate the recovery with monthly boot testing and screenshot creation (every 30 days)
- Click Next
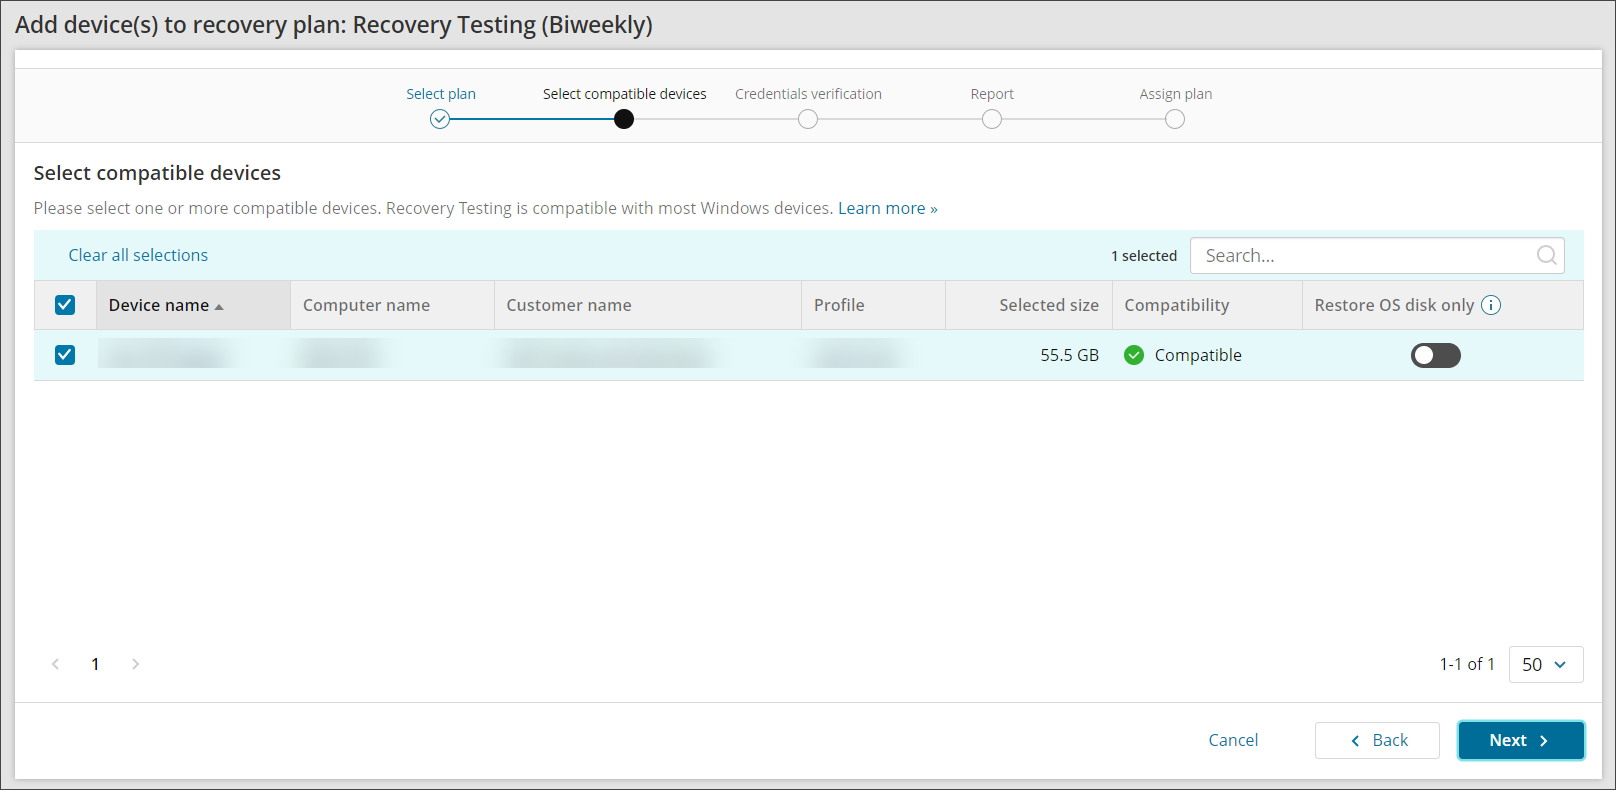
- Confirm the compatibility of devices and the selected size of the device's data and click Next
- If you wish to skip all data drives, enable Restore OS disk only
This will restore the system drive and check the machine's bootability, but it will not restore the data drives.
This function will be automatically enabled if the device is incompatible due to exceeding the 2TB selected size limitation
- Enter the Encryption Key/Security Code or Passphrase for the device(s). This can be either:
- Private encryption key - Created by yourself when installing Backup Manager on the device. If you have lost the Encryption Key/Security Code for the device, you will need to Convert Devices to Passphrase-Based Encryption
- Passphrase encryption - These are generated on demand for automatically installed devices. You can find information on this here
If you are logged in as a security officer, this will be detected automatically.
Any customer based in the EU (except Germany) will be required to agree to the policies linked.

- Click Next to progress to the Report window to enter one or more email addresses to receive a report when:
- The recovery is complete (Successful or Failed)
- The recovery was successful
- The recovery failed
Multiple addresses should be separated using a comma or semi-colon
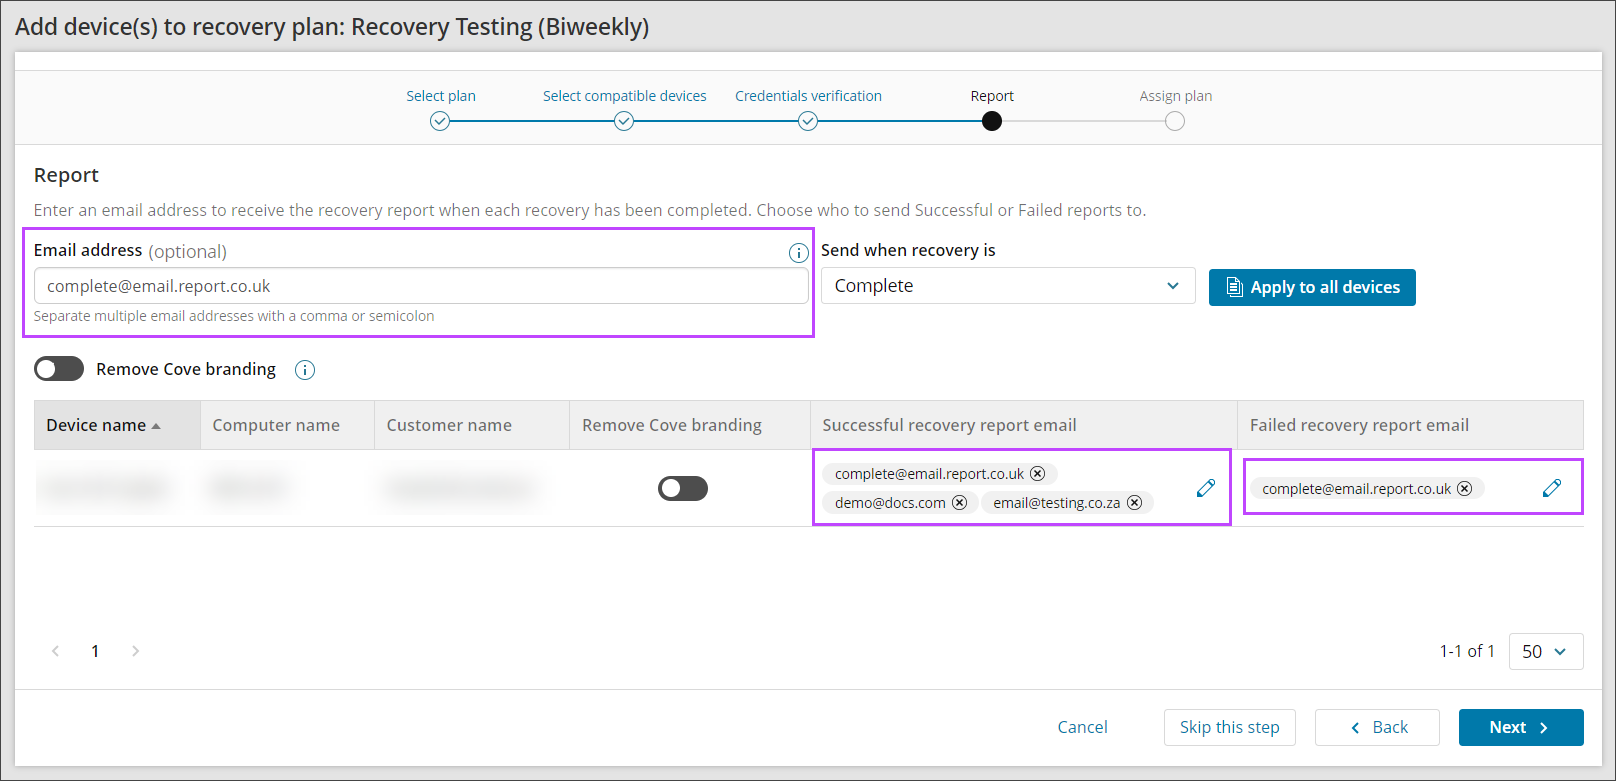
If you do not want to add an email address to receive reports, click Skip this step
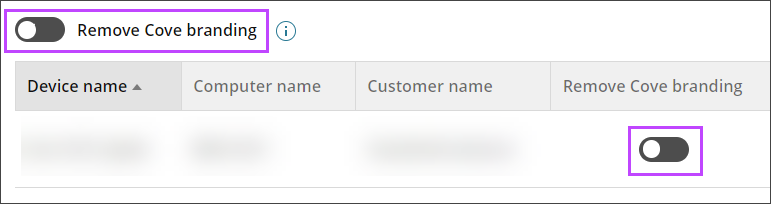
- To remove all branding from the reports, use the Remove Cove branding toggle per device, or above the device list to apply the changes to all devices in this window
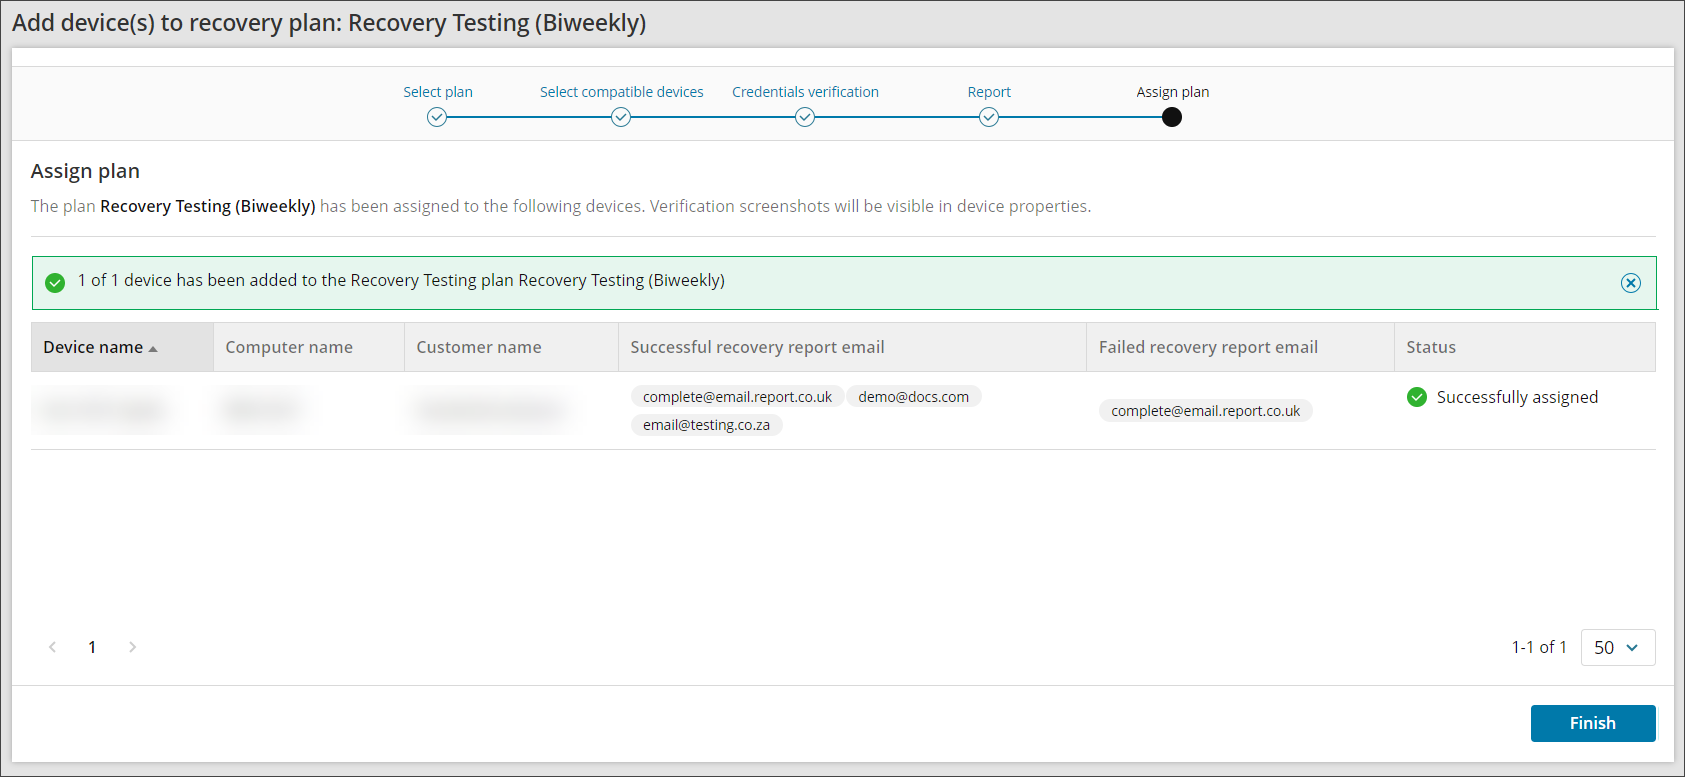
- Select Next to enable the plan on the selected devices
- You will now see the status of the plan has changed to Completed and the banner shows the number of devices added to the plan.
- Click Finish to complete the process
From Recovery Testing Overview
To add Recovery Testing to devices from the dedicated Recovery Testing Overview:
- Log in to the Management Console under a SuperUser or Manager account
- Navigate to Continuity > Recovery Testing
- Click Add to Plan
- Select the customer the device(s) you wish to apply the Recovery Testing plan belong to
- Choose the restore frequency
- Biweekly (every 14 days)
- Monthly (every 30 days)
- Click Next
- Select all devices to apply the recovery testing plan

In this window, it is possible to search compatible devices by Device Name, Customer Name and Profile
- If you wish to skip all data drives, enable Restore OS disk only
Use this function if the device is otherwise incompatible due to exceeding the 2TB selected size limitation
- You will now be taken to the Add Device to Plan wizard. Follow the steps to enter the devices Encryption Key/Security Code starting at step #10 where you can now follow the above instructions to add the device to the plan
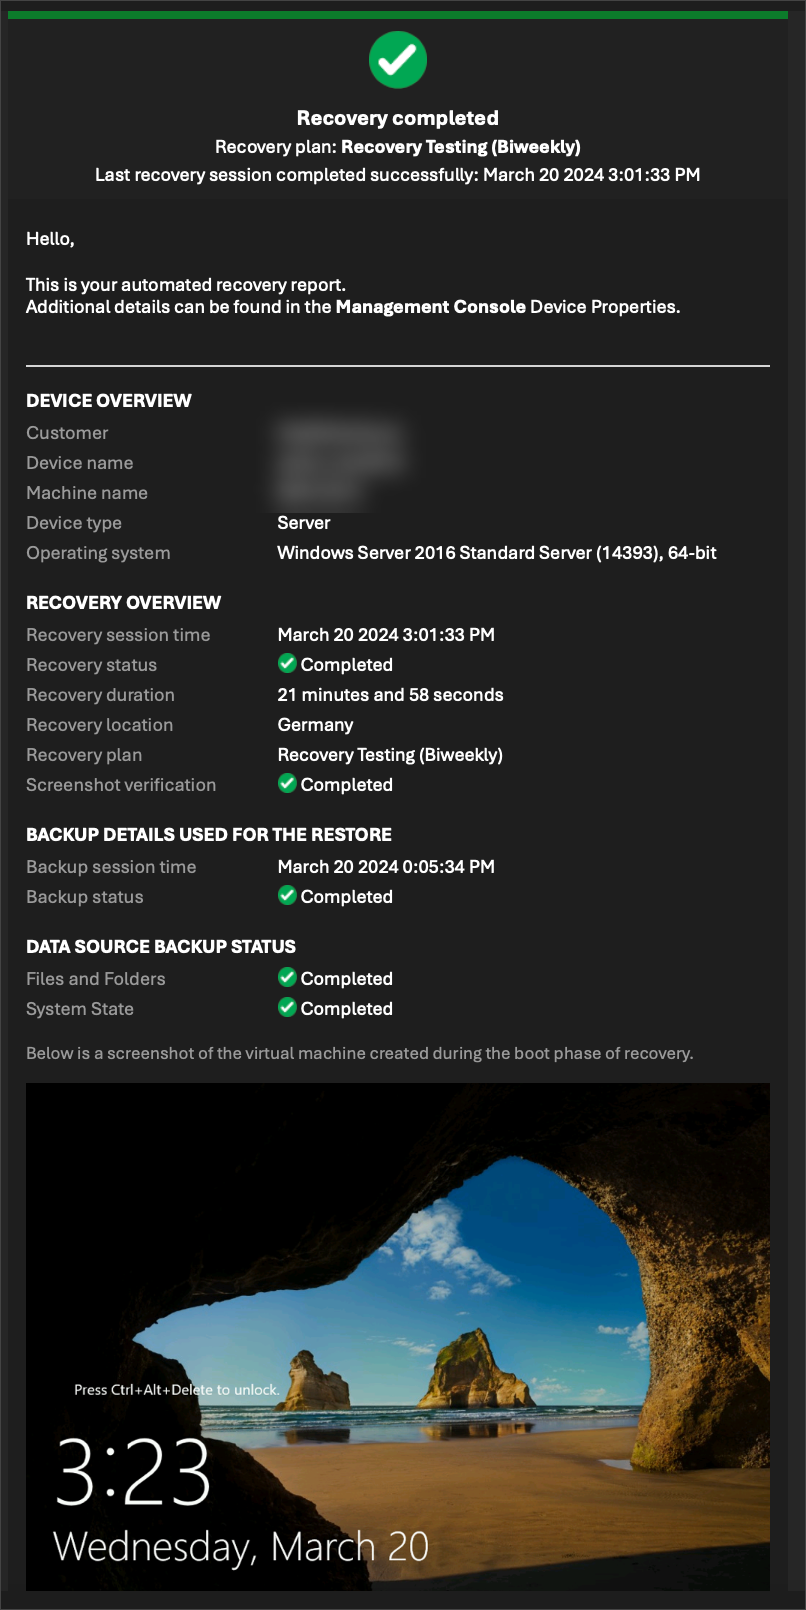
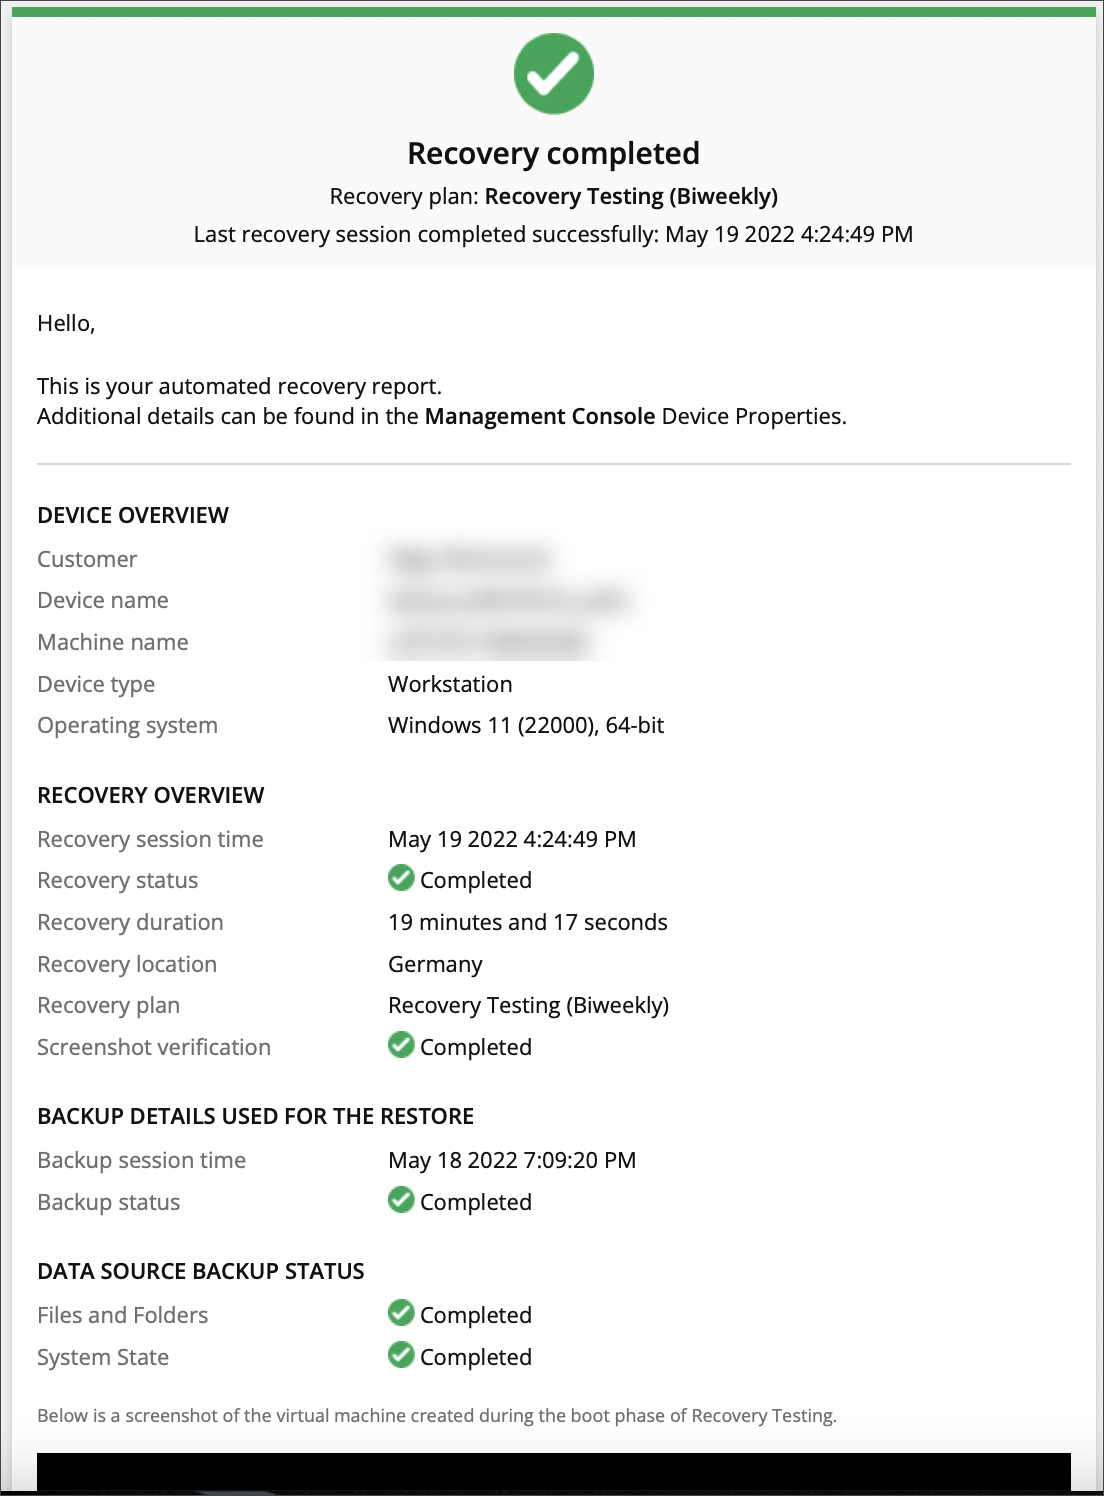
Recovery reports
When the device(s) assigned to the plan have Successful recovery report email or Failed recovery report email recipient address(es) configured, and once the test has completed, those recipients will receive the report in their email inbox.Here is an example report with Cove branding:
Here is an example without Cove branding: