
Permissions to modify storage locations to a Network Share are available for Reseller level and lower, for SuperUsers with Security Officer permissions only.
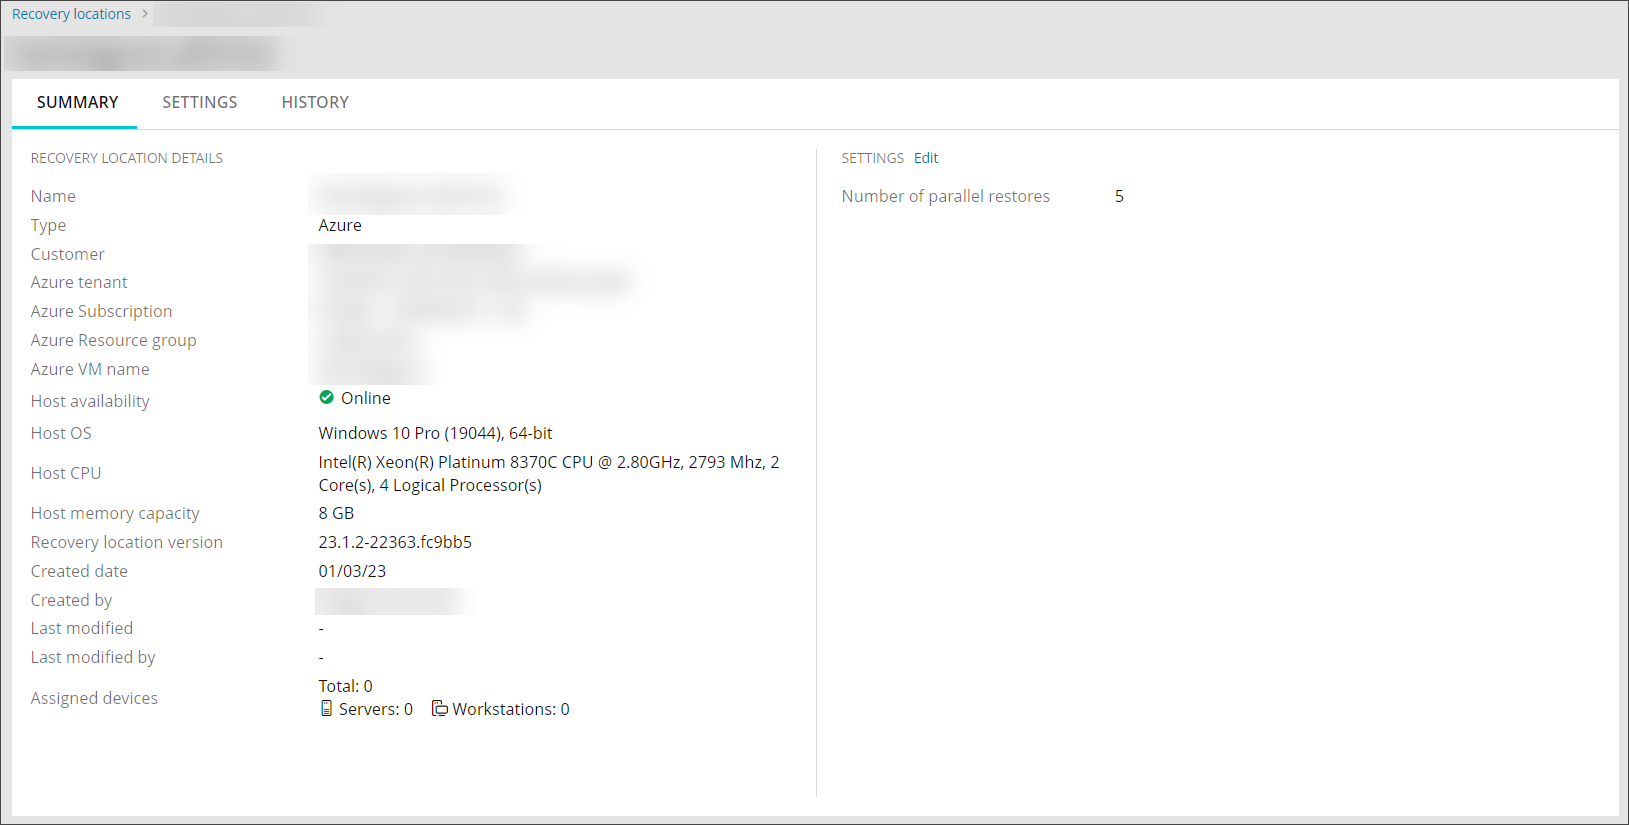
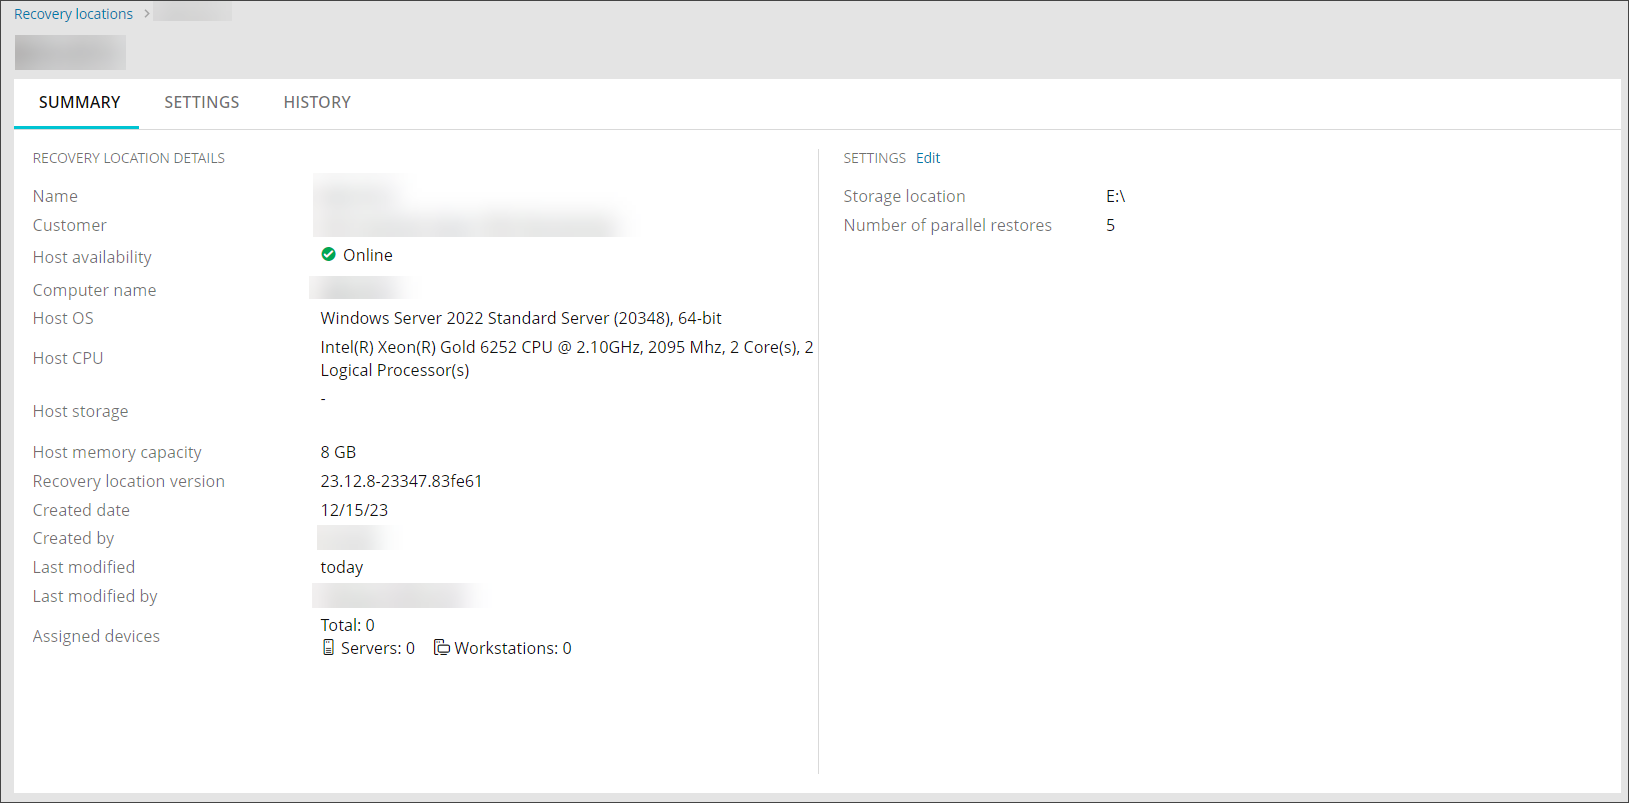
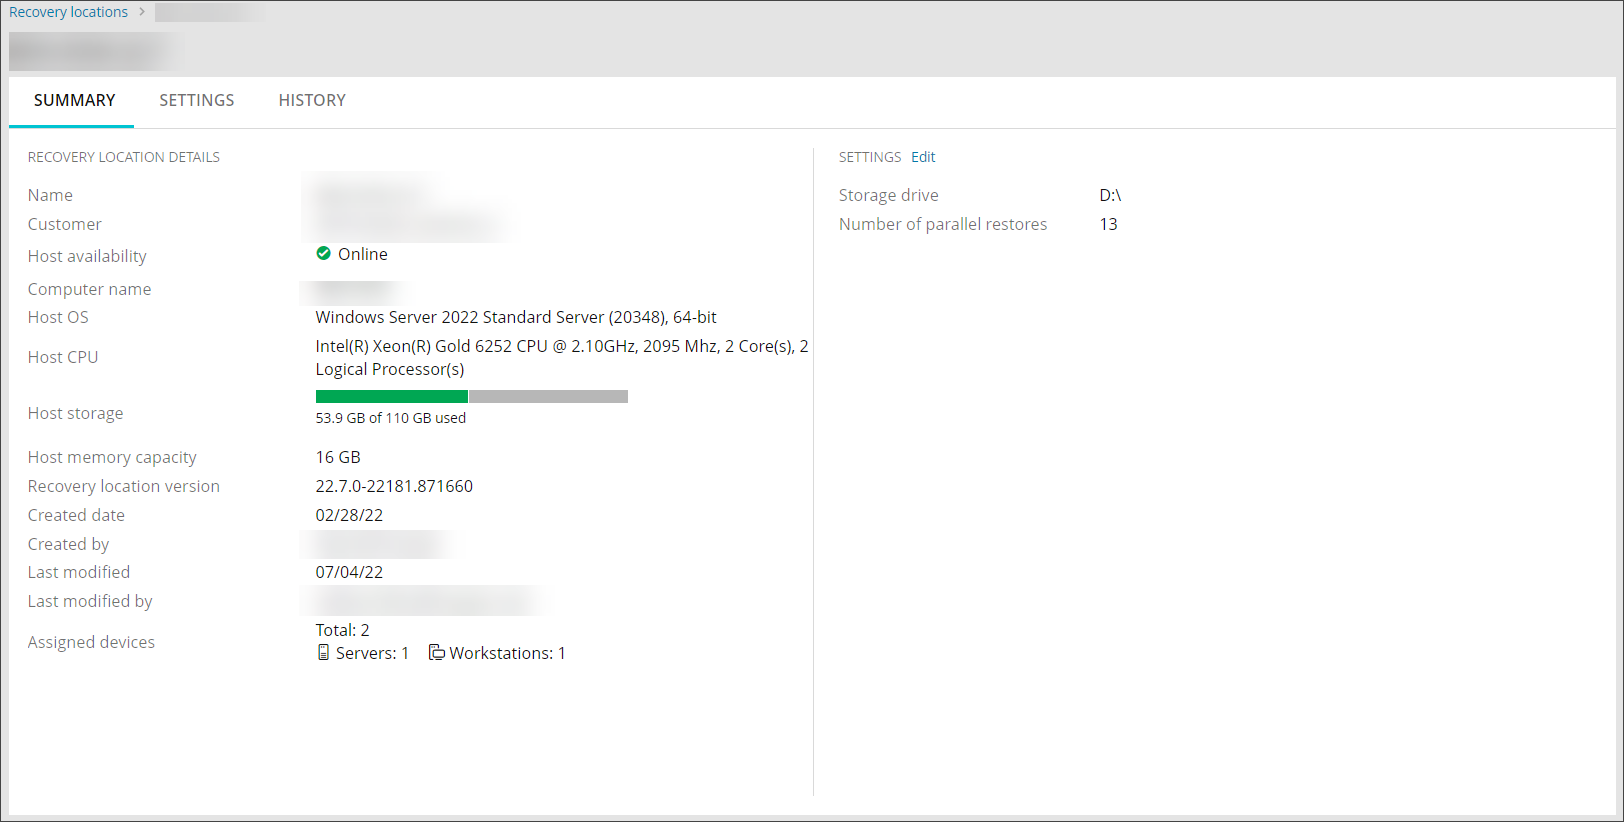
View Recovery Location Summary
A summary of information relating to each Recovery Location can be viewed one at a time from the Continuity > Recovery Locations page using one of four methods for both Self-hosted (for Standby Image) and Azure location types.
- Recovery Location name
- Select the recovery location name to open the Summary page
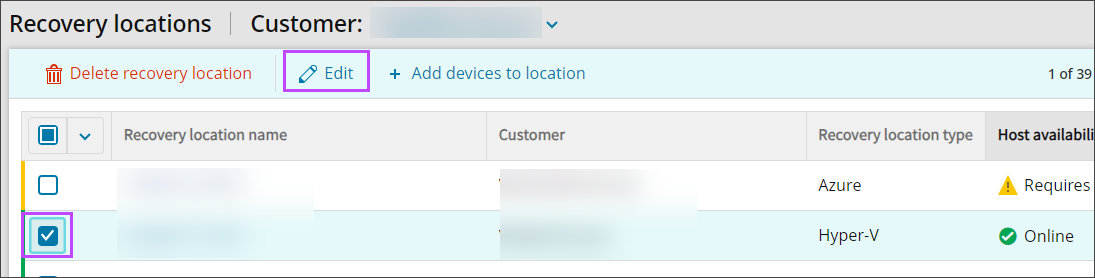
- Top bar menu
- Select the checkbox for the Recovery Location
- At the top of the Recovery Locations page, select Edit
- Switch to the Summary tab
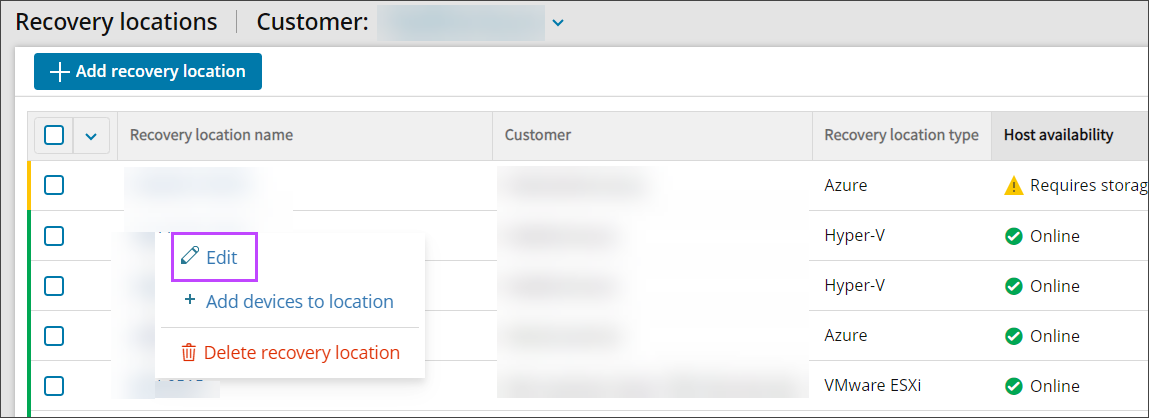
- Location context menu
- Right-click on the Recovery Location to edit
- Select Edit
- Switch to the Summary tab
- Right hand menu
Click the action menu for the Recovery Location, seen as three dots in a vertical line to the right of the location's version
- Select Edit
- Switch to the Summary tab
Azure:
ESXi:
Hyper-V:
Edit Recovery Location
Recovery Locations can be edited one at a time from the Continuity > Recovery Locations page using one of the methods for Azure, ESXi and Hyper-V location types.
- Recovery Location name
- Select the recovery location name to open the Summary page
- Switch to the Settings tab
- Make any required changes to the following aspects of the recovery location:
- Customer - change the customer the storage location belongs to
- Recovery Location Name - change the name of the machine or server used to store your device restores
- Max number of parallel restores - manage the workload on the recovery machine by limiting the number of concurrent restores that can take place
- Storage Location - set the recovery location to the appropriate type
- Local Drive - The local path to the folder where your virtual machine files will be stored. This can be either a location at a drive, Cluster Shared Volume, or the drive itself. Examples:
- C:\Virtual_Machines
- D:\
- Network Share(available only for Hyper-V and ESXi) - Only available if all devices assigned to this recovery location are being restored to Local VHDX / Local VMDK files, remove any devices restoring to Hyper-V or ESXi on the recovery location to use Network Share
- Network path / IP address
- Username
- Password
- Local Drive - The local path to the folder where your virtual machine files will be stored. This can be either a location at a drive, Cluster Shared Volume, or the drive itself. Examples:
- Server Connections (Available only for ESXi) - see Step 5: Add Storage Location and Server Connections for instructions on connecting to the vCenter or ESXi Server
- Click Save
- Top bar menu
- Select the checkbox for the Recovery Location to edit
- At the top of the Recovery Locations page, select Edit
- Make any required changes to the following aspects of the recovery location:
- Customer - change the customer the storage location belongs to
- Recovery Location Name - change the name of the machine or server used to store your device restores
- Max number of parallel restores - manage the workload on the recovery machine by limiting the number of concurrent restores that can take place
- Storage Location - set the recovery location to the appropriate type
- Local Drive - The local path to the folder where your virtual machine files will be stored. This can be either a location at a drive, Cluster Shared Volume, or the drive itself. Examples:
- C:\Virtual_Machines
- D:\
- Network Share(available only for Hyper-V and ESXi) - Only available if all devices assigned to this recovery location are being restored to Local VHDX / Local VMDK files, remove any devices restoring to Hyper-V or ESXi on the recovery location to use Network Share
- Network path / IP address
- Username
- Password
- Local Drive - The local path to the folder where your virtual machine files will be stored. This can be either a location at a drive, Cluster Shared Volume, or the drive itself. Examples:
- Server Connections (Available only for ESXi) - see Step 5: Add Storage Location and Server Connections for instructions on connecting to the vCenter or ESXi Server
- Click Save
- Location context menu
- Right-click on the Recovery Location to edit
- Select Edit
- Make any required changes to the following aspects of the recovery location:
- Customer - change the customer the storage location belongs to
- Recovery Location Name - change the name of the machine or server used to store your device restores
- Max number of parallel restores - manage the workload on the recovery machine by limiting the number of concurrent restores that can take place
- Storage Location - set the recovery location to the appropriate type
- Local Drive - The local path to the folder where your virtual machine files will be stored. This can be either a location at a drive, Cluster Shared Volume, or the drive itself. Examples:
- C:\Virtual_Machines
- D:\
- Network Share(available only for Hyper-V and ESXi) - Only available if all devices assigned to this recovery location are being restored to Local VHDX / Local VMDK files, remove any devices restoring to Hyper-V or ESXi on the recovery location to use Network Share
- Network path / IP address
- Username
- Password
- Local Drive - The local path to the folder where your virtual machine files will be stored. This can be either a location at a drive, Cluster Shared Volume, or the drive itself. Examples:
- Server Connections (Available only for ESXi) - see Step 5: Add Storage Location and Server Connections for instructions on connecting to the vCenter or ESXi Server
- Click Save
View and Search Recovery Location History
A history of restores relating to each Recovery Location can be viewed one at a time from the History tab when looking from Continuity > Recovery Locations.
- Open the Recovery Location by clicking the Recovery Location name
- Switch to the History Tab
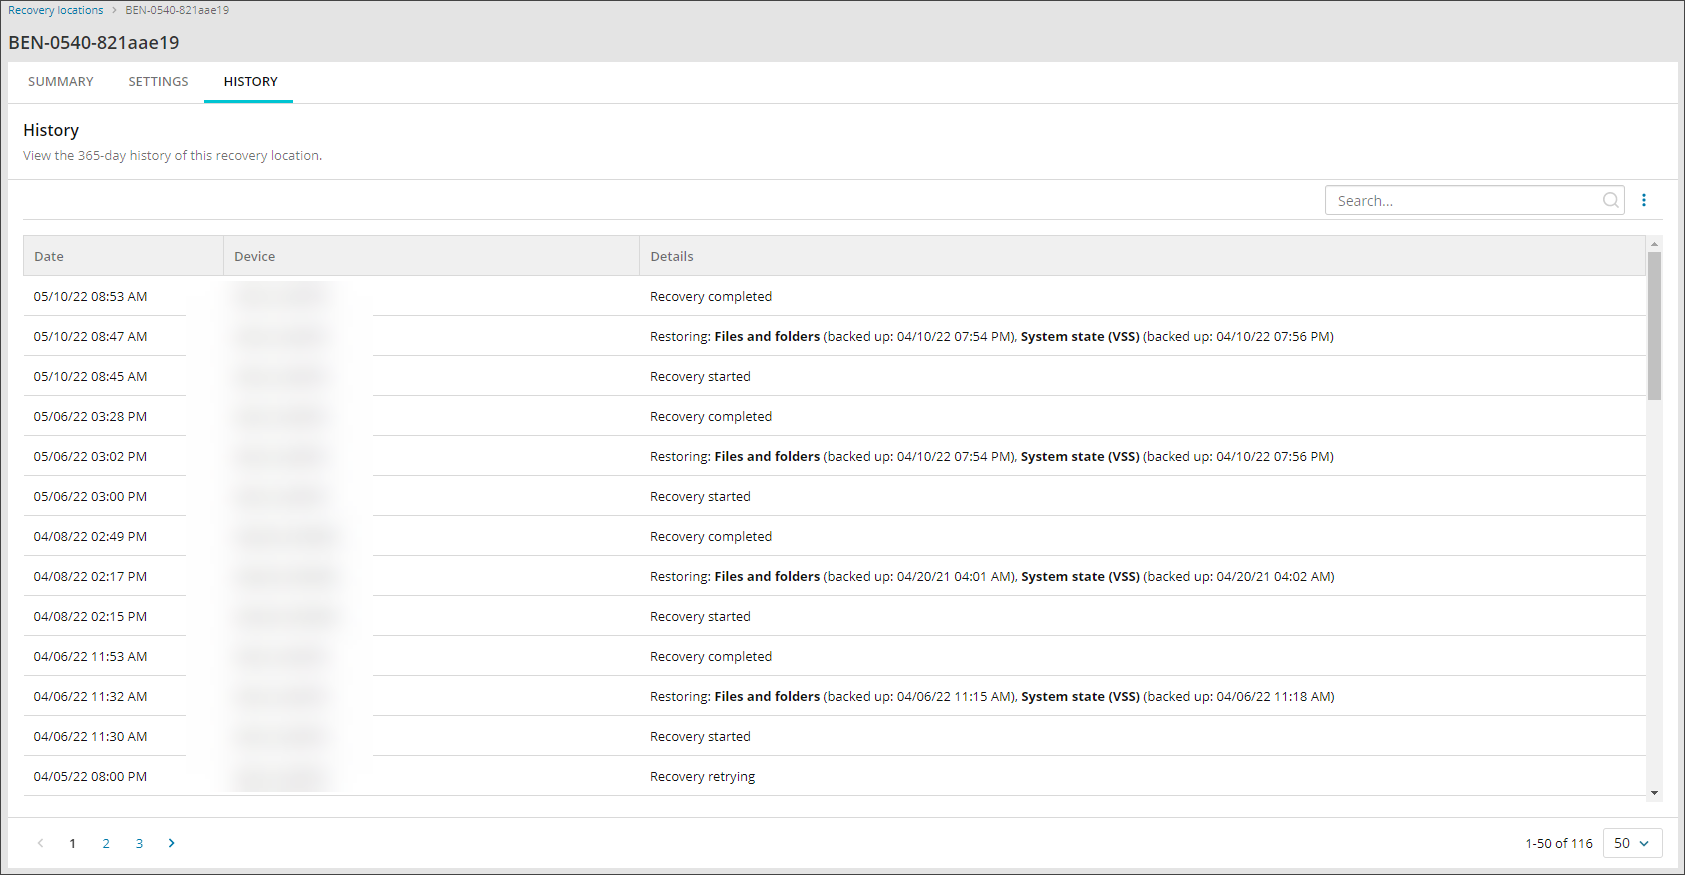
- Using the search bar, it is possible to search by the content in the Device column
Delete Recovery Location
Deleting a recovery location will uninstall the recovery service and all devices which were using the deleted recovery location will be unassigned from the Standby Image plan.
To delete a single recovery location:
- Sign in to the Management Console using a SuperUser account.
- Navigate to Continuity > Recovery Locations
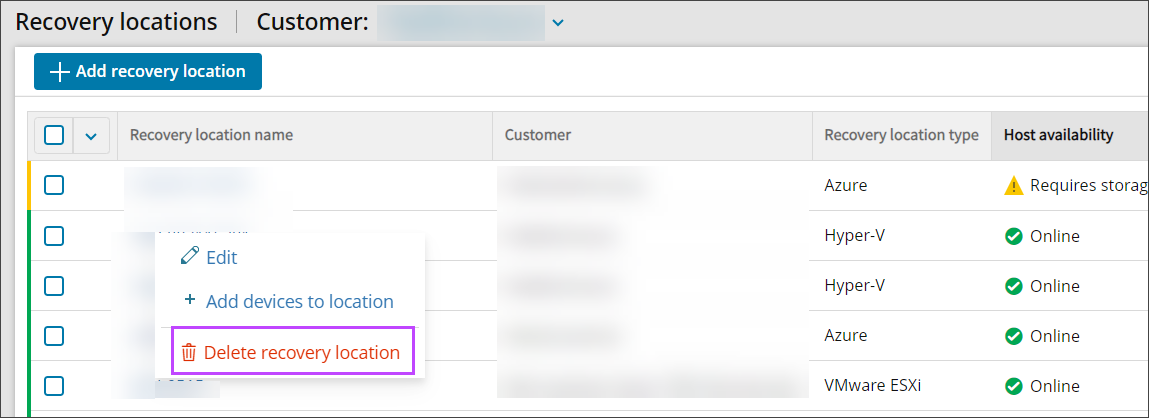
- Right-click on the Recovery Location to remove
- Select Delete recovery location
Or to delete single or multiple recovery locations:
- Sign in to the Management Console using a SuperUser account.
- Navigate to Continuity > Recovery Locations
- Select the checkboxes of any locations you wish to delete
- At the top of the page click Delete recovery location

Deleting a Recovery Location does not delete previously stored data. This restored data is kept on the device until manually deleted by the user.