
Please switch from Products to Retention Policies at your earliest convenience, as it is no longer possible to create new custom Products.
In the Cove Data Protection (Cove) Management Console, a Product refers to a service package based on a combination of features and storage options. These are now found on the Retention Policies page, in the Classic Policies (Products) section.
You can use products in many ways. Here are some typical examples.
- As real-world products that your clients actually sell or subscribe to (e.g. "Windows Files & Folders w/100 GB Storage & 30-day Retention" or "Database Backup, Unlimited Storage")
- As internal system administration tools to differentiate feature access across devices. It helps prevent the accidental inclusion of unnecessary files (especially large ones) into a backup selection or an unwanted restore that would overwrite the current files on a user's computer. Examples of such products: "MS SharePoint backup, scripts & selection off" or "Full system state backup w/o restore"
- As a temporary measure to limit access to the service (for example, in case of an overdue payment)
Each time you add a device, you need to assign a product to it. This can be a pre-defined product such as All-In or, you can create custom products based on your requirements.
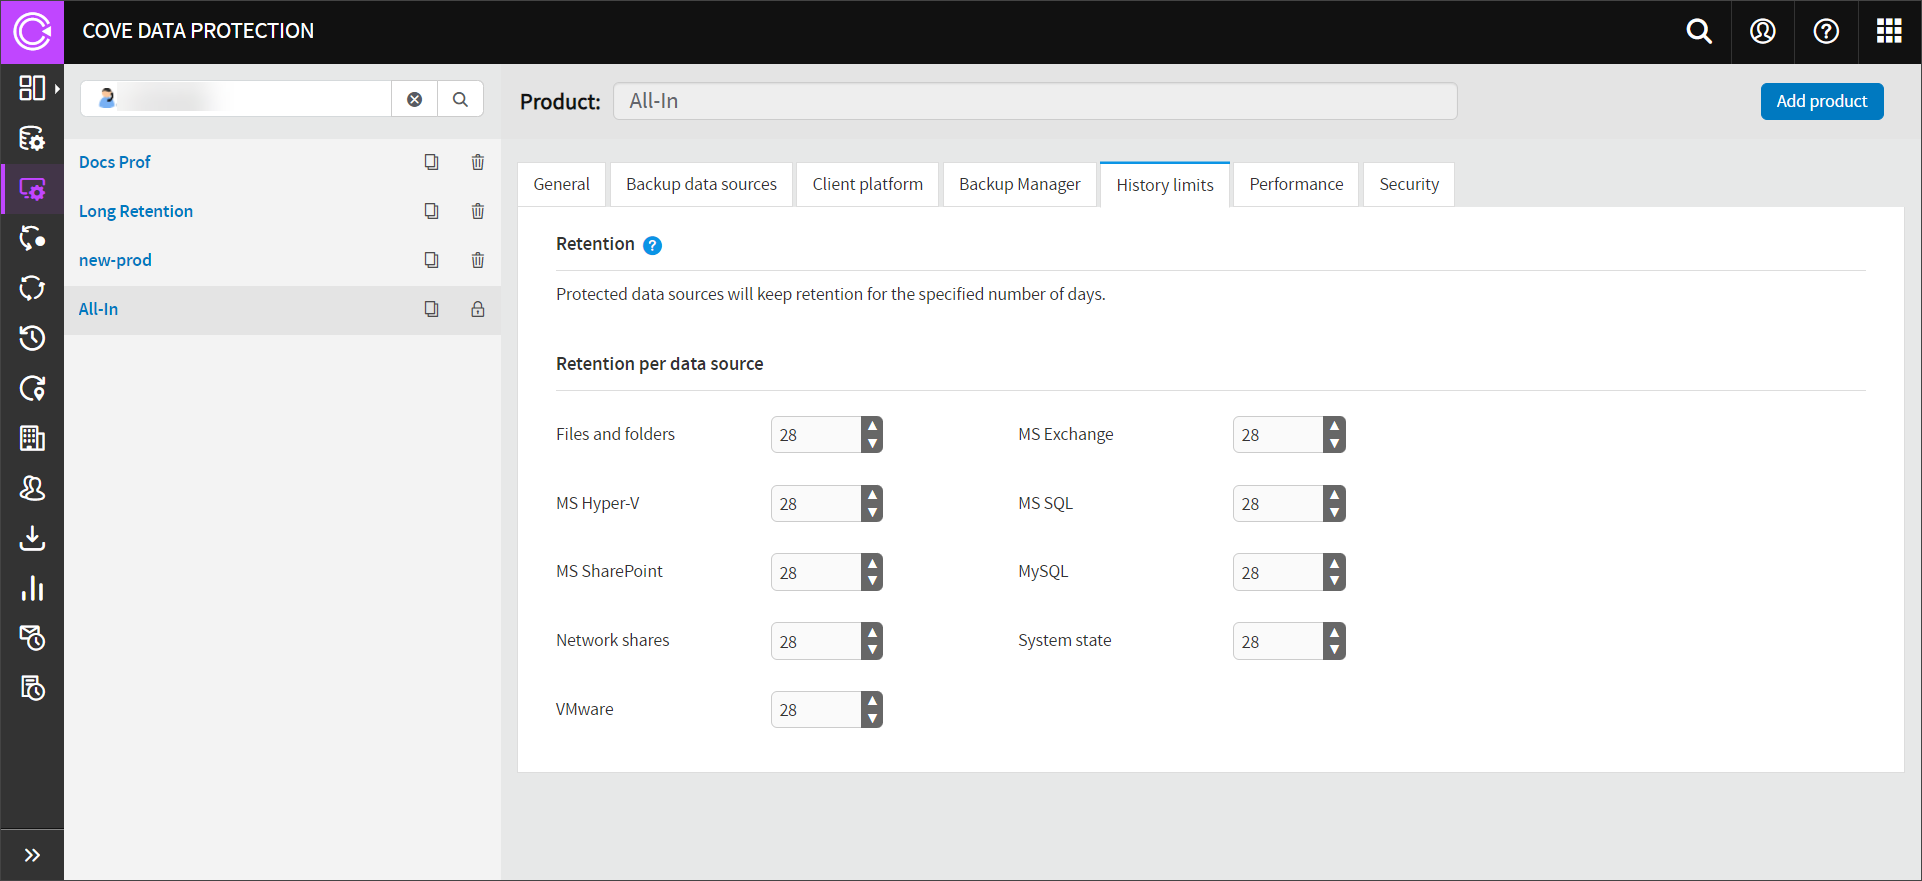
Our All-in product has all features enabled, all security selection options are set to "Unlimited" and the retention period (History Limits) of 28 days.
The maximum retention on any custom product is 365 days.
Backup session data can be stored for longer than the retention period by using Archiving backup sessions in Backup Manager.
Creating custom products
New custom products can no longer be created. Please use Retention Policies to set custom retention.
Assign Product
Assigning a product to a device can be done one of two ways within the Management Console:
From Device Properties
- Click the device name to open Device Properties
- Navigate to the Settings tab
- Select the Retention Policy or Classic Policy (Product) to assign to the device from the Retention Policy dropdown
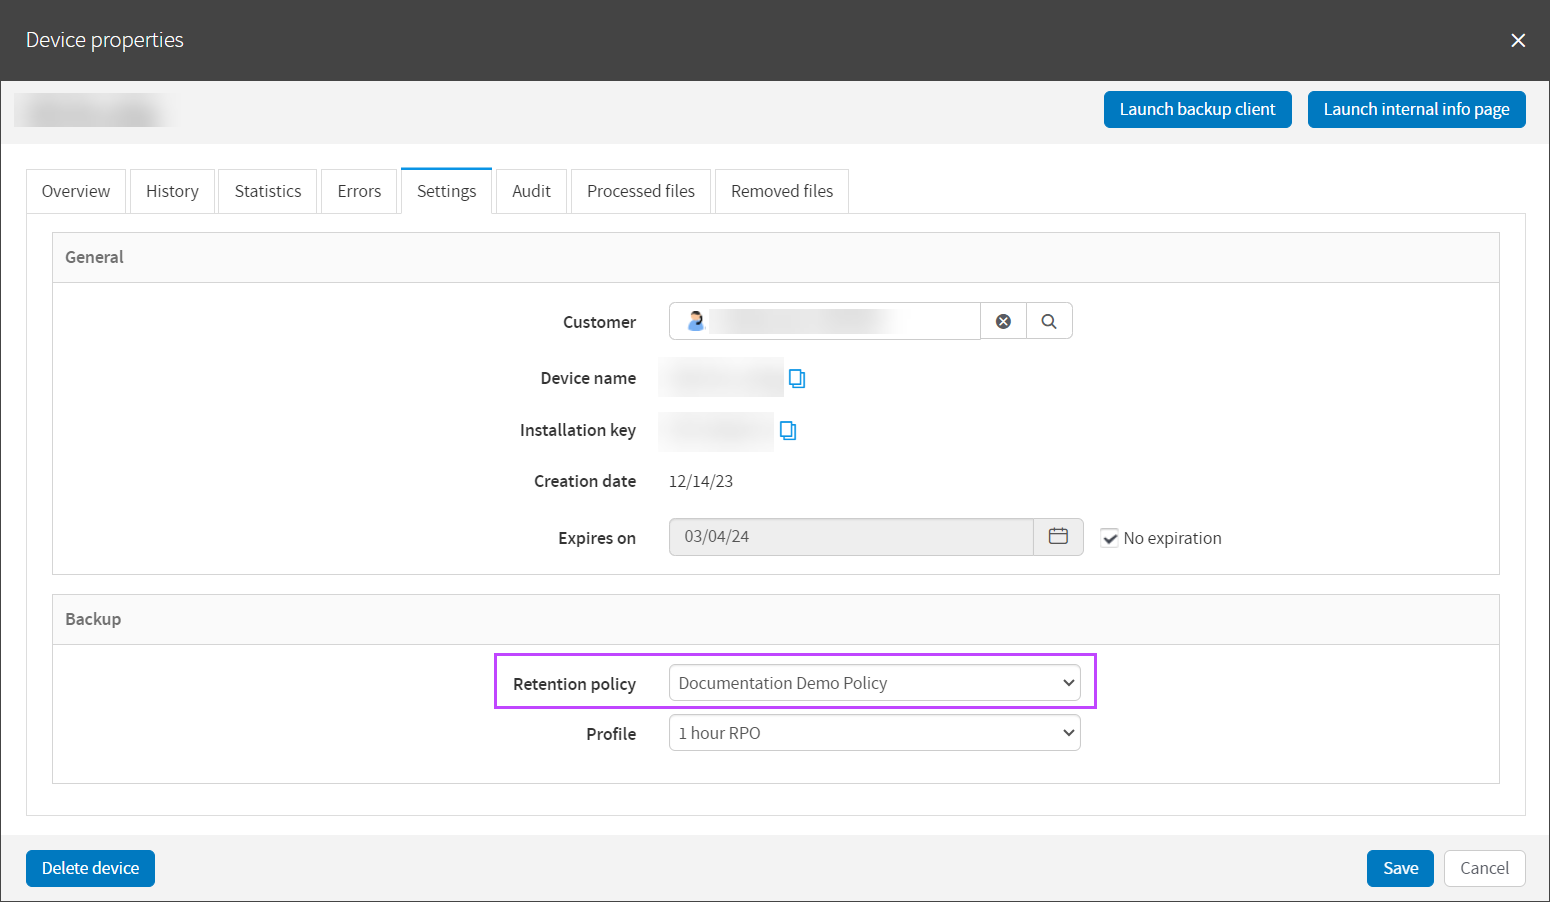
- Click Save
From the Assign option on the Toolbar
- In Backup > Dashboard, select the devices to assign a policy to
- Click Assign Retention Policy on the toolbar

- In the Assign Retention Policy window, select the Classic Product to assign from the dropdown

- Click Save
If the Save function is not available, this means the selected product is already assigned to the device.
Edit Product
To edit an existing product, do the following:
- Navigate to the Retention Policies page
- At the bottom of the list of Policies, a list of any Classic Policies (Products) will be shown
- Click the Policy (Product) you want to change
- Edit the options in the right-hand panel
- Save any changes
The devices to which this policy is assigned will be updated within the next 15 minutes.
If reducing the History Limits (retention period) of a product when editing it, all data that is no longer within this retention period will be removed during the cleaning phase of the next backup unless the session is marked as an archive point.
You can only edit products created by your own company and your customers. All other products are locked.
Custom product options
The following options are available when adding or editing a custom product. Place a tick the box to allow the product feature.
| Option | Permission |
General |
|
| Advanced scheduling | Allows scheduled backups (if disabled, only manual backups are available). |
| Archiving | Mark set backup sessions as archive points so they are not cleared after the retention period expires. For information on configuring the retention period, see History Limits below. |
| Automatic File Selection | Enables the "Automatic file selection" option for Files and Folders which automatically detects documents, images and videos for backup. |
| Backup Accelerator | Enables use of the Backup Accelerator driver which avoids unnecessary scanning of the full system (and whole files) by tracking changes as they happen on the device. |
| Bare metal recovery | Enable and perform a bare metal recovery. |
| Directory size calculation | This displays directory sizes in the Backup Manager UI when navigating file systems. |
| No restore |
Sets the device to a mode where the restore options on the device are no longer available. |
| Pre- and post-backup actions | Allows script execution to run before and/or after backups. These scripts run once per backup source. |
| Priorities | Mark critical files and folders as high priority. Backups perform those of high priority items first. |
| Proxy | Allows connection through a proxy server. We support HTTP, SOCKS4 and SOCKS5 proxies. |
| Restore only | Sets the device to a mode where the backup options on the device are no longer available. |
| Standby Image | A legacy continuous restore feature which restored directly to VHD. It remains available only to customers who used this feature prior to its removal and are still using it. The feature was succeeded by the Recovery Console's continuous restore functionality. |
| VSS snapshot management | Enables optimized VSS snapshot creation, minimizing memory consumption. |
| Virtual disaster recovery | Enable the virtual disaster recovery. Further steps are required to perform this. See Virtual disaster recovery guide |
| Virtual drive | Use the Virtual Drive utility to browse backups like a file system and access data faster. |
Backup Data Sources |
|
| Backup Data Sources |
Allows the backup selection of the data sources. If unticked, these data source will not be available for backup in the Backup Manager:
|
Client Platform |
|
| Windows OS |
Select the Windows operating system versions to allow the Backup Manager to be installed on. If unticked, these operating systems will not be available for Backup Manager. |
| Other OS |
Select the operating systems to allow the Backup Manager to be installed on. If unticked, these operating systems will not be available for Backup Manager:
|
Backup Manager |
|
| Adjustable backup selection | Allows the backup selection to be edited via the Backup Manager |
| Allow filters | Exclude the specific file types from backups. |
| Branding | Apply branding to the Backup Manager. Branding is configured in the Backup Console. You can remove references to the developer, enter a custom name, logo, color scheme and icons. |
| Restore to network shares only | Forces restores to be performed to a network share rather than the local device. |
| Search in restore | Filter the data available for recovery. |
| Settings | Enable the Preferences menu in the Backup Manager. |
History Limits |
|
| History Limits |
Protected data sources will keep retention for the specified number of days. By default we store backup sessions for 28 days. We will store any backup sessions marked as archives until a user deletes the session. |
| Retention per data source |
The number of days to keep sessions for. The maximum is 365 days |
Performance |
|
| Bandwidth throttling | Limit the bandwidth used by the Backup Manager during the specified time periods. |
| LocalSpeedVault | Allows enabling of the LocalSpeedVault. |
| Maximum Bandwidth (Kbit/s) | Set the upper bandwidth limit (cap) for a device. |
Security |
|
| Backup users rights | Allows restoring data with the same permissions as were used during the backup. |
| Ignore FilesNotToBackup registry key (Windows Only) |
The following registry key will be ignored:
This means that you will need to define your own system exclusions either directly in each backup manager, or more conveniently, in Backup Profiles in Management Console. This setting is not recommended for most devices. |
| Remote Management | Permit remote access and management through the Backup Manager. |
| Maximum file size | Set the threshold for the maximum size of a single file in the backups.
If the Maximum file size is set to Unlimited, this means there is no limit. Files of any size can be backed up. |
| Maximum selection size (data source) | Set the threshold for the maximum selection amount allocated per data source. |
| Maximum selection size (total) | Set the threshold for the maximum selection amount allocated per backup job. |
| Maximum used storage | Set the threshold for the maximum storage amount allocated for backups from a device. |
Rename product
To rename a product:
- Open the product on the Retention Policies page
- Rename the product in the text box at the top
- Click Save
Remove product
If you no longer need a product, it can be removed by:
- Open the product on the Retention Policies page
- Click the Remove icon
- Confirm your intention to remove the product by clicking Remove on the Remove Product pop-up
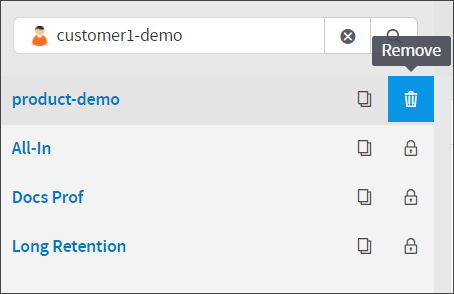
If the remove icon is replaced by a padlock, this means the product has been created by a user at a higher level than yourself. Products can only be removed by the user level it was created at or higher.
If you remove a product from a device which gave the device a longer retention period than the default 28 days, all data that is no longer within the retention period will be removed during the cleaning phase of the next backup unless the session is marked as an archive point.