
If using the new Retention Policies feature, adding new Archiving to backup sessions will not be possible. Please switch to using a custom Retention Policy at your earliest convenience.
This information and these instructions are relevant only to partners who already use Archiving.
As you regularly back up your data using the Backup Manager, a series of backup sessions accumulate in the Cloud (your remote storage location), and on the LocalSpeedVault if this is used. After a certain period, older sessions are cleaned to free up storage space on both the remote and local storage locations. The duration of this retention period is measured in number of days to keep backup sessions for (depending on your Retention Policies settings).
If needed, you can keep selected backup sessions in the storage after their retention period expires using the Archiving feature. Such sessions will not be deleted (unless you choose to do so manually).
Using Archiving will increase the storage space used.
If data is removed from the backup selection, any future backups will not include this information, but all versions of this data stored in an Archive session will not be affected and so will be kept until a clean is done of the archive sessions.
If LocalSpeedVault is used while Archiving is enabled, the used storage of both the Remote storage location (the Cloud) and the Local storage location (LocalSpeedVault) will increase.
Enable Archiving
To archive a backup session, you need to enable archiving on the devices Backup Manager. The task will apply to the next backup session to start after the archive time.
Previously completed backup sessions cannot be archived.
- The archive task can be an individual or repetitive task
- There can be only one archiving task for each data source per day
It is not possible to archive data belonging to the same data source several times a day
- Open the Backup Manager for the device you wish to configure archiving on
- Navigate to the Preferencestab
- Go to Archiving on the left hand menu
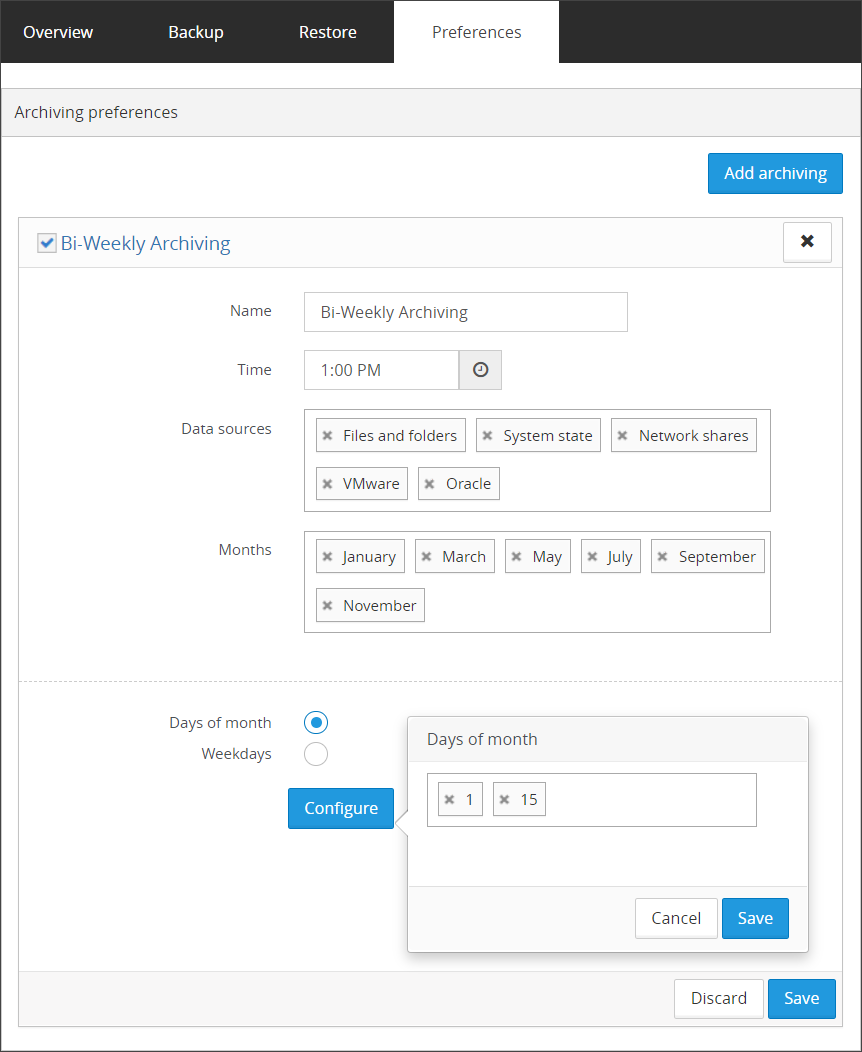
- Click Add Archiving

- Give your archive a name relevant to the frequency of the archive such as "End-of-month archiving" or "Bi-Weekly archiving"
- Set a time for the archive
- Select the data source(s) to apply the archive to
- Select the months you wish the archive to be applied to
- Now select either
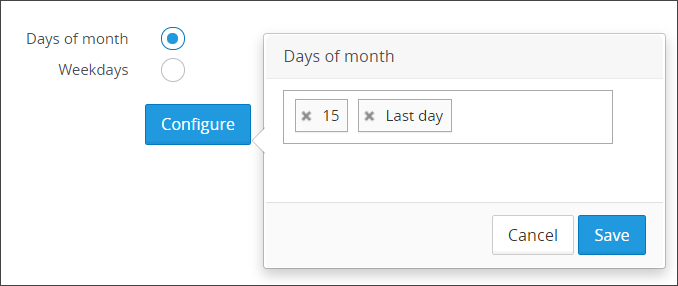
- Days of month: This will allow you to set the dates of days in the month you wish the archive to be set, for example the 15th of the month and the last day of the month:
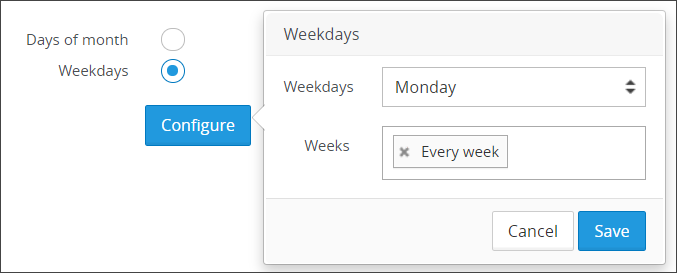
- Weekdays: This will allow you to set the day of the week and which week of the month(s) selected in step #8 you wish the archive to be set, for example every Monday:
- Days of month: This will allow you to set the dates of days in the month you wish the archive to be set, for example the 15th of the month and the last day of the month:
This does not mean the archive will run at the exact time, but that the archive session will apply to the nearest backup that runs after this time.
If you want to run an archive more frequently than the Weekdays selection but you do not wish to use the Days of month selection (for example you wish it to be set for every Monday, Wednesday and Friday) you must create multiple archives and select each day per Archive.
Edit Archive tasks
You can easily change the task after it has been created.
- Open the Backup Manager for the device you wish to edit archiving on
- Navigate to the Preferencestab
- Go to Archiving on the left hand menu
- Click the Archive task you wish to edit to expand the current settings
- Make all changes you need
- Click Save
Delete Archive tasks
When an archiving task is not needed anymore, you can delete it.
This will not make any difference to the backup sessions that have been archived through this task.
To delete an archive task:
- Open the Backup Manager for the device you wish to delete the archive task on
- Navigate to the Preferencestab
- Go to Archiving on the left hand menu
- Click the Delete button to the right of the Archiving task

- Confirm deletion by clicking Yes on the confirmation box

Recovering backup sessions from Archive
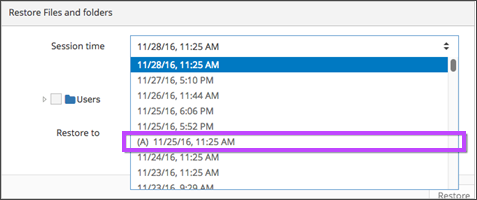
Data from archived sessions is recovered is the same way as from regular backup sessions. You will only notice that archived sessions have a special mark (A) in the Session time list which is intended to make it clear that the session is archived.
Clean up unneeded archiving sessions
If you no longer want to keep an archived session in the storage, you can clean it up. The (A) mark gets removed from the session. Then the session is cleared from the storage and is no longer available for recovery.
- Go to Preferences > Archiving
- Click Cleanup (You will see the list of all archived sessions that have passed their retention periods)
- Select the sessions to clean up
- Click the Cleanup button at the bottom
- Confirm your intention to clean up the selected sessions

The action cannot be undone. Once a session has been cleaned up, there is no way to get its contents back.
Save
You must make sure to save any changes you make before moving away from this page.