
Create and assign service level agreements
A service level agreement (SLA) is a contract between a service provider and a customer that defines the expected level of service. MSP Manager uses SLAs to sort tickets, send email notifications, and report on met and breached SLA policies. SLAs do not affect ticket assignment or billing. You define SLAs at the global level and then assign them to service items.
Create SLA policies to specify how long technicians have to create tickets and resolve issues for your customers. MSP Manager uses three alert levels to remind technicians when a ticket approaches an SLA breach. You can use your company business hours or specify custom hours so MSP Manager pauses SLA times when your business is closed.
Add a new SLA policy
- Go to Settings > Company Settings > SLA Policies.
- Select Add SLA Policy.
- Enter a policy name and description.
Configure alert thresholds
Use alert thresholds to control when MSP Manager notifies technicians that a ticket is close to breaching its SLA.
- In the Alert Thresholds area, expand an alert level.
- For Percentage to breach, enter a percentage value:
- MSP Manager sends a notification when the ticket reaches the percentage you specify.
- You can enter a value up to 200 to support SLA breaches up to twice the original SLA time.
- For Color, select the color to display on associated tickets:
- In the ticket list, tickets that use the policy show in the color you select.
- On each ticket, the alert color appears on the left side, and the percentage to breach appears on the right side.
- For example, you might use green for Alert Level 1, yellow for Alert Level 2, and red for Alert Level 3.
- For Notification recipients, select who receives email notifications at each alert level:
You might notify a single technician at the first alert.
You might notify all assigned users for the customer at the second alert.
You might notify all users in the company at the third alert to help prevent the SLA from being breached.
Repeat these steps for each alert level you want to configure.
Configure policy settings for ticket priorities
Use the Policy Settings section to configure SLA times for each ticket priority type.
- In the Policy Setting section, select Default Setting to expand the options.
- Select the checkboxes for each ticket status you want to track and enter a time in hours to define how long technicians have to move the ticket to that status.
- The Policy Settings section allows the configuration of SLA settings for each Ticket Priority type. Click Default Setting to expand it's options. Then select the check-box next to each option and enter a time in hours for each ticket status (Assigned, In progress and Complete).
- Select Only use business hours when calculating SLA to turn off SLA timers during off-hours. Within this setting, you can select to use your company business hours, or leave that option unchecked and specify a time for each day.
- To add more granular SLA settings to your ticketing process, click each section to configure additional SLA settings for Low, Normal, High, Urgent and Critical priority sections. Click a section to expand it's options and select Override default settings for tickets with this priority , then specify within how many hours tickets with the selected priority need to be assigned, marked in progress and completed.
- Click Save
 at the top of the SLA editor when you are finished configuring the policy.
Specify hours to put service level agreements on hold
During non-business hours, SLA timers stop running while your company is closed and continue when business hours resume.
- Go to Settings > Company Settings > SLA Policies.
- Select
 to edit an SLA Policy, and click each Policy Setting to expand it's additional options.
 - Click Only use business hours when calculating SLA to use the hours specified in your default account settings.
- Click Save SLA Policy.
To specify your Company Business hours, click Settings > Company Settings > General.
Assign an SLA policy to a service item
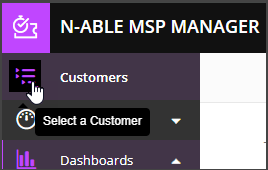
- Select the Customer icon
 in the left navigation to view your customer list.
- Choose a customer from the list to show that customer's menu.
- Select Service Items and select
 next to the service item you want to edit.
 - Select an SLA Policy from the SLA section of the service item editor.
- Select save
 .
.
Tickets that have service items with assigned SLA policies will send notifications based on your alert thresholds.
Sort tickets by service level agreement
- Go to Helpdesk.
- Select the Sort by list and select SLA.
The alert level color displays on the left side of each ticket and the percentage to breach displays on the right side.
What do you want to do?