
Manage your Helpdesk Workspace with Quick Filters
Use MSP Manager's Quick filters to create your own customizable quick access buttons within the ticket filter widget in your Helpdesk Workspace. Adding and configuring the filters in your Workspace Pages provides easy access to the tickets you work on the most. Learn more about configuring Workspace Widgets.
Use the Export as Personal button in the top right corner of the page to move the workspace page to Workspaces > Personal section, where you can edit and customize filter and list options.
To share your Workspace with other users, navigate to Settings > Users & Permissions > Roles and edit the role to which you would like to grant shared workspace permissions. Select the MSP Company Management section to expand its options, and select Manage Shared Workspaces. Save the Role to grant it's assigned users access to Shared Workspaces.
Add and configure Quick Filters
- After adding the Ticket Filter widget to your Workspace Page, click the Edit Workspace button in the top right of the page.
- Click the Configure button
 in the top right corner of the Ticket Filter Widget to open the Configuration Window.
 - Select Quick Filters from the options on the left of the Configuration Window and click Add Filter.

- Enter a name for the new Quick Filter and click
 next to Filter settings to expand it's options.
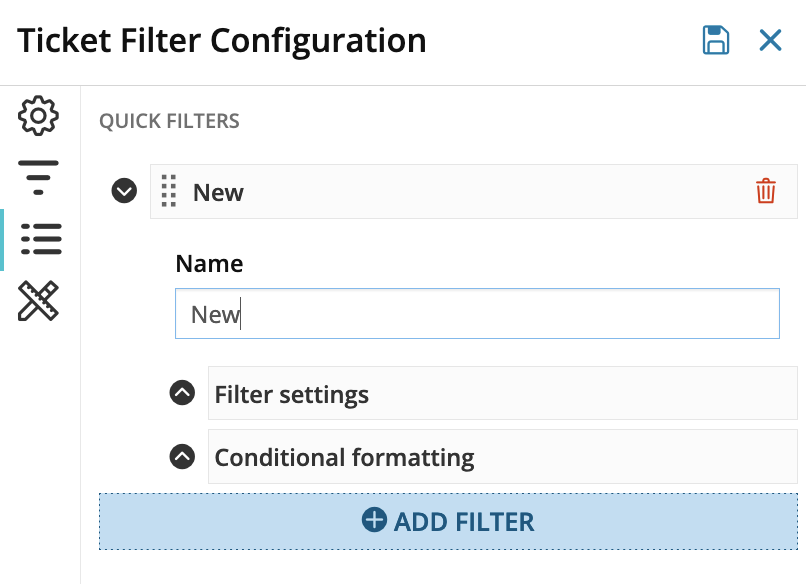
- Configure the filter's settings by selecting Assigned Users, Customers, Services, Locations, Contacts and Assets. Selections for each field will affect the other fields in the Quick Filter. For instance, the list of Contacts is filtered by the specified Location, or by Customers if no Location is specified.
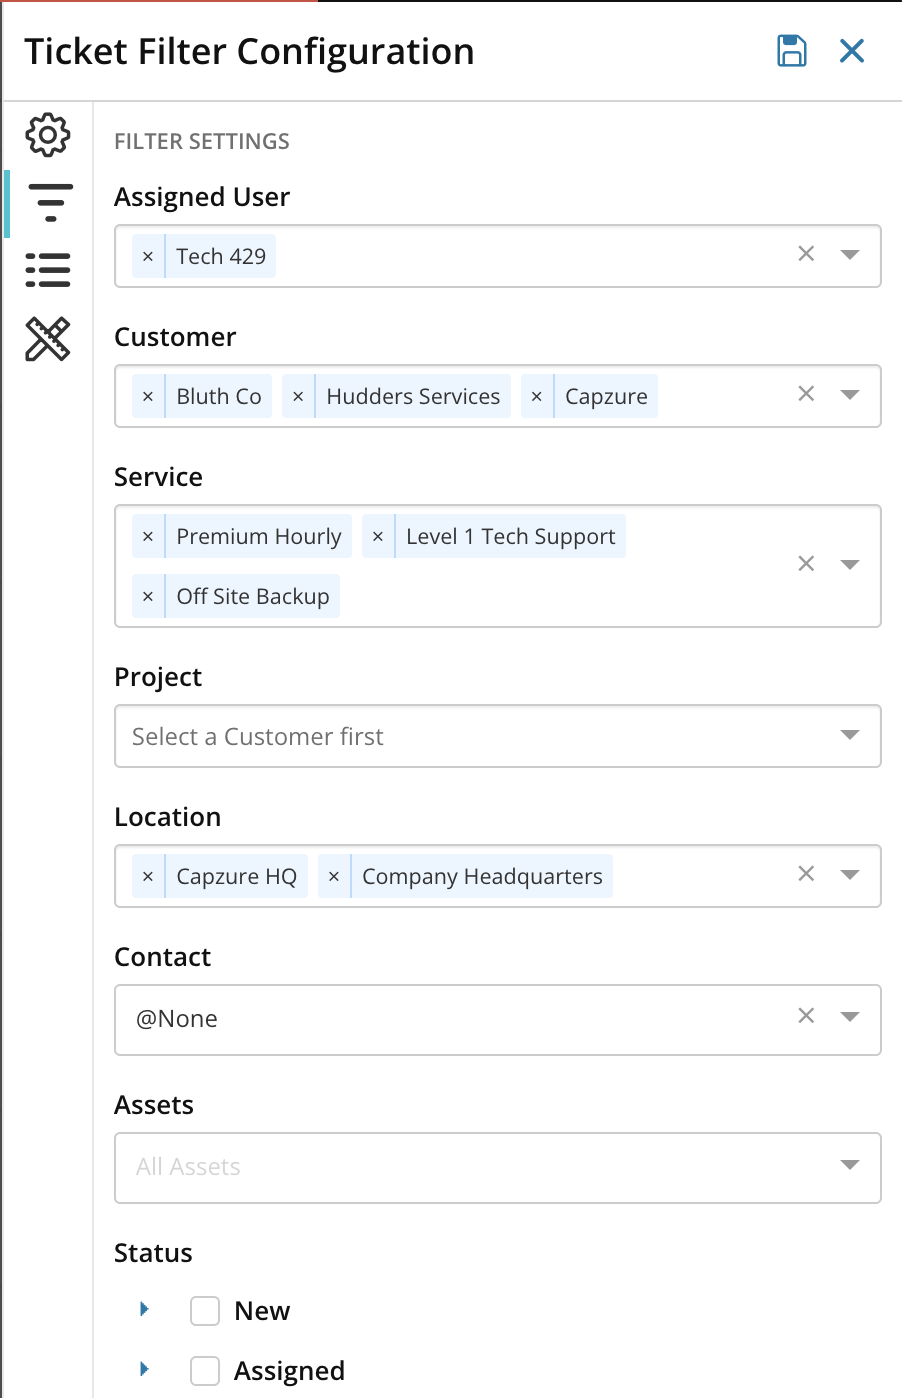
Leave the Asset field blank to include all Assets in the filter.
- In the Status section, select the check-box next to each ticket status you want to include in the filter, and click the arrow to the left of each status to view the Custom Statuses in each main status category.

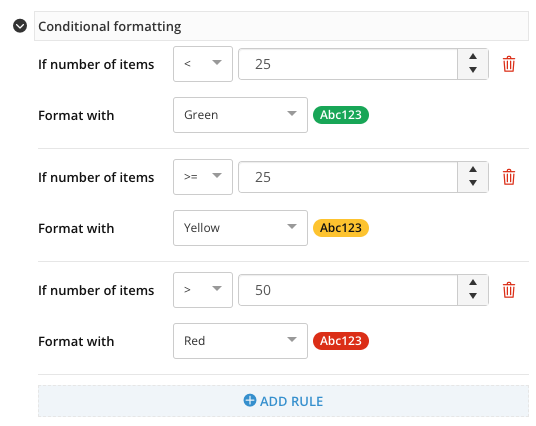
- Complete the remaining Filter Settings options and select the arrow next to Conditional formatting to expand it's options.
- Click Add Rule and select an option from the If number of items field, for instance >= for greater than or equal to, and enter a number. Use the Format with field to add or customize a color to display. In the example below, the filter will display green while it contains less than 25 tickets, yellow when it reaches 25 or more tickets, and red when the ticket count reaches greater than 50.
- Continue to add and customize your Filters and Rules as needed to enhance your Quick Filters, and click Save
 at the top of the Ticket Filter Configuration editor to save the filter's settings.
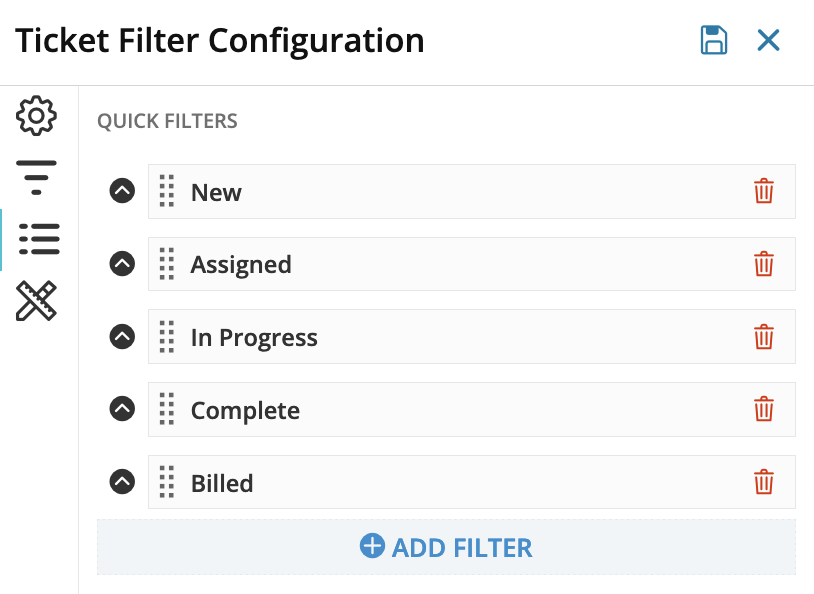
What would you like to do ?
- Learn more about opening and managing tickets for your customers from the Helpdesk
- Manage your tickets using the Ticket Queue in your Helpdesk
- View and manage rates using the Rate List widget