Configure Schedules
If Backup and Recovery options do not appear in N-sight RMM, use Cove instead.
To start a 30-day free trial of Cove:
- Open the app switcher in the Product Bar.
- Select Cove Data Protection (Cove).
As customer requirements change, it may become necessary to make changes to the data source (plugin) schedule, either editing an existing schedule or when adding a new data source. These settings are configured in the device's Backup Manager.
To launch the Backup Manager for a device:
On the computer
- Go to Start > All Programs > Backup & Recovery > Backup Manager
- Click on the desktop's Backup Manger icon (where available)
Or,
From the Dashboard
- Right-click on the target device in the North-pane of the Dashboard (or from the Server, Workstation or Device drop-down)
- Select Backup & Recovery > Open Backup Manager
Important: if you make any changes to the Schedule in the Backup Manager then the device will then have its own policy for Backup & Recovery and stops inheriting the policy from its Client or Site
Change Schedule
- Navigate to the Preferencestab in the Backup Manager
- Select Schedule in the left-hand menu
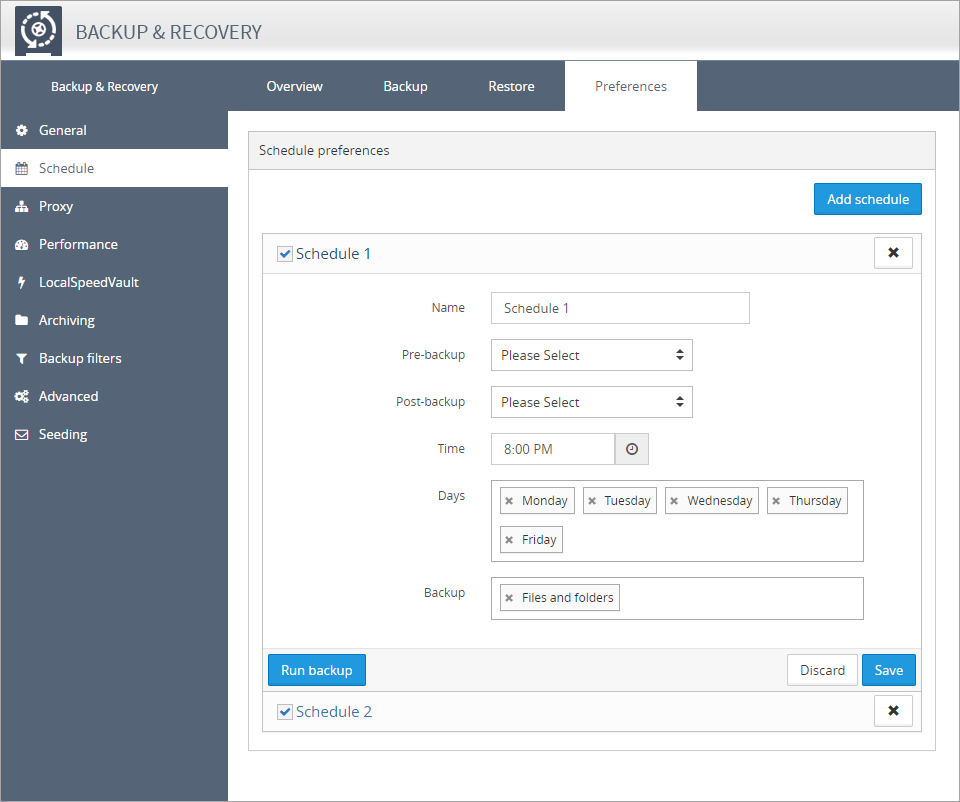
- You can now edit the current schedule settings, or add a new schedule;
- Click Add schedule (if creating a new schedule)
- Provide an identifiable Name (if required)
- Select Pre-backup or Post-backup scripts (if required)
- Choose the Time and Days for the backup to run on
- Select the Backup Data sources (for example Files and folders, Network Shares, Exchange stores etc.)
- Once complete, click Save to apply
The Backup schedule refers to when the backup will run based on the local time of the computer the Agent is installed on.
These schedule options are not available for workstations or laptops using Backup & Recovery Documents edition.

