
LocalSpeedVault
If Backup and Recovery options do not appear in N-sight RMM, use Cove instead.
To start a 30-day free trial of Cove:
- Open the app switcher in the Product Bar.
- Select Cove Data Protection (Cove).
The LocalSpeedVault tool provides a multi-tiered approach to backup storage, simultaneously backing up data to the cloud and the specified vault location, such as a network share, a USB drive, attached storage (NAS or DAS), or a client machine.
Backup & Recovery determines the best method to restore data, either over the LAN or from the cloud. If speed is of the essence, and the data sets are large, restoring locally from the vault dramatically reduces the restoration time. If the vault is unavailable due to internal network issues, a disk crash or disaster the data is retrieved from the cloud.
You can enable the LocalSpeedVault using the All Devices view or using the Backup Manager.
Ensure the device acting as the LocalSpeedVault has enough capacity to store the data backed up over the retention period.
Depending on its capacity, the LocalSpeedVault can be the backup repository for multiple devices—a different sub-directory is created for each server and workstation using this path as a LocalSpeedVault.
To enable the LocalSpeedVault using the All Devices view:
- In the All Devices view, go to Settings > Backup & Recovery > Settings
- Select the target entities from the Entity list of servers and workstations
- Ensure Setting: is set to On
- Tick the Enabled check box in the LocalSpeedVault section
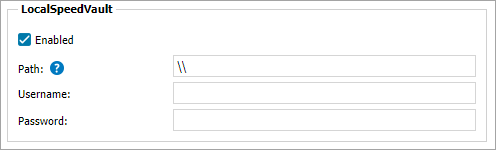
- Enter the local or network location to act as the backup repository in the Path field - such as
\\Storage1\Backup - Supply the Username and Password credentials (if required - usually for Network shares) - these fields appear once you have entered a network share path
- Click OK to save and apply
To enable the LocalSpeedVault using the Backup Manager after Backup and Recovery installation:
If changes are made to the Schedule, Backup selection or LocalSpeedVault in the Backup Manager, the policy is set at the individual level and the device no longer inherits the policy settings for the overall device type, Client or Site.
- Launch the Backup Manager from the All Devices view or directly on the remote computer
- Go to Preferences > LocalSpeedVault
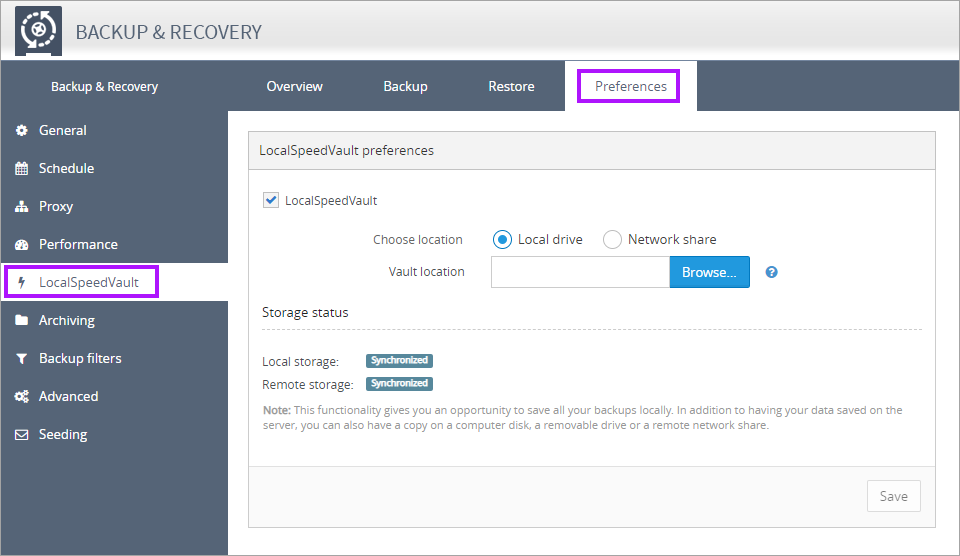
- Tick the LocalSpeedVault check box to enable
- Select Local drive or Network share
- Enter the Vault Location or click Browse on to locate
- Enter the Username and Password credentials (if required - usually for Network shares)