
Windows Agent settings
Edit Agent settings using the All Devices view
After the Agent is installed on a device, the device displays in the All Devices view North-pane Servers, Workstations or Mixed tabs. You can edit the device settings, and manage checks and features on the device. For more information, see Devices .
All Agent setting changes are communicated to the Agent the next time the Agent contacts N-sight RMM.
- In the All Devices view, right-click the device in the North-pane Servers, Workstations or Mixed tab.
- Select Edit Server or Edit Workstation.
- Go to General Settings.
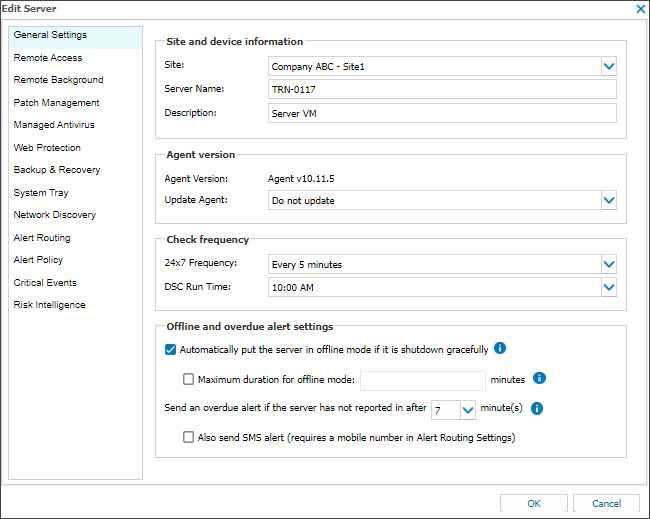
- Change the settings to meet your requirements.
- Select OK to save.
Edit Agent settings using the Agent console
After installation, you can login to the Agent on the device, alter its configuration settings and change its Checks.
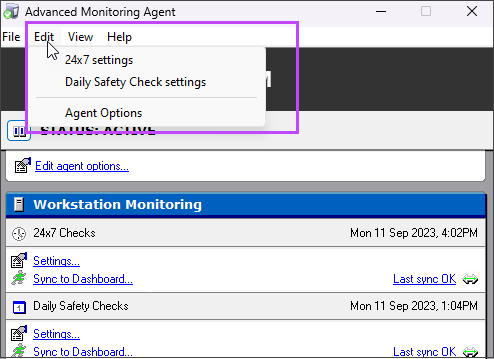
- Log in to the device and open the Agent (search for Advanced Monitoring Agent).
- If prompted, confirm that you want to make changes.
- Enter the N-sight RMM staff account username and password. If the device does not have internet access, use the password of the user who installed the Agent.
- Select OK to log in.
- Select Edit to choose the option to edit the 24x7 settings, the Daily Safety checks or the Agent options
.
If User Access Control is enabled, you may receive the message The requested operation requires elevation when opening the Agent without Windows administrative privileges. To resolve this issue, go to All Programs, right-click on Advanced Monitoring Agent and Run as Administrator.