File System Space Change Check
This check monitors changes in file system utilization, generating an Alert where the data at the selected mount point has grown by more than X percent in a 24 hour period.
Check configuration
Add
- In the All Devices view North-pane, select the device
- Go to the Checks tab
- Click Add Check
- Choose Add DSC Check > File System Space Change Check
-
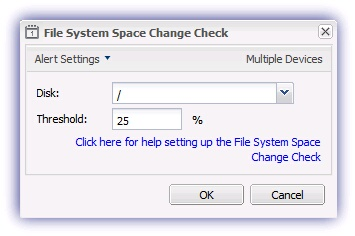
Select the Disk from the drop-down and enter the Threshold value
- To run an Automated Task when the Check fails choose Assign a Task after creating the Check
- Click OK to save and apply
Edit
- In the All Devices view North-pane, select the device
- Go to the Checks tab
- Select the target File System Space Change Check
- From the Check drop-down
- Click Edit Check (also available from the Check's right-click menu)
- Configure the settings
- Click OK to save and apply
Delete
- In the All Devices view North-pane, select the device
- Go to the Checks tab
- Select the target File System Space Change Check
- From the Check drop-down
- Click Delete Check (also available from the Check's right-click menu)
- Review the summary and select OK to confirm removal
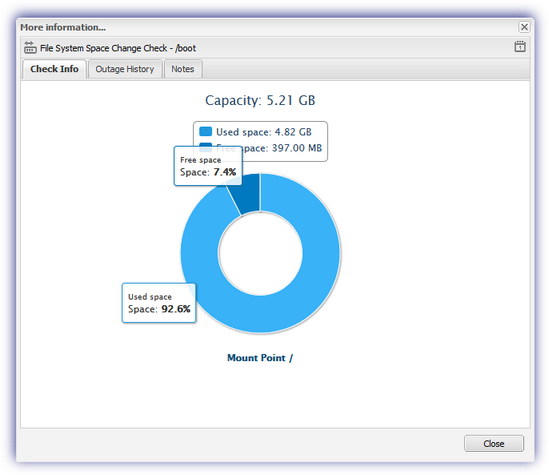
More information
After the check results are uploaded to the N-sight RMM user interface, the More Information column containing the Total and Free space values along with the percentage Change reported by the Check, whilst clicking on this link opens the More Information... dialog.
This dialog includes the overall file system Capacity, the Used space and Free space values along with a graphical representation of this information; the Space percentage is displayed when hovering over the Free space or Used space portion of the graph.