Best Practices for Security Groups and Folder Structures
Security groups and folder structures should reflect you company's policy's and practices, as well as adhering to security requirements of your business, and potentially those of the client (which you may require to discuss with your client).
-
Create Security Groups that will be consistent with your company's policies and titles
-
Create a Folder Structure that is easy to use and clearly defines what would be contained within
- Depending on how you delineate between different use cases, you could create a Folder Structure to separate Application Credential types from Website credential types, etc.
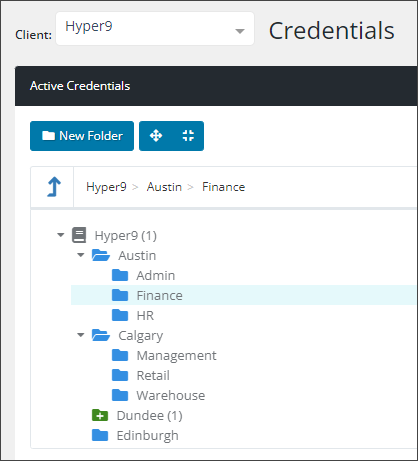
- As an example, the Folder Structure could be created to differentiate between client departments, such as Finance, Retail, HR, Managers, etc.
- These could be further structured such that, if the client has multiple geographical locations, each location has its own subset of folders.
-
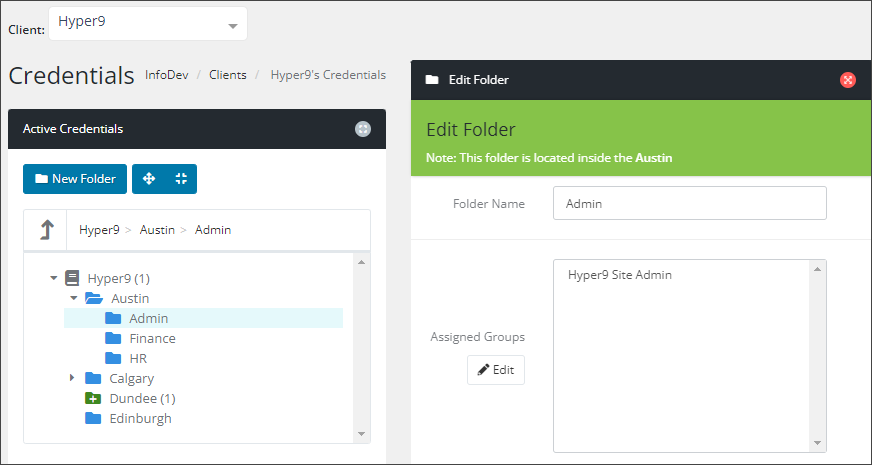
Apply Security Groups to relevant folders and assign clients to give appropriate access
Example Security Group and Folder Structure Setup
In this example setup, there are the Organization has 4 levels of Pro Users (technicians/engineers), with Level 1 being the most restricted, and Level 4 being the least restricted. The Organization requires that only particular Level Users have access to appropriate Client Credentials, as well as appropriate Clients.
- Create Security Groups based on technician levels (i.e. Levels 1 - 4) and assign the required Pro Users to those.
- Create Folders in the Client Credentials for each level of credential (i.e. Level 1 Credentials in a Folder named Level 1 , Level 2 credentials in a Folder named Level 2, etc.).
- Each Folder can be assigned specific Security Groups. Level 1 folder can be assigned Security Groups 1 - 4 (allowing appropriate levels and above access), Level 2 folder assigned Security Groups 2 - 4 (this excludes Level 1, while still allowing level 2 and above access), etc.
- Ensure the Credentials are stored in the appropriate Folders.
Do not create the various level folders inside of each other (i.e. the Level 2 folder contained inside the Level 1 folder) as this may have inadvertent permission results.
There are a 2 options in terms of assigning User access to specific Clients.
- Assign Clients to the Security Groups - this may not be suitable if different Users in a specific Security Group require access to specific Clients and not to others.
- Assign Clients in the User account - this would allow all Level 1 Users to be contained in the Level 1 Security Group, but retain only access to Clients based on their individual User account setup.
- Views where a Folder structure can be created (such as in the Articles view) the above information can also be applied.
- Views that do not allow a Folder structure to be created (such as Assets), but the individual items Actions options contain the User Access option - you can limit access based on Security Groups.
- Views that offer neither Folder structure nor User Access option on the items (such as the Domains view) - there is no limitation to user access available.


