
Managing Security Groups
Security groups are used to restrict access in two different ways;
- Restricting access to a folder to a group of specified users only.
- Assigning clients specifically to a group of specified users.
The Best Practices for Security Groups and Folder Structures topic contains useful information to take into account when creating folder structures.
Create New Security Group
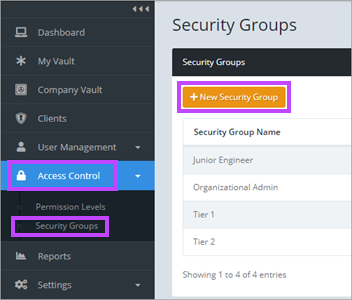
- Navigate the menu, Access Control > Security Groups.
- Select the + New Security Group button.
- The New Security Group dialog opens. Click into the Name field and enter a name for the new group.
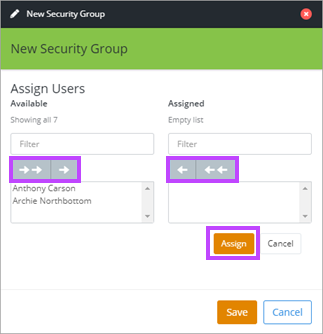
- Click Edit for each of Assigned Users and Assigned Clients to set which users and clients are associated to the Security Group.
- Assign Users/Permissions by selecting them from the left pane and selecting the right arrow button above the column. The double arrows move all in the column.
- To remove Users/Permissions, select them to be removed on the right pane and select the left arrow button in the center.
- Click Assign once the required permissions are set to be taken to the previous screen.
- Click Save once Users and Permissions have been assigned.
- Security groups are applied to folders in the Edit Folder window by selecting or removing previously created/saved groups.

Edit Security Group
- Select Edit Security Group in the Actions column of the Security Group list, next to the relevant group.
- To assign or remove users or permissions, follow the same steps as above.

Delete Security Group
- Select Delete Security Group in the Actions Column of the list next to the desired security group.
