
Configuring AD Sync in a Single Domain Controller Environment
Prerequisites
- 64-bit
- Dual Core CPU
- 4-6GB RAM
- 30-40GB Storage Space
- Windows Server 2012R2 and newer promoted to a Domain Controller (i.e. has the FSMO roles RID, PDC and Infrastructure)
- Windows Server Core is NOT currently supported at this time as the OS GUI is required to facilitate authentication
- Domain Admin access on Domain Controller
- Supports TLS 1.2 or higher. More information on which versions of windows server support which TLS protocols can be found in this article.
- C++ 2015 Redistributable (64-bit version) and .NET 4.5 installed on target device.
- Outbound FTP Endpoint: agent.passportalmsp.com port 21 should be enabled (Optional)
- Ports 7771 and 7777 open for internal network communuications
- Port 443 (TLS) for communications with the Passportal dashboard
Should you prefer a 'headless' installation not requiring the server GUI, please raise a Feature Request via the N-ableMe
For clarification on the Windows Agent settings, see Active Directory and Entra ID Integration.
- Go into the Company Vault > Credentials on the left hand navigation bar
- Click the 3 dots menu to the top right of the screen
- Choose Edit Client
- Select the appropriate Microsoft Sync option for the drop-down menu, and select any other required options
- See Active Directory and Entra ID Integration for Active Directory configuration
- See for Entra ID Synchronization for Entra ID configuration
- Click Save
- Install the Windows Agent in your network and select your company from the Client drop-down when configuring the agent during the install process
Terminology
We refer to Primary and Secondary DC's throughout the installation procedure.
The Primary DC is one of your own choosing (that meets the required Prerequisites above) where you will install the Primary Passportal Agent.
Any Secondary DC's are where you will install the Secondary Passportal Agents.
Single Domain Controller - Primary Domain Controller Setup Instructions
- Edit the client to enable Microsoft Sync with either Connect to Active Directory or Active Directory + Entra ID, and download the Windows Agent
- Copy the Agent Key using the copy icon to the left of the key, or view it by clicking the eye icon to the right - this Agent Key is required when installing the agent
- Make sure you have a copy of the Organization Key as well
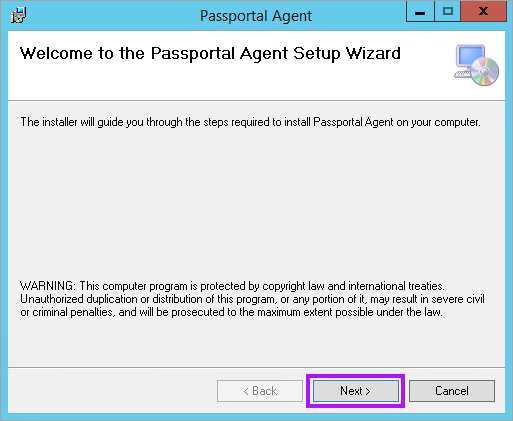
- Once the Windows Agent has been downloaded, transfer the installer to the Primary Domain Controller and launch the installer using Setup.exe
- Click Next
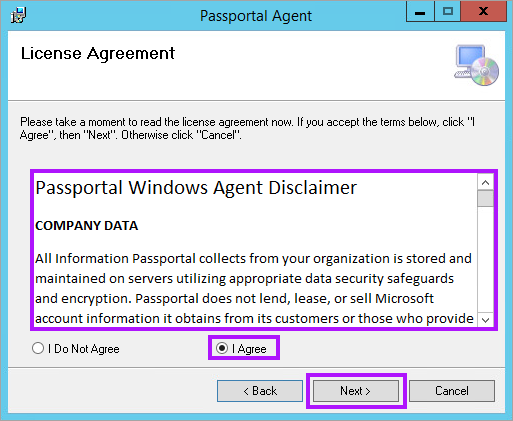
- Read the License Agreement, click the I Agree radio button, and then click Next
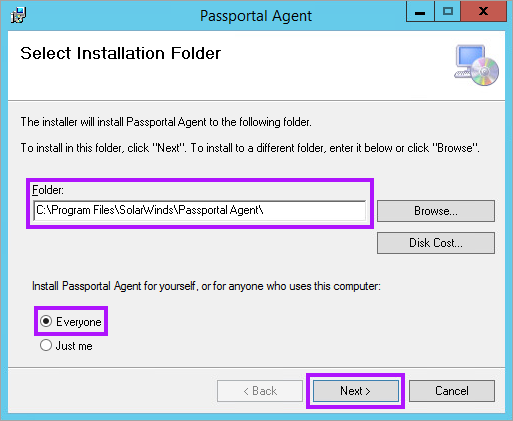
- Accept the default target Install Folder or enter a preferred location - Leave the Everyone radio button selected - Click Next
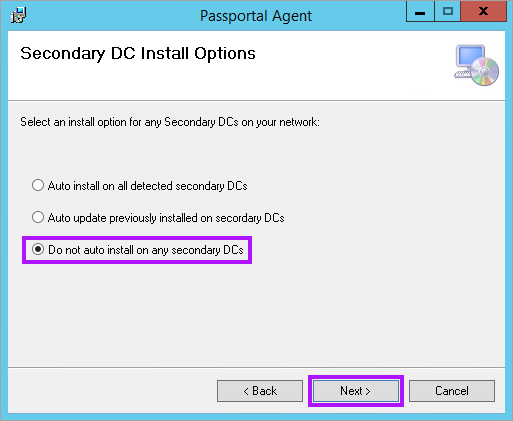
- Select the Do not auto install on any secondary DCs radio button and then click Next
- Enter the IP Address of the Primary DC
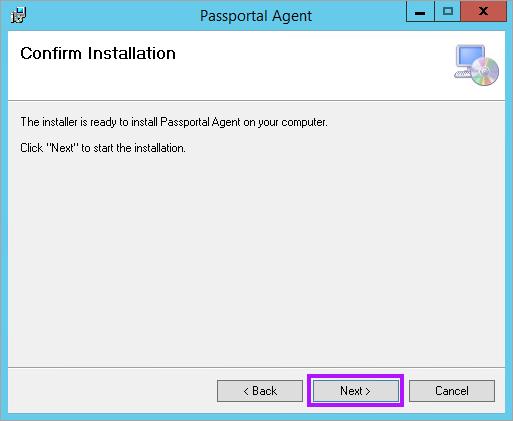
- Confirm the Install by clicking Next
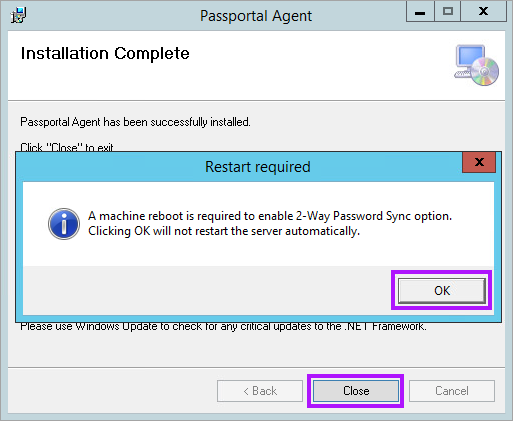
- The Windows Agent will now install. Once completed, you will be prompted to reboot the Domain Controller to enable 2-Way Password Sync - This does not need to be done immediately, and clicking OK will not cause a reboot to happen - Please ensure the Domain Controller is rebooted at a suitable time - Click Close in the main dialog, to close the installer
- The Windows Agent application will launch to continue with its configuration - Enter the Agent Install Key for the Client and your Organization Keyand click Authenticate
- A message advising you have Successfully Authenticated is displayed, along with the Passportal Client name - Click Continue
- You are now prompted to create the Windows Service Account which is used to run the Passportal and PassportalUpdater services - Enter an appropriate name for the service, such as PassportalSync - Also enter a password for the account or click Random to generate a random password - Click Save and Start Agent
- If the Windows Service Account does not exist on the Domain Controller, you will be prompted to create it. Click Yes to do so
- When the account has been created you will receive message advising Passportal Windows Services were restarted successfully and then the window automatically closes
- Once the Windows Agent has been installed, we recommend to confirm the newly created Windows Service account has been populated into Passportal
Both the Agent Key and Organization Key are required during the installation process during step 12 below

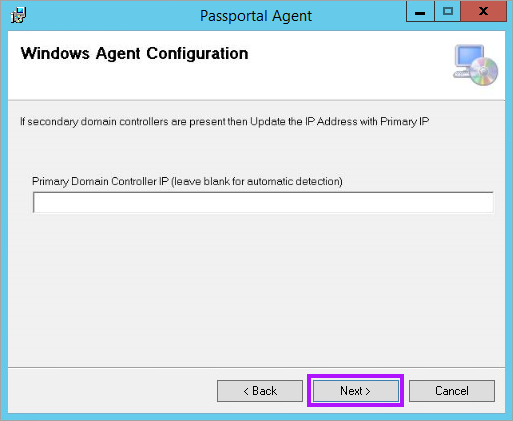
DO NOT enter the hostname as this will cause failures

The account used for authentication needs to have the Permission Setup AD Sync in order to authenticate.


If you did not restart the Domain Controller after installing the Windows Agent, please do so at the next convenient time so that Two-Way Sync will function