Customer management allows users to update or remove existing customers.
- See Customer management in Management Console for details on the types of customer.
- See Add Customers for how to add a new customers.
- See Custom Branding for custom branding behavior and how to enable custom branding.
Editing customers
To access customer editing options, this must be done from the Customer Management window:
- Log on to the Management Console
- In the Management section of the vertical menu, click Customers to open the customer Management window
- Find the name of the customer to edit
- Scroll to the right of the Customer and click the three vertical dots to open the action menu
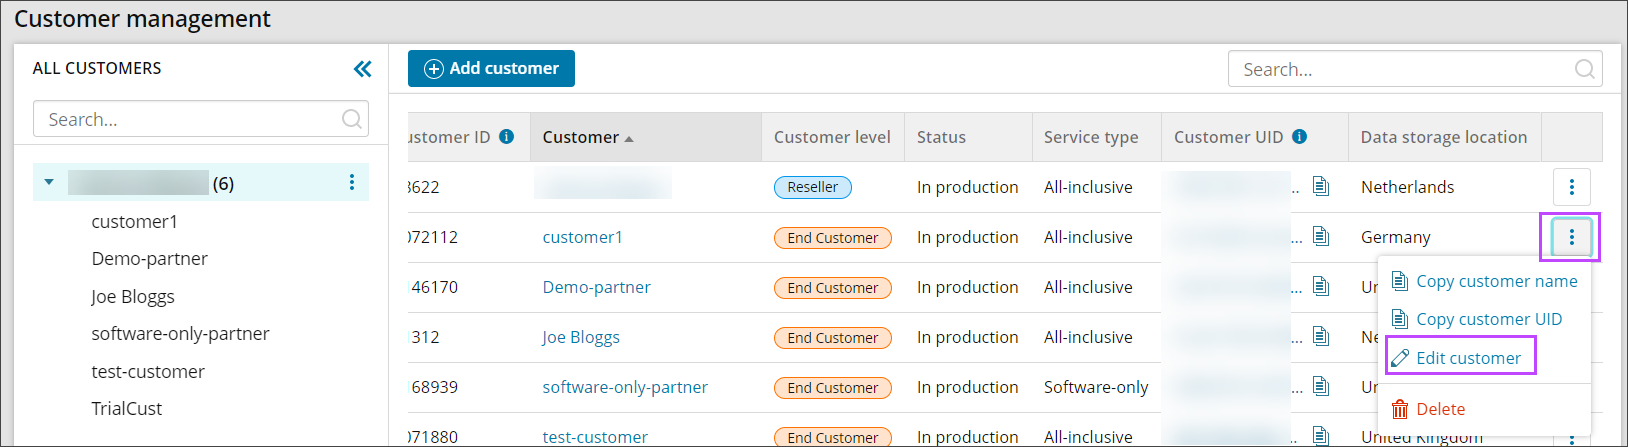
- Click Edit customer
- Make any changes as detailed below
- Click Save

You can change the settings that you configured when creating the customer and access additional settings on the numerous tabs:
General
- Name - You may rename the Customer, but please keep in mind that customer names are sometimes required for authorization. So users from the customer company will need to update their access credentials for the Cloud
- Parent Customer - Move the Customer to a different parent Customer
- Customer Level - Change the customer to a different customer level
- Service type for customer - Use the dropdown to select either All-Inclusive or Software-Only.
- Service type to provide - Use the checkboxes to select which services the new customer will be able to provide to their customers, with a choice of All-Inclusive and Software-Only.
- Customer Reference - Add additional information to identify the Customer
- Automatic Deployment - Enable or disable Automatic Deployment for devices under this partner
- This feature allows unattended installation of the Backup Manager through the command line on Windows device. For full information see Enable Automatic Deployment in Management Console
Company
All fields in this tab are optional:
- Legal Name
- Website
- Country
- State
- Address
- Zip Code
- City
- District
- Phone number
- Fax number
- Camber of commerce #
- Vat #
- Bank Account #
Contacts
All fields in this tab are optional. Click Add Contact to add the names of people to contact and their details:
- Title
- First Name
- Last Name
- Position
- Phone Number
- Type:
- Authorized signer
- Administrative
- Technical
- Sales
Notes
Notes can only be added once a contact is created. Click Add Note to register past and upcoming communication activities, or relevant information regarding the Customer:
- Contact
- Type:
- Phone
- Personal contact
- Instant messenger
- Contactless
- Status:
- Planned
- Done
- Date and Time
- Details
Custom Branding
See Custom Branding for full details on custom branding options for the Cove Management Console and the Backup Manager GUI.
Delete customers
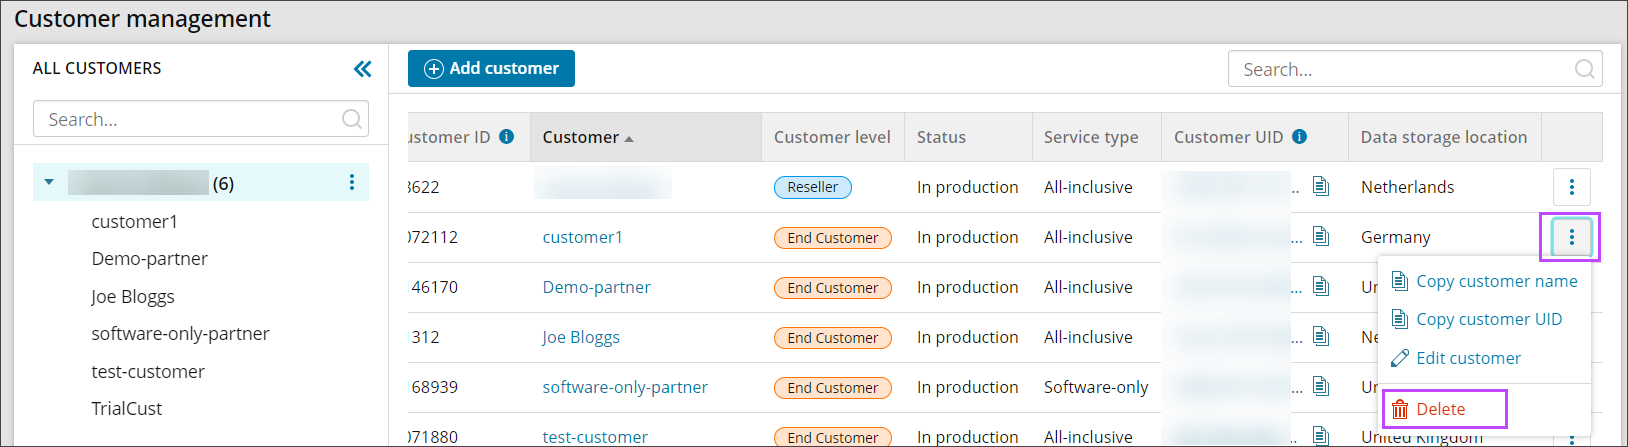
You can remove only those customers that do not have any devices or customers of their own, or with any recovery locations assigned to them. This must be done from the Customer Management window:
- Log on to the Management Console
- In the Management section of the vertical menu, click Customers to open the customer Management window
- Find the name of the customer to remove
- Scroll to the right of the Customer and click the three vertical dots to open the action menu
- Click Delete
- Confirm your intention to delete the customer
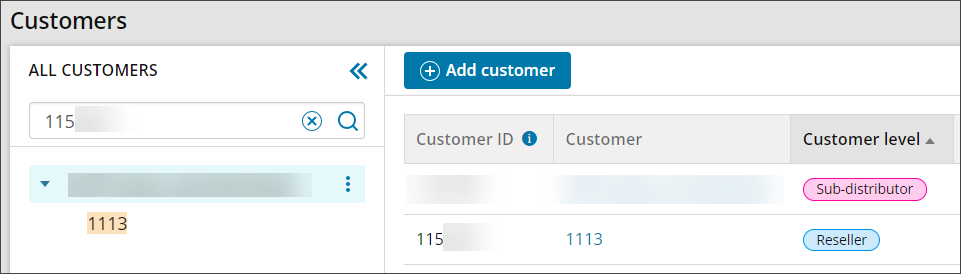
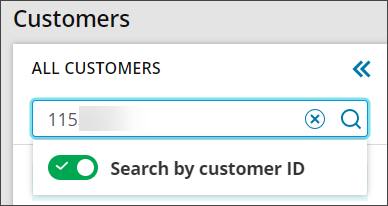
Search by Customer ID
On the customer Management page, you may search the list of customers using the Customer name, or by using the Customer ID:
- Log on to the Management Console
- In the Management section of the vertical menu, click Customers to open the customer Management window
- Click into the search bar and toggle on the search by customer ID
- Enter the full Customer ID
This search requires the entire Customer ID, partial searches will not return results
- The searched for Customer ID will be returned in the both the left-hand search panel and the main customer list to the right-hand side in a tree structure with the parent and any child partners: