
Once the Domain Properties windows is open, the different tabs will provide you with the relevant information.
View Overview
On the Overview tab, you can check the account statistics for the services added to the domain.
In here, you will have the opportunity to change the customer that the domain belongs to.
To add new services, follow the Add Microsoft 365 domain steps for the relevant service in the Enable Backups page.
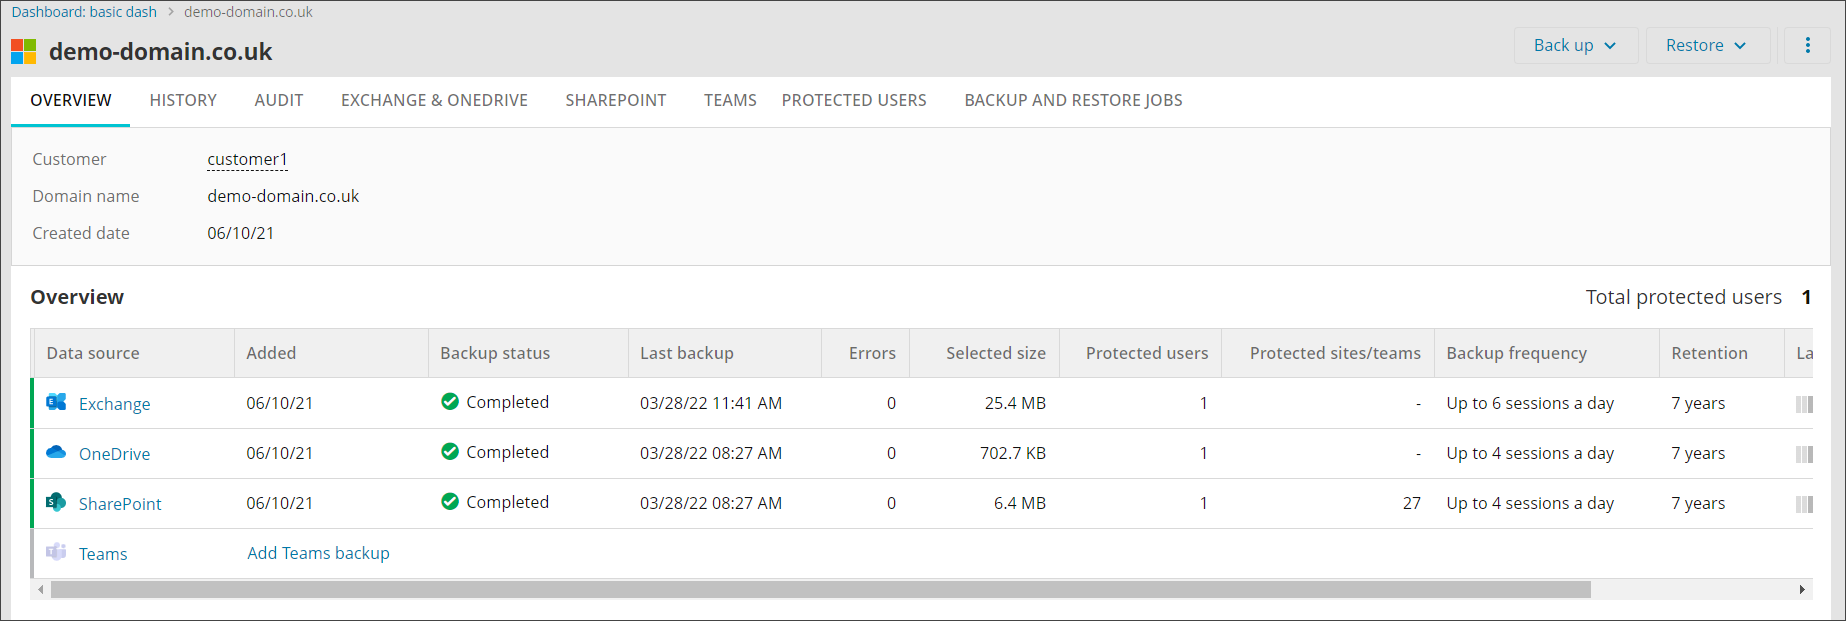
- You can also add a service from the Overview tab if one has not yet been added
- You can also use the 3 dots menu to the right of each entry to delete the data source from Backup (2 or more data sources must be configured for this option to be available)
Change Customer
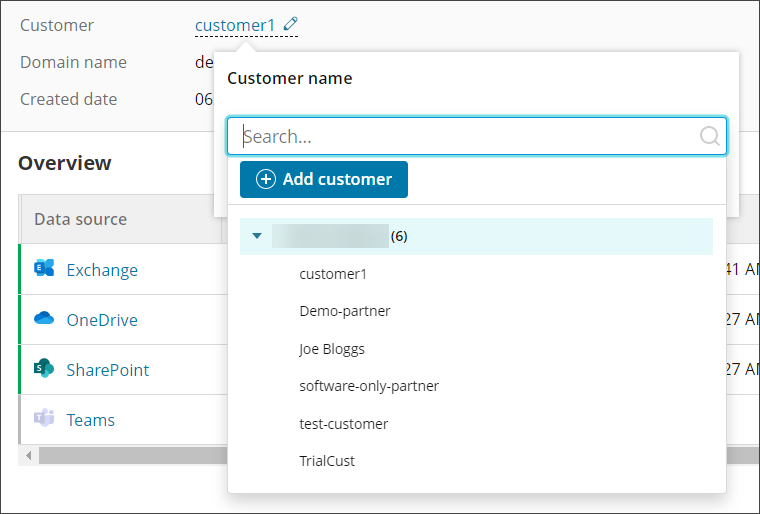
The customer a domain belongs to can be changed by:
- Click the customer name
- Select the new customer from the dropdown or add a new customer by clicking Add
- Click Save
Add Services
To add new services either:
- Add it using Add Service Name from the Device Overview tab
- Follow the Add Microsoft 365 domain steps for the relevant service in the Enable Backups page

Or
Remove Services/Delete Backups
This is only available to Management Console users with Security Officer permissions, all other users will not see this option.
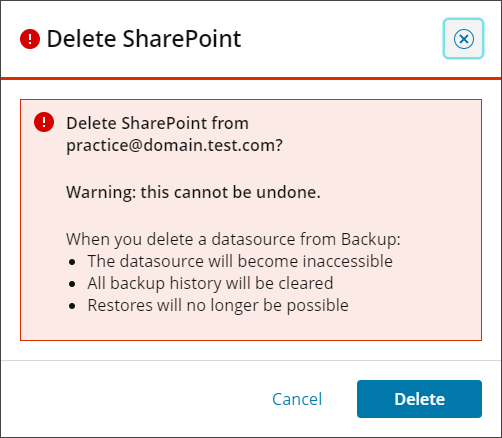
To remove a service and delete the full backup history of this service,
- Click the three dots to the right of the service to open the Action Menu
- Select Delete Service Name

Deleting data can take up to 30 days.
It will not be possible to recover previously backed up data from any mailbox, account or site which has since been removed from the N-able Cloud
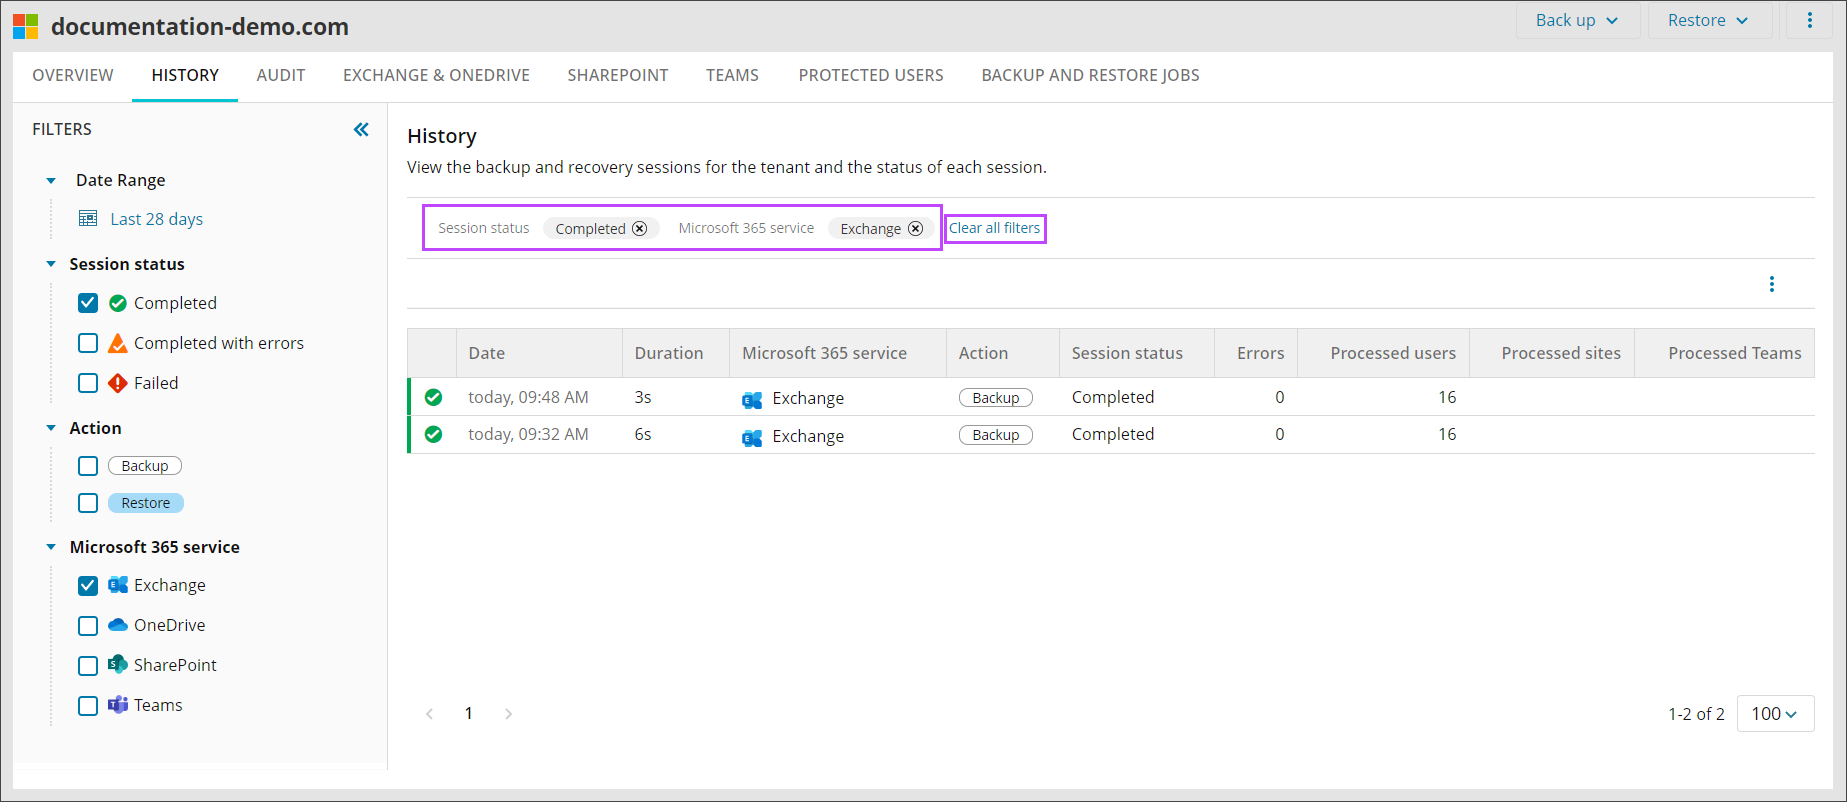
History
The History tab will provide you with a list of the backup and recovery sessions for this device, what data source they are for and the status of this backup session.
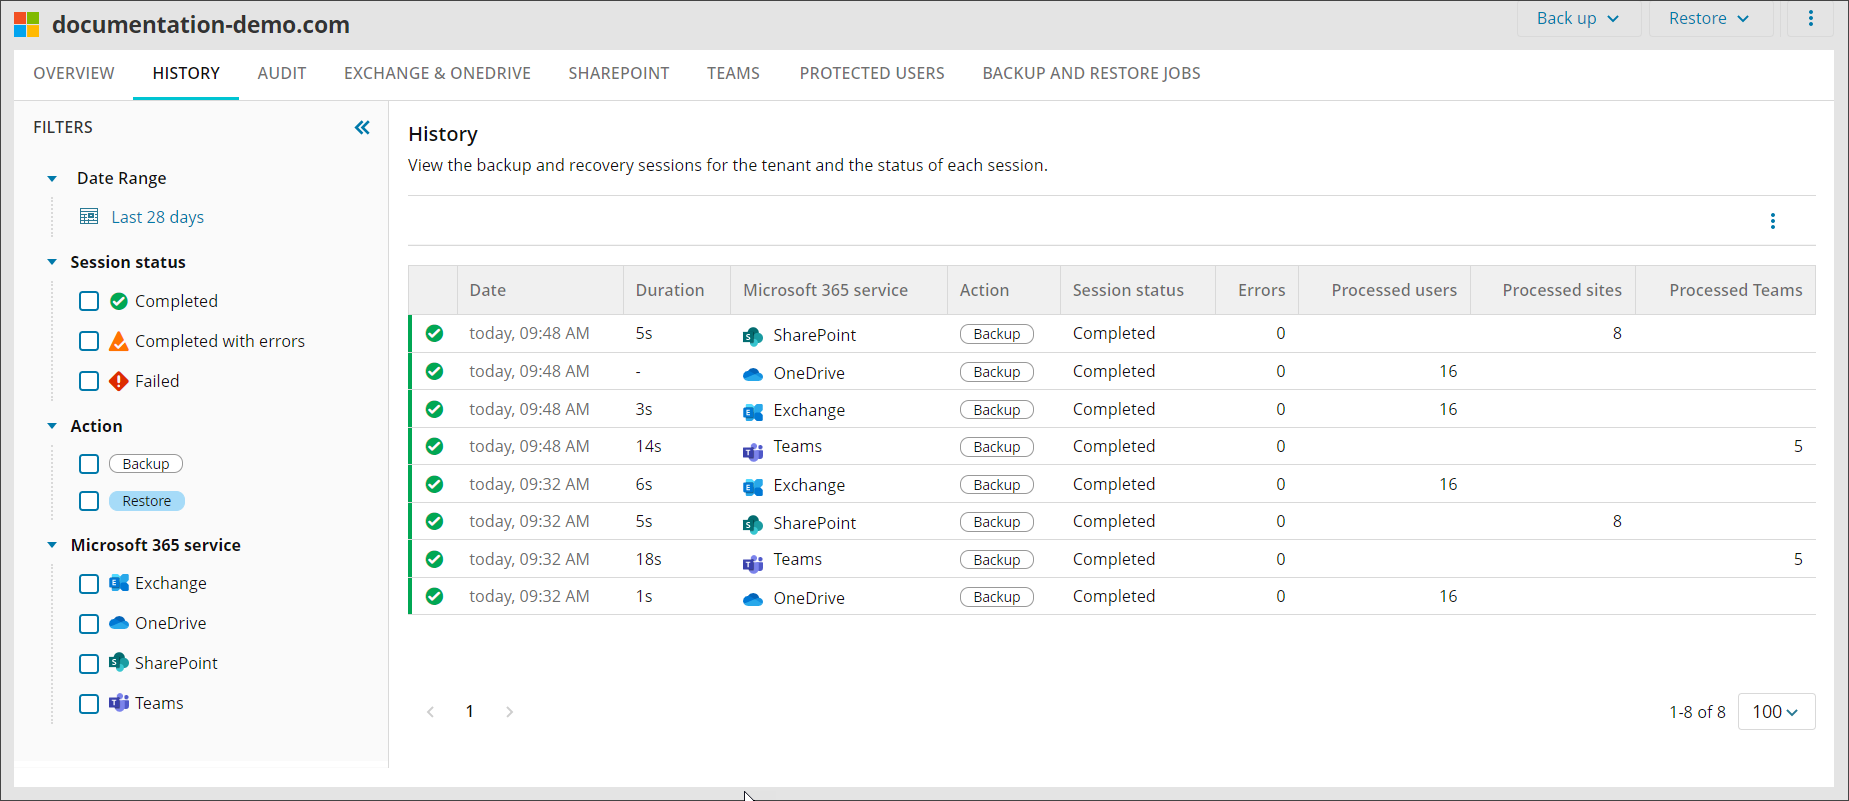
The list of historical events can be filtered using the filter options on the left hand side - as each filter is configured, you will see filter chips across the top of the results. Click 'x' in the chip to remove that filter item, or to remove all filters, click Clear all filters.
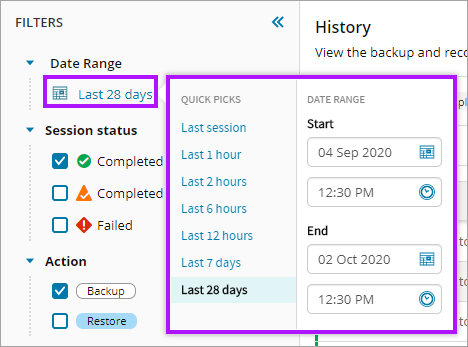
The date range filter item allows selection of default or custom ranges.
Errors Column
In the Errors column of the History tab, you can click the errors count (if it is over 0) to open the Session errors dialog, which details the errors encountered during the backup itself - these may aid with any troubleshooting of the issue.

Error information given here will be required by support in cases where you contact them for assistance.
Audit
You can check the Audit tab to see which user account has been used to carry out actions on the domain.
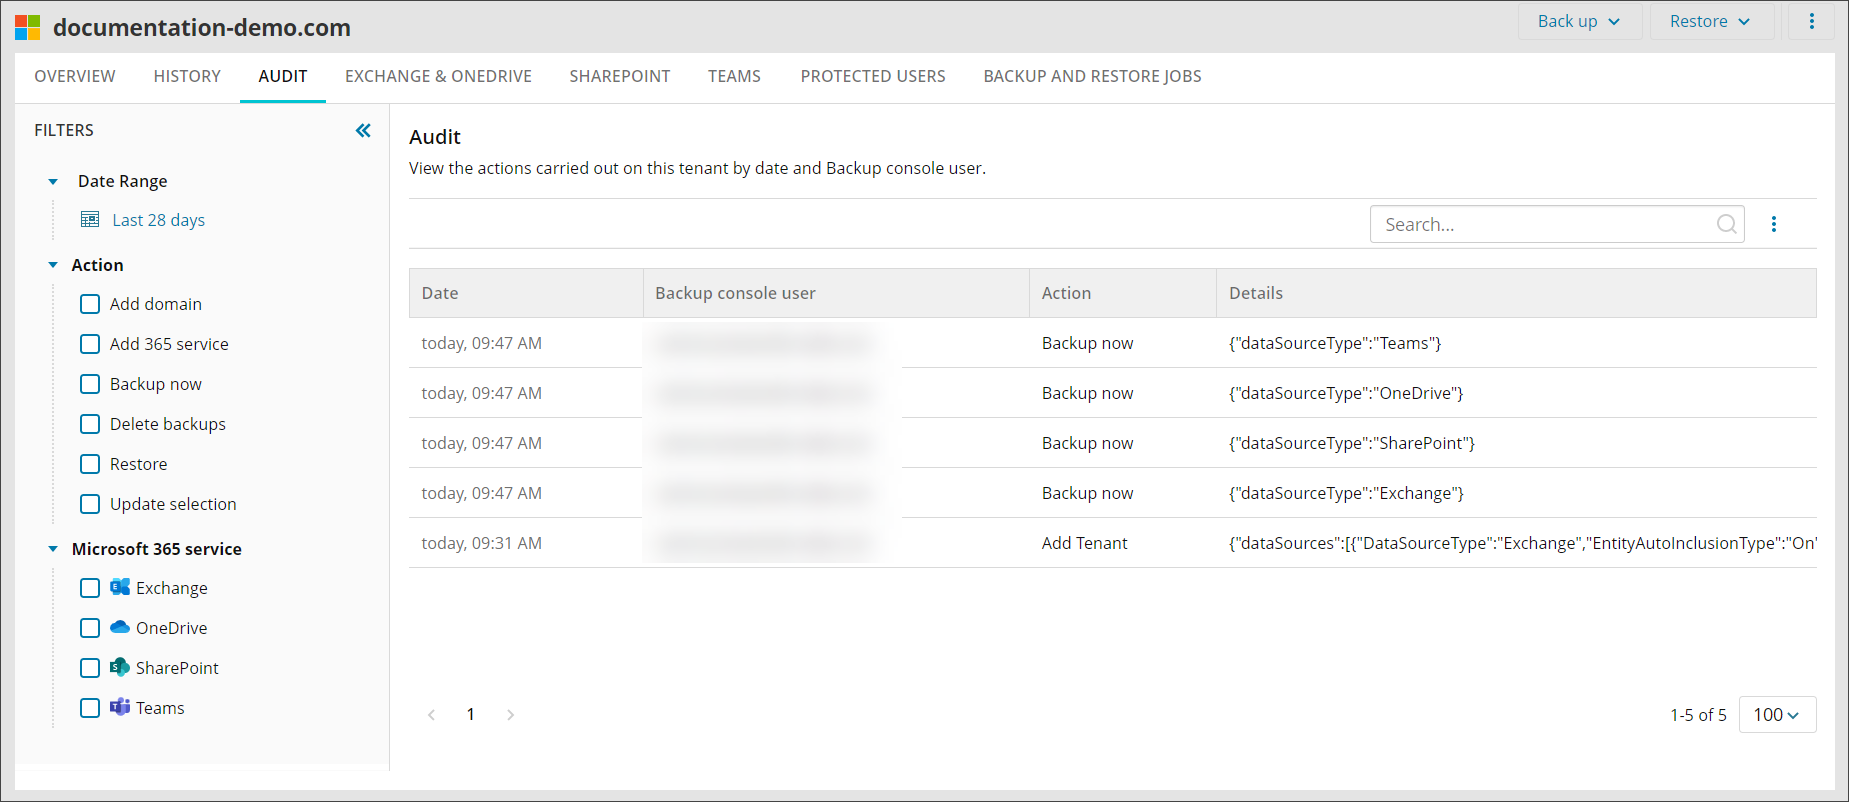
In here you will be able to see which user account created the domain, added or removed services, amended backup selections, started restores and deleted backup history.
It is also possible to see whether restores were carried out to an alternative account in the Action column:

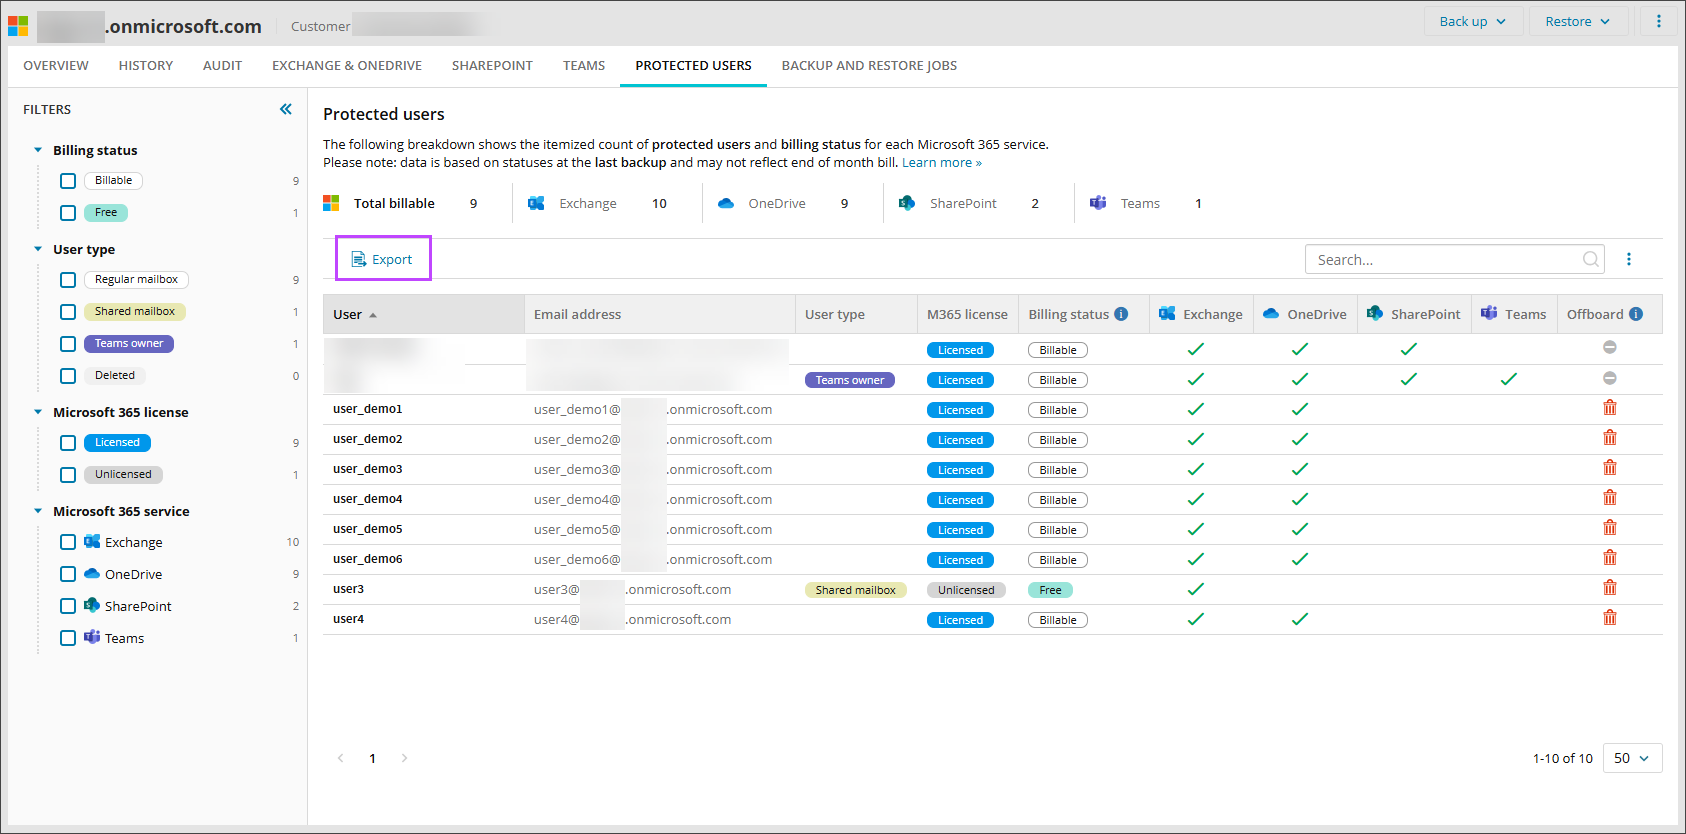
Protected Users
On the Protected users tab, you can view a full list of all users for whom at least one data source (service) is backed up, how many of these users are billable and the services protected for these users.
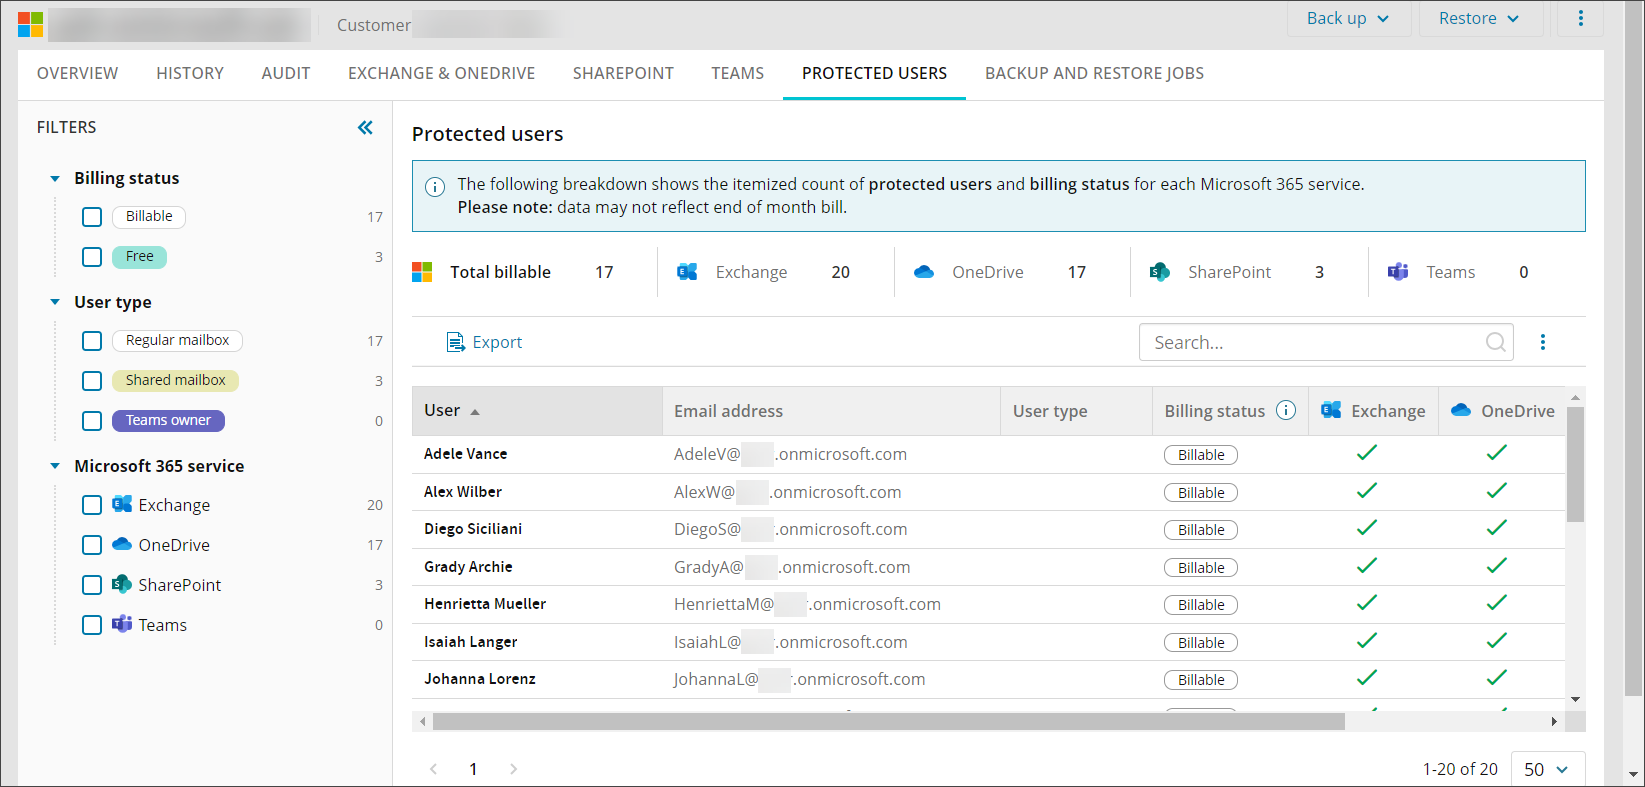
This tab is read-only, but filtering is available on the left hand banner to select whether a user is billable or free, which data sources (services) are protected, whether the user is licensed or unlicensed, and types of users you wish to view.
For information on what makes a user billable, see the Billing Status section of the Microsoft 365 Billing Policy page
Export Protected Users
You can export a list of protected users from the Management Console to a spreadsheet in either .xlsx or .csv file formats.
Export files created by the Console contain all the data that is currently displayed in the protected users table. If the data spans across multiple pages, all the pages are exported.
- From the protected users tab apply any filters or searches to limit the list of users displayed
For example using the Billing status filter to show only 'free' mailboxes that will not be charged
- Click Export from the Toolbar
- Select the file format from:
- XLSX
- CSV
- Click Export
The report will then be generated and downloaded